Short answer
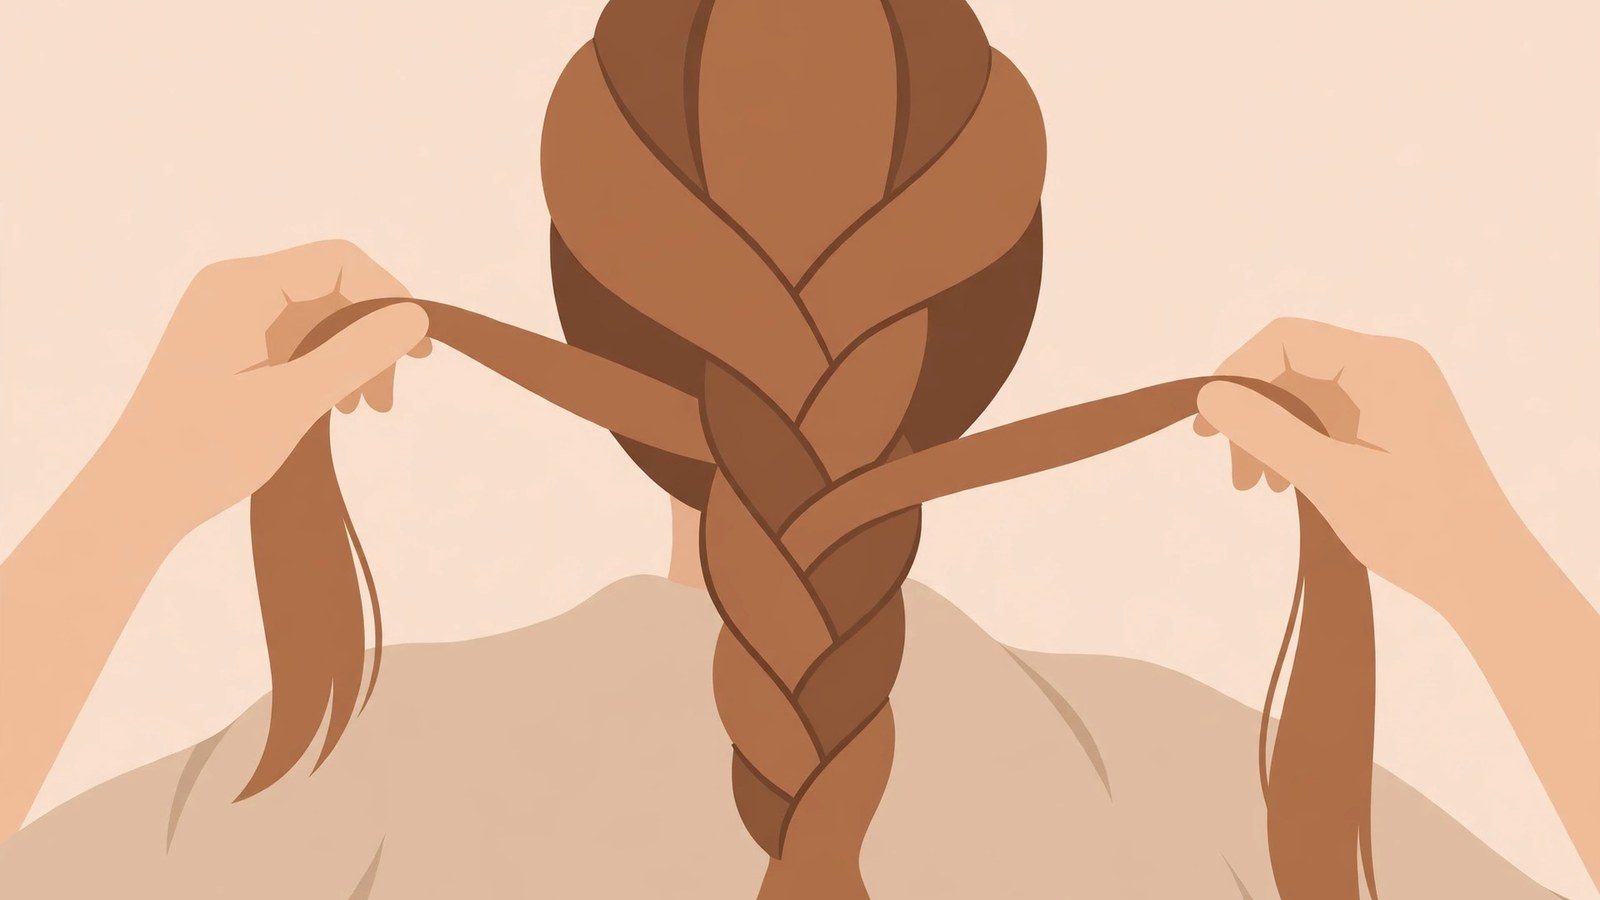
- To French braid your own hair, brush or comb all your hair back and take a section about two to three inches wide at the front hairline. Divide it into three equal strands. Make one regular braid cross on each side to anchor the pattern: right strand over the middle, then left strand over the new middle. After that, repeat one move on each side all the way down: pick up a small section of loose hair, add it to the outer strand, and cross the combined strand over the middle. Keep the additions small, even, and smoothed, and keep tension firm but comfortable and the same on both sides. When no loose hair remains, finish with a regular three-strand braid and secure the end with a small hair tie. If the braid leans, bumps, or unravels, the cause is almost always uneven additions, uneven tension, or a loose start, and each of those has a specific fix later in this guide.
Introduction
French braiding your own hair feels awkward at first because your arms are behind your head, you cannot see the back, and your fingers have to learn a pattern they have never done without looking. That awkwardness is normal, and it fades with practice. The braid itself is simple: start with three strands, then add a small section of loose hair to each outer strand before crossing it over the middle. This guide breaks that pattern into slow, learnable steps, with help on hand position, tension, adjustments for different hair types, practice drills that build the skill in stages, and fixes for the mistakes that make a braid unravel or lean to one side.
The guide is a styling tutorial, not medical advice. The hair care points in it follow published guidance from the American Academy of Dermatology (AAD), checked on 30 October 2026 and named in the Sources section. If your hair or scalp is causing concern, a board-certified dermatologist is the right person to ask, not a general guide.
Before You Start: Hair, Tools, and Setup
French braiding works best on hair that is not freshly washed and slippery, and not so tangled that sections catch as you pick them up. Hair washed the day before, or hair with a little texture from a light styling product used as directed, is often easier to grip. If your hair is very clean and slippery, a small amount of texturizing spray or dry shampoo, applied as directed, can give it grip. Neither product is required; they are grip aids, not part of the braid itself.
You need a brush or a wide-tooth comb, a few small hair ties, and, optionally, a clip to hold a section out of the way and a couple of small pins for loose pieces at the end. Stand or sit in front of a mirror for the front sections. A handheld mirror can help you check the back at the end, but many people learn faster by feeling the pattern rather than watching it constantly, because a mirror reverses left and right and can confuse your hands while you are learning.
Detangle thoroughly before you start. The AAD advises being gentle with hair, notes that hair is delicate when it is wet, and recommends a wide-tooth comb instead of a brush to detangle wet hair, combing slowly from the ends first and then working higher. Use that ends-first method for dry hair before braiding too, so you do not drag knots down through the length. A braid started on tangled hair will pull, catch, and produce uneven sections no matter how careful the braiding is. Conditioner after washing helps here too: the AAD notes that it can improve the look of damaged or weathered hair by increasing shine, decreasing static, and improving strength, and that fine hair does better with conditioner concentrated on the tips rather than the scalp or length.
Braid on dry or nearly dry hair while you are learning. The AAD notes that wet hair breaks more easily when it is combed or brushed, and a first French braid involves a lot of handling and restarting. One exception in the same guidance: people with tightly curled or textured hair are advised to brush their hair when wet to decrease the chances of breakage, and for thick or curly hair the best time to comb is in the shower, before rinsing out conditioner. Follow the handling pattern that matches your hair type, then braid once the hair is detangled and manageable.
Set yourself up for the length of the task. If your hair is very thick or long, work in a cool room and expect to take breaks, because holding your arms up behind your head tires the shoulders, and tired arms lead to uneven tension and dropped strands.
Understand the Pattern First
A regular three-strand braid crosses the right strand over the middle, then the left strand over the new middle, repeating down the length. The strand you just crossed becomes the new middle, so the middle position keeps changing hands. A French braid uses exactly the same crossing pattern, with one addition: before each cross, you add a small section of loose hair to the strand you are about to cross. That added hair is what pulls the braid close to the scalp and creates the woven look along the head.
Think of it as two jobs repeating: add hair, cross over. Add hair, cross over. If you forget to add hair on one side, that stretch will look like a regular braid hanging loose instead of a French braid hugging the scalp. If you add too much at once, the braid looks bulky and runs out of loose hair too early. Small, even additions give the neatest result.
Hold the three strands securely, one outer strand between the thumb and index finger of each hand and the middle strand held by the remaining fingers, shifting strands as they cross. There is no single correct grip, but it should keep tension on all three strands while one hand stays free enough to pick up new hair. If the pattern feels overwhelming, practice the grip and crossing order with a plain regular braid first. That skill transfers directly, because the French braid adds only the pickup step.
How this differs from nearby braids
A Dutch braid uses the same three strands and the same add-hair-as-you-go idea, but the outer strands cross under the middle instead of over it. Crossing over lays the braid flat against the head, which is the French braid look. Crossing under pushes the braid up so it sits on top of the hair, which is the Dutch braid look. That single direction change is the whole difference, and it is covered only as a contrast here because the full Dutch technique is a separate skill with its own guide.
Two other names you may meet are separate styles again, not variations to improvise from this guide. A lace braid adds hair from only one side of the strand instead of both, so it can follow a hairline or a part. A waterfall braid lets each crossed section drop through and replaces it with fresh hair, creating falling strands. Both build on the adding skill taught here and deserve their own step-by-step treatment, so learn the standard French braid first and treat them as next steps.
Step 1: Section the Starting Hair
Brush or comb all your hair back, away from your face, as if you were making a ponytail. At the front hairline, take a section about two to three inches wide, centered on the top of your head. This starting section should reach from the front hairline back toward the crown, but it should not be so large that it is heavy to hold. Divide it into three roughly equal strands: left, middle, and right.
Hold the strands firmly but not tightly. Too much tension pulls at the hairline; too little lets the braid loosen and slip within minutes. Aim for a firm, comfortable hold that keeps the three strands separate and identifiable by feel.
Step 2: Start With One Regular Braid Cross
Before adding any new hair, make one regular braid cross on each side so the pattern is established. Cross the right strand over the middle strand. The right strand is now the middle strand. Then cross the left strand over the new middle strand. The left strand is now the middle strand. You have completed the starting braid, and you are ready to add hair.
This anchors the braid and gives your fingers a clear rhythm. Skipping it often leads to a loose, confusing start.
Step 3: Add Hair and Cross, Right Side
Now pick up a small section of loose hair from the right side of your head, near the braid, about the width of a finger or a little wider. Add this new hair to the right strand, combining them into one slightly thicker strand. Then cross that combined strand over the middle strand. Keep tension steady as you cross, so the new section lies flat against the scalp rather than puffing out.
Use your fingers to smooth the added section before crossing, if needed. A quick smoothing pass with your fingertips prevents bumps and keeps the braid looking neat. Do not rush this step. A smooth addition matters more than speed, and speed comes on its own after several practice braids.
Step 4: Add Hair and Cross, Left Side
Repeat on the left side. Pick up a small section of loose hair from the left side, similar in size to the section you just added on the right. Add it to the left strand, combine them, and cross the combined strand over the middle strand. Check by feel that the left and right additions are similar in size. Uneven additions are the most common cause of a braid that leans to one side or looks lopsided.
Continue alternating sides: add on the right, cross over; add on the left, cross over. Each time, pick up the loose hair closest to the braid, working from front to back and from the sides toward the center. Near the ears and the nape the pickups get smaller and closer to the hairline. Work through those carefully, because that is where loose pieces most often escape.
Step 5: Keep Tension and Position Steady
Tension is what keeps a French braid neat and comfortable. Keep it consistent from section to section. If you pull very tightly on one side and loosely on the other, the braid will drift toward the tighter side. If you pull too tightly overall, the braid may feel uncomfortable and may pull at the hairline, and a braid that hurts is a braid to loosen and redo, not to endure. If you pull too loosely, the braid will slacken during the day and may unravel at the top.
Keep the braid centered as you work. Periodically feel with your fingers whether it is still running down the center of the back of your head. If it starts drifting, adjust the next few additions: pick up slightly more hair from the side it is drifting away from, and slightly less from the side it is drifting toward, to guide it back to center. Small adjustments early are far easier than correcting a braid that has drifted well to one side.
If your arms get tired, rest with the strands held, or clip the braid loosely in place. When you restart, re-establish which strand is the middle before crossing anything, because most mid-braid mistakes happen in that first cross after a break.
Step 6: Finish With a Regular Braid and Secure It
Once all the loose hair has been added, usually at or just below the nape, you will be left with three strands and no more loose hair to gather. Continue with a regular three-strand braid down the remaining length: right over middle, left over middle, repeating until you reach the ends. Keep tension consistent, and try to keep the three strands similar in size as you go, so the tail does not thin out unevenly.
Secure the end with a small hair tie, firm enough not to slip off but not so tight that it creases the hair sharply. For a softer, fuller finish, gently pull the edges of the braid outward with your fingertips, starting from the bottom and working upward, a little at a time on each side. This is sometimes called pancaking. Stop before the top loosens, where you want the braid to stay secure.
If you want the braid to hold through an active day, a light mist of hairspray, applied as directed and from a distance, can help tame flyaways. Use it lightly. The AAD advises reducing the use of long-lasting hold styling products, and notes that using a comb to style hair after applying such a product can cause the hair to break. So spray only after the braid is finished, and smooth flyaways with your palms rather than a comb.
Adjustments for Different Hair Types
Fine or slippery hair. Your main problem is escape: strands slide out of the grip and out of the finished braid. Start with smaller additions than you think you need, keep tension a touch firmer than usual without pulling at the hairline, and add grip before you start with a texturizing product used as directed. Pancake less than you would on thicker hair, because fine hair loosens further on its own.
Thick or heavy hair. Your main problems are arm fatigue and bulk. Take slightly larger additions so the pickup rhythm keeps pace with the volume, smooth each addition firmly so thick sections lie flat, and plan at least one rest, holding the strands or clipping the braid so the work is not lost.
Curly or textured hair. Work with the hair detangled in the pattern the AAD describes for your hair type: combing in the shower before rinsing out conditioner is its suggested timing for thick or curly hair, and conditioner is what moisturizes and detangles and makes hair easier to manage. Braid on hair that is detangled and settled rather than freshly fluffed, gather each pickup cleanly with your fingers instead of raking through curls, and expect the finished braid to look softer and less sharply segmented than it does on straight hair. That softness is the texture, not an error.
Layered hair. Shorter layers are the pieces that slip out, usually at the sides and the nape. Use smaller additions so each layer is captured close to where it grows, keep tension steady rather than tight, and pin the few pieces that still escape after braiding instead of re-braiding the whole style. A looser, softer braid often looks better on layered hair than a very tight one that pulls layers out as it settles.
Short hair. A single French braid needs enough length for the strands to cross and hold, so very short hair may only manage the front section. Braid from the hairline to the crown and secure the rest, and treat that as the complete style while the hair grows, rather than forcing small, tight sections that slip out within the hour.
Freshly washed hair is covered in the setup section above: let it dry fully, work gently, and use a grip aid if needed. A braid that will not hold on squeaky clean hair is usually a grip problem, not a technique problem.
Practice Drills That Build the Skill in Stages
Do not try to master a full French braid in one sitting. These drills isolate one difficulty at a time.
Drill 1: the blind regular braid. Braid a plain three-strand braid on your own hair, or on the tail of a ponytail, without a mirror, until the crossing order feels automatic. This teaches the right over middle, left over middle rhythm and the strand shuffle, with no adding to think about.
Drill 2: the visible side braid. Practice a side French braid brought over one shoulder, where you can see your hands and watch each pickup. This is where you learn to judge addition size: too big, too small, and just right are all visible here in a way they never are at the back of your head.
Drill 3: the front-to-crown braid. Start a centered French braid at the hairline and braid only to the crown, then secure the rest as a ponytail. This isolates the two hardest parts of the full braid, the start and the first additions, in a short attempt you can repeat several times in one session.
Drill 4: pickup-only practice. On a side braid or a front section, practice just the pickup motion: free one hand, gather a finger-width section, smooth it, add it, and cross, then stop and check before continuing. Slow, checked pickups build the evenness the full braid depends on.
Drill 5: the full braid on a low-pressure day. Attempt the complete braid when you have time and no need for it to look perfect. Braid slowly, take breaks, and finish it even if it is uneven, because finishing teaches the nape pickups and the transition to the plain tail, which the shorter drills never reach. After a few full attempts, your hands will start finding the sections without conscious thought, and that is when the braid starts to look neat.
Fixing Common Problems
The braid unravels at the top. The starting section was too loose, too small, or both. Next time, take a slightly larger starting section, complete the full starting cross on both sides before adding hair, and make the first few crosses a little firmer, without pulling painfully.
The braid looks bumpy. The added sections were uneven, or they were crossed without being smoothed first. Slow down, smooth each addition with your fingertips before crossing, and keep additions similar in size from side to side and from step to step.
The braid leans to one side. Check your additions before you check anything else. Many people naturally pick up more hair on their dominant-hand side. Consciously take a slightly smaller section on that side for a few crosses, and add the centering correction from Step 5: a little more hair from the side the braid is drifting away from.
Your fingers keep losing a strand. Your grip needs the adjustment, not your patience. Try holding the middle strand with your ring and little fingers while your thumb and index finger handle the outer strands and the pickups, and return to Drill 1 until the shuffle is automatic. Losing strands usually means the crossing order is not yet automatic, so the pickup step overloads it.
Pieces escape at the nape and sides. Those pickups were probably too large, taken too early, or missed a short layer. On the next braid, save smaller, lower pickups for the nape, gather right down to the hairline behind the ears, and pin any remaining escapees afterward rather than undoing the braid.
The braid feels tight or sore. Loosen it or take it out. A French braid should feel secure, not painful, and pain is the signal to redo it looser. The AAD warns against continuously wearing braids and other styles that pull on the hair, because that tension can lead to breakage, and if the tension continues, permanent hair loss can develop.
The tail thins out unevenly. The three strands were not kept similar in size after the adding stage ended. Re-divide the remaining hair into three equal parts at the nape before starting the plain braid, even if that means a brief pause to redistribute them.
Frequently Asked Questions
How long does it take to learn to French braid your own hair?
There is no fixed number of attempts, because the skill is two habits learned in sequence: the crossing rhythm, then the pickup. The staged drills in this guide separate those habits on purpose. Most beginners find the side braid manageable first, then the front-to-crown braid, then the full braid, which typically looks noticeably neater after several complete attempts than on the first one. Short, repeated practice on low-pressure days builds the finger pattern faster than one long session, because tired arms degrade tension and make the practice itself sloppy.
Should hair be wet or dry for a French braid?
Dry or nearly dry is the easier learning condition, and it matches the AAD handling guidance: hair is delicate when wet, wet hair breaks more easily when combed or brushed, and a wide-tooth comb rather than a brush is the detangling tool for wet hair. The exception in the same guidance is for tightly curled or textured hair, which the AAD says should be brushed when wet to decrease breakage, with thick or curly hair combed in the shower before conditioner is rinsed out. Whatever your hair type, detangle gently and completely first, braid second.
Why does my French braid keep slipping out?
Slipping is usually grip and tension together: freshly washed smooth hair, additions too large to lock in, or tension easing off in the later crosses as arms tire. Braid on day-old hair or add a grip product as directed, take smaller additions, re-check tension after every few crosses, and secure the end firmly. On layered hair, expect a few short pieces to escape regardless, and pin those rather than re-braiding.
What is the difference between a French braid and a Dutch braid?
The direction of the cross. In a French braid the outer strand crosses over the middle, so the braid lies flat and woven against the head. In a Dutch braid the outer strand crosses under the middle, so the braid is pushed upward and sits on top of the hair in a raised ridge. Both add hair the same way as they go. They are taught as separate guides because the hand motion feels different in practice, even though the pattern difference is only that one word, over versus under.
Can a French braid damage your hair?
A single braid worn at comfortable tension and taken out afterward is an ordinary style. The risk the AAD describes is about tension over time: it advises not continuously wearing braids, cornrows, ponytails, and hair extensions, because these styles pull on the hair and can cause tension that leads to breakage, and if the tension continues, permanent hair loss can develop. Keep braids comfortable rather than tight, and keep brushing to a minimum when you take one down, since the AAD also notes that brushing hair 100 strokes a day can cause split ends.
How do I make a French braid look fuller?
Finish and secure the braid first, then pancake it: gently pull the outer edges of each segment outward with your fingertips, starting from the bottom and working upward, a small amount on each side in turn. Bottom-up matters because loosening the top first can unravel the start. Fine hair needs a lighter touch, because it keeps loosening after you stop.
Keep reading: Hairstyles, Hair and Beauty Inspiration
Sources & references
- American Academy of Dermatology, Tips for Healthy Hair (AAD guidance, copyright 2019 AAD, as reproduced in full on the Foothill Dermatology page opened for this check). Used for using conditioner after every shampoo unless a 2-in-1 product is used, conditioner improving the look of damaged or weathered hair by increasing shine, decreasing static, and improving strength, and concentrating conditioner on the tips of the hair for fine hair rather than on the scalp or length.
- American Academy of Dermatology, Tressed to Impress: Tips for Keeping Your Mane Magnificent (AAD news release, PRNewswire, as reproduced on The K Beauty Science). Used for learning your hair type, applying conditioner to the entire length for dry or curly hair and to the ends for fine or straight hair, conditioner moisturizing and detangling hair and making it easier to manage, hair being delicate when wet, using a wide-tooth comb instead of a brush to detangle wet hair, combing the ends first and then working higher, and combing thick or curly hair in the shower before rinsing out conditioner.
- American Academy of Dermatology, Your Hair Style May Be Causing Hair Damage and Hair Loss (AAD news release, 9 July 2013, opened as the GlobeNewswire PDF). Used for handling wet hair as little as possible because wet hair breaks more easily when combed or brushed, the exception that people with tightly curled or textured hair should brush when wet to decrease the chances of breakage, keeping brushing to a minimum and 100 strokes a day causing split ends, reducing the use of long-lasting hold styling products and combing after applying them causing hair to break, and not continuously wearing braids, cornrows, ponytails, and hair extensions because the pulling tension can lead to breakage and, if it continues, permanent hair loss.


