Short answer
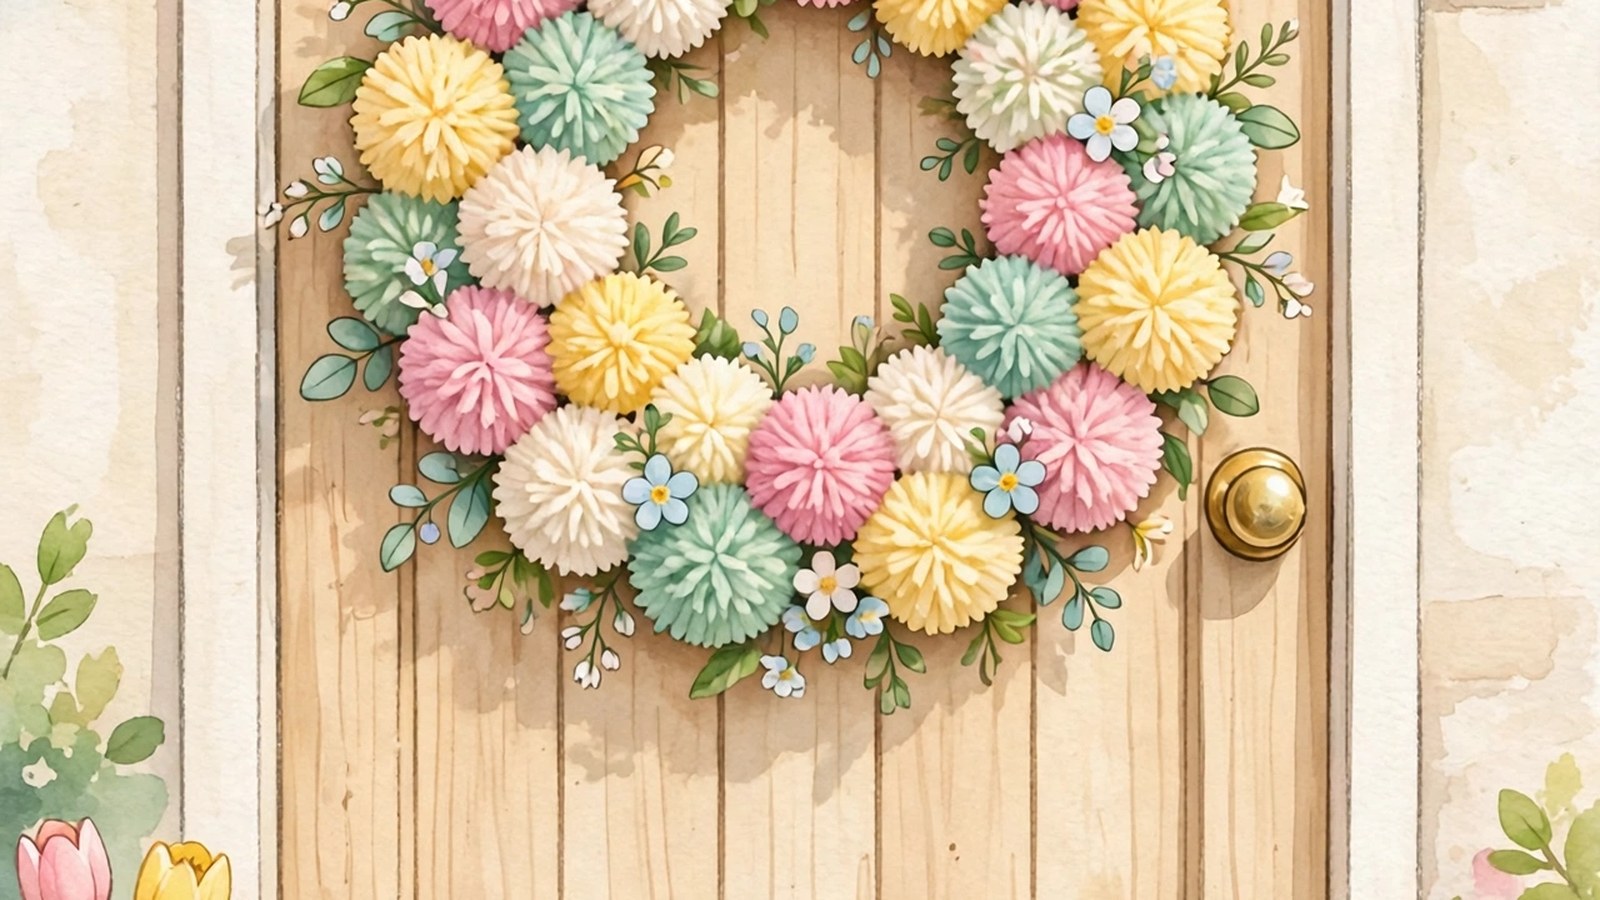
- Choose a foam or wire wreath form about 12 to 14 inches across and medium weight acrylic yarn in three to five spring colors. Make roughly 30 to 40 dense pom-poms by wrapping yarn around a pom-pom maker or two cardboard rings, tying the middle tightly, cutting the loops, and trimming each ball into a round shape. Arrange the pom-poms on the form before attaching anything, placing the largest first and filling gaps with smaller ones, then tie or glue each one in place so the front, inner edge, and outer edge are all covered. Add one or two small spring details if you like, attach a ribbon loop, and hang the wreath on a hook or over-door hanger on a covered porch or behind a storm door. Store it in a box, not a bag, between seasons.
Introduction
A front door dressed for spring changes how coming home feels. After months of bare branches and gray skies, a wreath built from soft, fluffy pom-poms adds color and texture in a way that lasts far longer than fresh flowers. It will not wilt, it can stay up for weeks, and when the season turns it can be packed away and brought out again next year.
This guide explains how to make a DIY pom-pom wreath from start to finish: choosing a form and yarn, making dense pom-poms by hand or with a simple maker, arranging them so the colors balance, attaching them securely, adding a few restrained spring details, and hanging and storing the finished wreath so it keeps its shape. The method is original craft instruction written for this article. It makes no claim about search figures, product performance, or how long any particular yarn or glue will last outdoors, because those outcomes depend on the materials you choose and the exposure your door gets.
The project suits beginners. It needs no stitching, no precise measuring, and no specialist equipment, and small mistakes are easy to hide or fix. Slightly uneven pom-poms are not a flaw here. A mix of sizes and a slightly shaggy finish are what give the wreath its soft, cloudlike texture.
What You Will Need
Most of the supplies are ordinary craft materials, and many crafters already own them. Gather everything before you start, because the project flows best when the pom-pom making stage is not interrupted by a trip to the store.
- A foam or wire wreath form, about 12 to 14 inches across. A foam form is the easier starting point for a first wreath because pom-poms can be pinned or glued straight onto its surface. A wire form gives a lighter finished wreath, but each pom-pom must be tied on firmly.
- Yarn in three to five spring colors. Medium weight acrylic yarn is a practical choice because it is affordable, widely available, and offered in many colors. Plan on roughly one ball of yarn per color as a starting estimate, and expect the exact amount to depend on pom-pom size, wrap density, and how full you want the finished wreath.
- A pom-pom maker in one or two sizes, or two pieces of cardboard cut into matching ring shapes. A maker speeds the work up and makes sizes more consistent. Cardboard costs nothing and works well; cut the rings from a sturdy box so they hold their shape through repeated wrapping.
- Sharp scissors. Wrapping and trimming are the two cutting jobs in this project, and dull blades crush yarn instead of cutting it cleanly, which makes trimming slow and the finish uneven.
- A hot glue gun and glue sticks, or strong craft glue and straight pins if you prefer to avoid hot glue. Glue choice is covered in the assembly section below.
- A length of ribbon or twine for hanging, and a small piece of felt or ribbon to cover the back if you want a neat finish.
- Optional extras: a few small felt leaves, a small wooden butterfly or bird shape, or one larger pom-pom in a contrasting color to act as a focal point.
Buy or set aside a little more yarn than you think you need in your main color. Running short partway through is the most common reason a wreath ends up with an uneven color balance, because the replacement color then has to fill more space than planned.
Plan the Size, Colors, and Fullness First
A few decisions made before the first wrap will shape the whole project. Start with size. A 12 to 14 inch form suits most front doors: large enough to read clearly from the path, small enough to hang from a standard over-door hanger without crowding a knocker or handle. If your door has glass panels, hold the bare form against the door first and check that the ring frames the glass rather than covering its edges.
Next, choose colors against the door, not in the abstract. Pastel pink, butter yellow, mint green, and cream look fresh against a white or pale door. Brighter coral, teal, and sunshine yellow stand out more clearly on a dark door. Lay the yarn balls side by side in daylight and check that no single color dominates unless you want it to. A useful starting balance is one main color for about half the pom-poms, two supporting colors sharing most of the rest, and one accent color used sparingly. That is a design suggestion, not a rule.
Finally, decide on fullness. A full wreath comes from density: pom-poms packed close together so no part of the form shows from any angle. For a 12 inch form, plan on roughly 30 to 40 pom-poms as a working estimate. The real number depends on pom-pom size. Larger pom-poms cover the form with fewer pieces but can look bulky on a small ring. Smaller pom-poms take longer but fill edges more neatly. Many makers settle on a mix: medium pom-poms for the front face and small ones for the edges.
How to Make a Pom-Pom, Step by Step
The pom-pom itself is the whole craft. Once you can make one dense, round pom-pom, the wreath is repetition and arrangement. Work through these steps slowly for the first two or three, then settle into a rhythm.
Step 1: Wrap the yarn
Open the pom-pom maker, or hold your two cardboard rings together so their holes line up. Wrap yarn around both arms of the maker, or around the paired rings, passing the yarn through the center hole each time. Keep the wraps side by side rather than piled in one spot, so the bundle grows evenly.
The number of wraps decides the density. Wrap until the center hole is nearly closed and the bundle feels firm when you squeeze it. A thinly wrapped bundle makes a sparse, straggly pom-pom that will look lost on the wreath, so be generous. If you want two-tone pom-poms, wrap part of the bundle in one color and the rest in a second color before moving on.
Step 2: Tie the middle tightly
Cut a separate length of yarn about 8 to 10 inches long. Once wrapping is done, work this length around the middle of the bundle: through the center of the cardboard rings, or along the groove of the maker. Pull it as tight as you can and knot it twice. This tie is the only thing holding the finished pom-pom together, so a loose tie means strands will pull free later.
Leave the ends of the tie long rather than trimming them flush. Those ends are useful later: you can tie them around a wire form, or tuck and glue them out of sight on a foam form.
Step 3: Cut the loops
With the tie secured, cut through the wrapped loops around the outside edge of the bundle. Keep your scissor blades between the two cardboard rings, or along the groove of the maker, and work slowly around the full circle. Cut every loop. A missed loop shows up later as one long strand sticking out of the finished ball.
Step 4: Release and fluff
Pull the cardboard rings away, or open and remove the maker. The bundle will look untidy at this point, which is normal. Shake it gently and use your fingers to spread the strands evenly around the tie, rolling the pom-pom lightly between your palms until it reads as a ball.
Step 5: Trim into a round shape
Hold the pom-pom by its tie ends and trim any long strands so the outline is round. Turn it as you work and trim a little at a time. Compare it with a pom-pom you are already happy with rather than chasing a perfect sphere. Stop earlier than you think you should: a slightly shaggy pom-pom looks softer and more natural than a tightly clipped one, and over-trimming is the easiest way to shrink a pom-pom you spent time wrapping.
Repeat the process, rotating through your colors so you build a balanced pile instead of making all of one color first. Make a few extra pom-poms beyond your estimate. Spares are useful for filling small gaps at the end, and they are far easier to make now, while your materials are out, than after everything has been put away.
Working in Batches and Keeping Sizes Consistent
Thirty or more pom-poms is a lot of repetition, and a simple batch system keeps the work pleasant and the sizes consistent. Make pom-poms in groups of five or six in one color, then switch. Grouping lets you compare each new pom-pom with the last few while your hands still remember the wrap count that produced them.
To keep sizes close, use the same maker setting or the same pair of cardboard rings for every pom-pom in a size group, and count wraps for the first few until the firmness feels familiar. Small differences are fine across the whole wreath, but a single pom-pom twice the size of its neighbors will pull the layout out of balance.
Sort the finished pom-poms into piles by size as you go: large, medium, and small. Assembly is much faster when you can reach for the size a gap needs. This is also a good project to share. A second person can wrap yarn while you tie and trim. Anyone helping should use scissors they can handle safely, and hot glue work later belongs to an adult, with each glued piece left to cool before the wreath is handled.
Assembling the Wreath
Assembly is where the wreath takes shape, and the most important step happens before any glue comes out.
Arrange first, attach second
Lay the form flat and arrange the pom-poms on it without attaching anything. Place the largest pom-poms first, spaced evenly around the ring, then fill between them with medium pom-poms, reserving the smallest for edges and gaps. Distribute colors as you go rather than finishing one section at a time.
Step back and look at the arrangement from a few feet away, the distance a visitor sees it from. If all the pink pom-poms have ended up on one side, shuffle them now, while moving them costs nothing. Check the ring from the side as well. Pom-poms sitting only on the front face leave the form visible from the side, which spoils the effect every time the door opens. Plan small pom-poms along the inner edge and the outer edge so the wreath looks full from every angle.
Attach each pom-pom securely
Work in sections, attaching one pom-pom at a time and pressing it gently into place so it sits snugly against its neighbors.
On a foam form, you can tie the long tie ends around the form where the form is narrow enough, pin the pom-pom in place, or add a dab of hot glue under the pom-pom where it meets the foam. On a wire form, tie the pom-pom firmly to the wire using its tie ends, knotting twice, and add a small amount of glue where a pom-pom still shifts after tying.
If you use hot glue, apply it to the form or to the base of the pom-pom, press and hold for a few seconds, and let each piece cool before moving the wreath. If you prefer craft glue, allow more drying time and consider pinning pom-poms in place while the glue sets. Whichever method you choose, test the first few pom-poms with a gentle tug once they have set. A pom-pom that moves now is easy to reattach. One that falls off a hanging wreath later is more annoying.
Keep checking coverage as you work. Hold the wreath up at arm’s length every few pom-poms and turn it slowly. Gaps are easier to see, and easier to fill, while neighboring pom-poms can still be nudged aside.
Finish the back and add the hanger
When the ring is covered, turn the wreath over. Trim any loose tie ends that stick out, taking care not to cut the ties that are holding pom-poms to a wire form. For a tidy finish that sits smoothly against the door, glue a circle of felt over the back of a foam form, or weave a length of ribbon through the back of a wire form to soften the points where wire meets door.
Attach the hanging ribbon last. Loop it through the top of the form and knot it securely, or glue and pin a ribbon loop to the back of a foam form and let the glue set fully before hanging. The loop should be long enough for the wreath to hang centered at eye level on the door, and short enough that the wreath does not swing against the door when it opens and closes.
Adding Spring Details
A plain yarn pom-pom wreath is complete on its own, but a few small details can give it a clear spring character without making it fussy.
Felt leaves are the simplest addition. Cut simple oval shapes with a pointed tip, freehand, in two shades of green. Slightly irregular leaves look more natural than identical ones. Tuck them between pom-poms so just the tips show, in small groups of two or three, at a few points around the ring.
A single focal piece can anchor the design: a small wooden butterfly, a felt bird, or a cluster of tiny white pom-poms grouped like blossom. Place a focal piece slightly off center rather than at the very top. An off-center detail looks more natural and draws the eye around the whole wreath.
Resist adding too much. The charm of this wreath is its softness, and heavy decorations can flatten the pom-poms and add weight the ties and glue then have to hold. Choose one or two details, hang the wreath, and live with it for a day before deciding whether it needs anything else.
Simple Variations Once You Know the Method
The same method adapts easily once you have made one wreath. None of these variations changes the core steps of wrapping, tying, cutting, and attaching.
For a fuller, softer look, make every pom-pom one size larger and pack them closer, adding a second layer of small pom-poms over the joins between the first layer. For a neater look, use only two colors, trim each pom-pom a little tighter, and arrange the colors in repeating blocks around the ring instead of mixing them.
For a smaller project, use a smaller form and fewer, larger pom-poms. Leftover pom-poms can be strung on twine as a simple garland, so spares rarely go to waste.
Color is the easiest variation of all. The same wreath made in deeper or warmer shades reads as an autumn piece, and one made in a single color family, from pale to deep, gives a gentle gradient effect.
Hanging and Caring for Your Wreath
Hang the wreath on a hook or an over-door hanger rather than driving a nail or pin through the pom-poms, which crushes them and can loosen their ties. Check that the hanger itself sits flat and does not hold the wreath away from the door at an angle.
Placement matters for how long the wreath stays looking its best. It does best on a covered porch or behind a storm door. Yarn can handle a little dampness, but repeated soaking will make a wreath heavy and slow to dry, and a waterlogged form may lose its shape. On a fully exposed door, expect the wreath to last for a season rather than several, and bring it inside during prolonged heavy rain. Avoid leaving the wreath in direct, strong sunlight for months on end, because bright sun can fade yarn colors over time.
For everyday care, a light shake outdoors lifts most dust. Spot-clean small marks with a damp cloth and let the wreath dry fully before hanging it again. Do not soak the whole wreath to clean it: soaking can distort the form, loosen glue, and take a long time to dry.
Between seasons, store the wreath in a box rather than a bag. A bag lets other stored items press the pom-poms flat, while a box with tissue paper packed loosely around the wreath helps it keep its shape. If pom-poms have flattened in storage, a gentle shake and a few minutes of fluffing with your fingers will usually restore them.
Troubleshooting Common Problems
The wreath looks thin in places. The answer is almost always more pom-poms, not bigger ones. Fill gaps with small pom-poms in colors already present in that part of the wreath, tucked into the joins between larger ones.
The wreath feels lopsided. Check that the largest pom-poms are evenly distributed around the ring. Moving just two or three of them usually restores the balance. Also check the hanger: a loop attached slightly off center will make even a balanced wreath hang crooked.
Pom-poms keep coming loose. The tie was probably not pulled tight enough, or the glue did not reach the form. Re-tie the pom-pom with a fresh length of yarn, pulled tight and double knotted, and apply glue directly to the form rather than only to the yarn surface.
Individual strands pull out of a pom-pom. That pom-pom was tied too loosely at the middle. There is no reliable way to tighten a finished pom-pom, so replace it with a spare and keep it for a less visible spot, or unpick it and reuse the yarn.
The pom-poms look uneven. Trimming is a skill that improves quickly with practice. Trim a little at a time, rotate the pom-pom as you go, and hold it beside one you are happy with. If a pom-pom has been trimmed too small, use it on an inner or outer edge, where smaller sizes belong anyway.
The colors look muddled. Stand back and look for the color that appears in clumps. Redistribute those pom-poms before attaching, or, on a finished wreath, add a few pom-poms of your clearest, brightest color at spaced points around the ring to lift the whole arrangement.
Why This Project Works for Beginners
Pom-pom wreaths are kind to beginners because there is no single right outcome. The wreath does not depend on precise measurements, neat stitching, or expensive tools. The skills involved, wrapping, tying, cutting, and trimming, are learned within the first few pom-poms.
Mistakes are easy to hide or repair. A slightly small pom-pom disappears between two larger ones, a gap is filled with a spare, and a loose pom-pom can be re-tied. The project can also be paused and resumed at any point without anything spoiling: make pom-poms in the evenings, assemble on the weekend.
Most of all, this is a project with a visible reward. In a single afternoon of assembly, a pile of yarn becomes something that greets you every time you walk through your front door, and that same wreath can come back out next spring.
Frequently Asked Questions
How long does this wreath take to make?
Allow an afternoon for assembly and several hours in total for the whole project. Making the pom-poms takes the longest, roughly a few minutes each once you have a rhythm, so 30 to 40 of them add up quickly. Many makers spread the pom-pom stage over a couple of evenings and assemble the wreath in one sitting, which keeps the layout decisions fresh.
Can I use leftover yarn?
Yes, and this project is well suited to it. Small amounts of yarn in different colors work well as long as they are roughly the same weight, so the pom-poms come out at similar densities and sizes. Mix weights with care: very chunky yarn makes much larger, looser pom-poms than medium weight yarn, so group any odd weights together in one section rather than scattering them.
Will a pom-pom wreath survive outdoors?
It does best on a covered porch or behind a storm door. On a fully exposed door it will still serve for a season, but repeated rain and strong sun will shorten its life, making yarn heavy and slow to dry and fading colors over time. Bring it inside during prolonged heavy rain if you can.
Can I wash the wreath?
It is better to spot-clean than to wash the whole wreath. Soaking can distort the form, loosen glue, and take a long time to dry. Use a damp cloth on small marks, shake out dust outdoors, and let the wreath dry fully before hanging it again.
How do I make the wreath fuller?
Work on density at both stages. Add more wraps of yarn to each pom-pom so the balls themselves are firm and full, then pack the pom-poms closer together on the form, cover the inner and outer edges as well as the front, and fill every join with a small pom-pom. Fullness is a matter of density, not of using a larger form.
What if I do not have a pom-pom maker?
Use two cardboard rings instead. Cut two matching ring shapes from sturdy cardboard, hold them together, and wrap, tie, and cut exactly as described in the steps above, sliding your scissors between the two rings to cut the loops. Cardboard rings wear out after a while, so cut a spare pair before you start a large batch.
Sources & references
- This article is based on original craft instructions written for Amberaisle. The method, materials list, quantities, timings, and troubleshooting advice are craft method guidance developed for this guide, stated as working estimates where they appear, and no external factual claims, statistics, product tests, expert quotations, or search figures are relied on. No external sources were opened for this adaptation because the article makes no factual claims that require one. Quantities such as the pom-pom count for a 12 inch form and the time the project takes are planning estimates that vary with pom-pom size, wrap density, and the maker's pace, and they are qualified as estimates in the text.


