Short answer
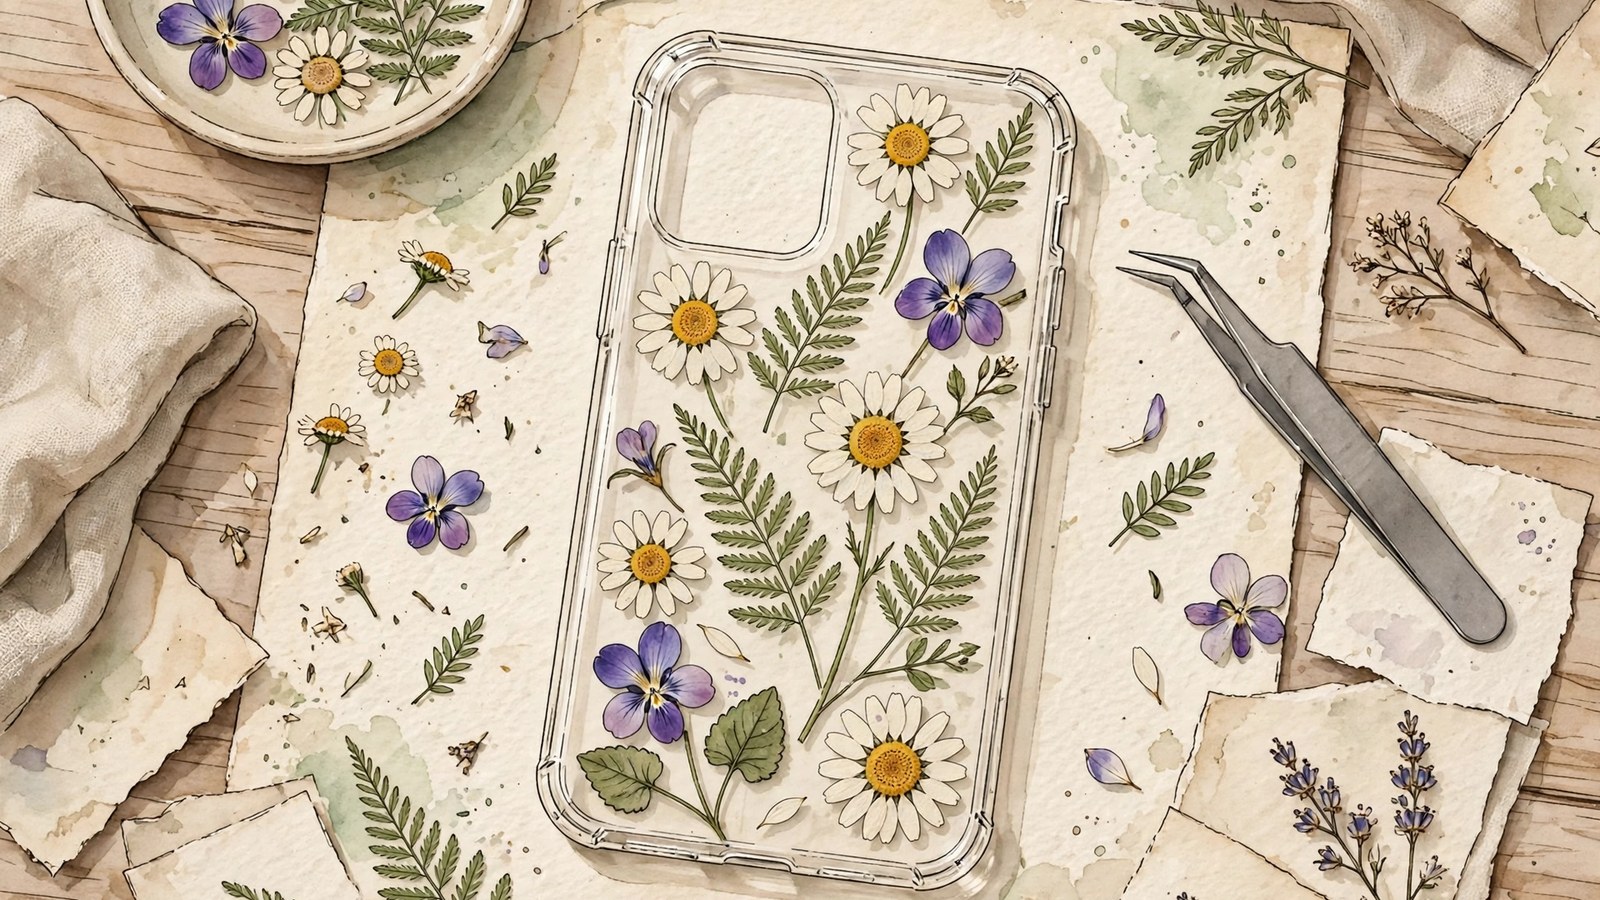
- Press flowers until they are completely dry, flat, and papery, which takes one to three weeks in a book or flower press for most small blooms. Buy a clear, hard case made for your exact phone model and test the empty case for button, camera, and charging fit before you add anything. For the beginner friendly no resin method, arrange the flowers on the clean case, glue each one with a very thin layer of clear drying craft adhesive, let the design dry fully, then seal it with thin, even coats of a clear topcoat tested first on a hidden corner. For the resin method, an adult working in a well ventilated space with nitrile gloves and eye protection glues the flowers lightly in place, lets any sealant dry fully, then pours a thin layer of resin mixed exactly to the product label ratio and leaves it undisturbed for the full curing time on that label. Keep flowers away from edges, camera, and ports, leave clear space in the design, and let the finished case cure fully before use.
Introduction
A pressed flower phone case turns flat, dried blooms into a small piece of art you can carry every day. You can see the petals through a clear case, keep a garden memory in your pocket, and make a gift that looks far more delicate than the effort it took. The project is forgiving for beginners, because flowers can be rearranged until the design feels right, and it is satisfying for experienced crafters, because color, layering, and sealing choices change the result in subtle ways.
This guide covers two main approaches. The first is a no resin method using a clear case and a protective top layer, which is the best starting point for most people. The second is a resin method for a harder, glossier finish, which needs more safety care and should be done only by an adult who follows the label and safety sheet for the specific resin product used. The guide also covers pressing flowers well, choosing a case that fits your phone, designing a layout that survives daily use, caring for the finished case, and fixing common problems.
Resin safety in this article is qualified throughout. Resin products differ by brand and formula, so no general safety claim is made for all resins. What one manufacturer states for its own product does not transfer to another product. Always read the label and safety data sheet for the product in your hands and follow them over any general craft advice, including this article.
What a Pressed Flower Case Can and Cannot Do
A pressed flower case is decorative first and protective second. The flowers sit on or in the case and are protected by a clear cover layer, but they are not as tough as a plain plastic case. A well sealed case will handle normal pocket and bag use, but it is not designed for drops onto concrete, for bending, or for long exposure to water. If you need maximum drop protection for work or sport, use a sturdy everyday case and keep the pressed flower case for gentler days.
Flowers also change over time. Even well pressed, well sealed flowers can fade slowly, especially with sunlight, heat, and daily handling. That fading is normal for natural materials. A case kept out of direct sun, away from radiators, and out of a hot car will keep its color longer than one left on a sunny windowsill. Think of the case as a seasonal piece that you can remake with new flowers next year, rather than a permanent object.
Phone fit matters more than flower choice. Buy a clear case made for your exact phone model, with precise cutouts for the camera, buttons, and charging port. A case that is too large will shift, and flowers near the edge may peel. Test the empty case before you add any flowers. Check that buttons press easily, the camera is not blocked, and wireless charging still works if you use it, because some thick, layered cases can interfere with charging.
Finally, decide who this project is for. The no resin method is suitable for a careful beginner, including an older child working with an adult. The resin method involves chemicals and curing times and should be done by an adult in a well ventilated space, following the resin product label and safety sheet exactly. If you are making a case with a child, choose the no resin method. The result can be just as pretty, and the process is safer and easier to undo if a flower lands in the wrong place.
Pressing Flowers Well
Good pressing starts with good flowers. Choose blooms that are naturally flat or that press flat without breaking. Small daisies, violets, pansy faces, fern fronds, small leaves, lavender sprigs, and tiny wildflowers are reliable choices. Thick, fleshy blooms such as large roses press poorly, because their centers hold moisture and can mold or turn brown. If you love a thick flower, press individual petals rather than the whole bloom.
Pick flowers when they are dry, ideally in the morning after dew has dried. Avoid flowers that are wet, damaged, spotted, or already fading. Check that a garden plant has not been treated with a pesticide you would not want on your hands, and avoid protected or rare species. If you pick from a public place, check local rules first, because many parks and reserves ask visitors not to pick flowers. A garden, a windowsill pot, or a purchased bunch is a safer source.
Pressing can be done with a flower press, with heavy books, or with a microwave flower press made for the purpose. The book method is the simplest. Place a flower face down between two sheets of plain, absorbent paper, such as blotting paper, watercolor paper, or plain newspaper without glossy print. Close the book, stack another heavy book on top, and leave it undisturbed. Change the paper after two or three days if it feels damp, because damp paper slows drying and encourages mold. Most small flowers need one to three weeks to become fully flat and papery. Thicker flowers need longer.
A microwave press dries flowers faster, often in minutes, but it needs care. Follow the press instructions exactly, use short bursts, and check frequently, because overheating can scorch petals or make them brittle. Microwaved flowers can keep brighter color than book pressed flowers, but they can also become fragile. Whichever method you use, the test for readiness is the same. The flower should feel completely dry, flat, and papery, with no cool, soft, or flexible spots. A flower that still holds moisture will brown, bubble, or mold under a sealant. Patience at this stage saves disappointment later.
Store pressed flowers flat between sheets of paper in a dry folder or envelope, away from light and humidity. Handle them with tweezers or clean, dry fingers, because skin oils can mark petals and dried flowers tear easily. Keep them away from children under three and from pets that might chew them, since pressed flowers are decorative craft materials, not food or toys.
Choosing Materials and a Case
For the no resin method, you will need a clear, hard phone case for your exact phone model, pressed flowers, tweezers, small scissors, a clear drying craft adhesive or decoupage medium suitable for the case material, a small brush, and a clear topcoat or a second clear case layer to protect the design. A clear, flexible case can work, but a hard case gives a flatter, more stable surface for arranging flowers. Test any adhesive on a small, hidden area of the case first, such as an inside corner, to check that it dries clear and does not cloud the plastic.
For the resin method, you will need, in addition to the case and flowers, a craft resin product made for coating or casting, mixing cups, stir sticks, nitrile gloves, eye protection, a silicone mat or covered work surface, and a well ventilated workspace. Choose a resin type that matches your plan. A thin coating resin is designed for sealing a surface. A casting resin is designed for deeper pours. Read the product label before you buy, and do not substitute a resin meant for another purpose. Keep resin, hardener, and uncured pieces away from children, pets, food, and drink.
Other useful supplies include a pencil for sketching a layout, a toothpick for nudging petals into place, and a lint free cloth. Dust is the enemy of a clean finish. A single hair or dust speck trapped under a topcoat will be visible for the life of the case. Work in a room that is not dusty or drafty while adhesive or resin is wet.
Think about color before you glue anything. Flowers look different against a clear case than they do on white paper, because the phone behind the case adds its own color. If your phone is dark, pale flowers such as white daisies, light violets, and cream blossoms will stand out. If your phone is light, deeper colors such as purple, pink, and green will show better. Test your layout by placing flowers on the case over your phone, in daylight, before you commit to adhesive.
Designing a Layout That Works in Real Life
A good layout balances beauty with durability. Flowers near the edges and around the camera cutout are the most likely to lift, peel, or catch on a pocket. Flowers in the center of the case, away from edges and button areas, last longer. Keep at least a small margin around the entire edge of the case, and keep flowers clear of camera lenses, flash, speaker holes, and charging ports. A design that respects those openings looks intentional and works properly.
Start by sketching two or three layouts on paper, using the case as a template. Trace the outline, mark the camera area, and draw flower positions loosely. Then try the layouts with real flowers on the empty case, without adhesive. Try a single large flower as a focal point, a scattered meadow pattern, and a simple border along one side. Take a phone photo of each trial layout so you can compare them.
Consider scale. One or two larger blooms with smaller fillers often looks more elegant than a crowded surface. Negative space, the clear area left empty, lets the eye rest and lets each flower be seen. It also gives the topcoat a flat area to grip. A case completely covered in overlapping petals may look lush at first, but overlapping layers create thickness, uneven edges, and places where moisture or air can get trapped.
Layering needs care. If you layer a small flower over a leaf, glue the leaf first, let it dry, then add the flower. Press gently with a clean finger or a flat tool, so no air bubbles remain underneath. Bubbles show as pale spots under a topcoat and can cause lifting later. If a flower is thick in the center, trim the back slightly with small scissors, or choose a flatter bloom. Flatness matters more than size for a case that will live in a pocket.
The No Resin Method, Step by Step
Clean the outside of the clear case thoroughly and let it dry completely. Any dust, fingerprint oil, or moisture will show under flowers or weaken adhesive. Place the case face up on a clean surface, with the phone removed. Arrange your chosen flowers on the case, following your tested layout, and leave them in place while you work from one section at a time. Working section by section prevents flowers from shifting while adhesive dries elsewhere.
Apply a very thin layer of clear drying craft adhesive to the back of one flower at a time, using a small brush or a toothpick. Less adhesive is better. Too much adhesive can seep out, cloud the case, or make petals translucent in an uneven way. Place the flower on the case, press it gently and evenly, and hold it for a few seconds. If adhesive squeezes out, wipe it away immediately with a clean, damp cloth, taking care not to move the flower. Repeat for each flower and leaf, letting each section set before moving to the next.
Once all flowers are placed, let the case dry completely, following the adhesive label for drying time. Do not rush this step. A flower that looks dry on top may still be soft underneath, and sealing too early can trap moisture. When the design is fully dry, apply a thin, even topcoat over the entire decorated area, following the product label. A decoupage medium or a clear sealant made for plastic can work, but test it first on a spare case or a hidden corner. Brush in one direction, avoid over brushing, which can lift petals, and let the first coat dry fully before adding a second thin coat if the product recommends it.
For extra protection, some crafters place the decorated case inside a second, slightly larger clear case, so the flowers are sandwiched between two layers. This also lets you change the design later. Test the double case fit before you glue anything, because a tight second case can shift flowers during insertion.
Let the finished case cure fully before using it. Curing time varies by product, and it is often longer than surface drying time. A case that feels dry to the touch may still be soft enough to mark if it goes into a tight pocket immediately. Give it the full time on the label, ideally overnight, in a clean, dust free spot. Then test it on your phone, checking buttons, camera, and charging, before you carry it for a full day.
The Resin Method, Step by Step, With Safety First
Resin gives a hard, glossy finish, but it requires respect for the chemistry involved. Work in a well ventilated area, away from children and pets, with no food or drink nearby. Wear nitrile gloves and eye protection, and wear an apron or old clothing. Read the resin label and safety data sheet before you open the product, and follow the mixing ratio, working time, and curing time exactly. Different brands vary, and guessing a ratio leads to sticky, soft, or cloudy results. Manufacturer guidance for one well known craft epoxy, checked for this article, likewise stresses wearing gloves, working in a well ventilated space where air can move freely, washing resin off skin right away with soap and water, and rinsing eyes with water and seeking medical attention if resin gets in them. Treat those points as a floor, not a ceiling. If your own product label requires more, such as a respirator when ventilation is limited, follow your label.
Prepare the case in the same way as the no resin method. Clean it, arrange the flowers, and glue them lightly in place so they do not float when resin is poured. Sealing flowers with a thin coat of clear sealant before resin, if your resin label recommends it, can reduce bubbles and color change, especially for delicate petals. Let any sealant dry fully. Then mix a small batch of resin in a clean cup, stirring slowly to avoid introducing bubbles, and following the label for mixing time. Pour a thin layer over the design, using a stir stick or toothpick to guide resin to the edges without pushing flowers out of place. Thin layers matter. The manufacturer guidance checked for this article describes its coating resin as designed for thin layers of about one eighth of an inch and advises building depth in multiple thin layers rather than one thick pour. Your product may differ, so use its stated layer thickness.
Remove surface bubbles gently, using only a method your resin brand recommends. Some brands recommend a quick pass with a heat tool held at a distance and moving constantly, so the resin does not overheat. Others recommend a toothpick. Do not use a method your brand does not recommend, and keep any flame or heat source away from alcohol or solvents until they have fully evaporated. Cover the curing case with a clean box or cover to keep dust off, without touching the wet surface, and leave it undisturbed for the full curing time on the label. Resin may feel firm or dry to the touch well before it is fully cured. The manufacturer example checked here puts dry to touch at about 24 hours and full cure at about 72 hours for its product, but those times belong to that product only. Moving or using a case too early can leave fingerprints, bends, or soft spots.
After curing, inspect the case in daylight for bubbles, dust, cloudy patches, or shifted flowers. Small bubbles near the surface can sometimes be sanded and recoated, following the resin brand guidance for sanding, with eye protection and a dust mask, in a well ventilated area. If the result is badly cloudy, sticky, or uneven, starting again with a new case usually gives a cleaner result than repeated repairs.
Handle waste with the same care. Do not pour leftover uncured resin down a drain. The manufacturer cleanup guidance checked for this article states that point plainly and advises wiping containers and tools, then cleaning them as the label directs. Keep uncured resin waste, mixing cups, and used gloves sealed and dispose of them according to the product label and local rules. Wash hands with soap and water if resin touches skin, removing gloves carefully so resin does not spread. Do not sand, drill, or heat a cured case near food or drink, and never use a resin case itself for food contact. Whether a fully cured resin is described by its maker as suitable for food contact depends entirely on that specific product, its mixing, and its cure, so make no assumption about a phone case on that point.
Caring for Your Finished Case
A pressed flower case lasts longer with gentle care. Clean it with a soft, slightly damp cloth, and dry it immediately. Avoid harsh cleaners, alcohol wipes, and abrasive cloths, which can cloud a topcoat or damage petals at the edges. Do not soak the case, leave it in water, or use it in rain for long periods. Water can seep under a lifted edge and damage flowers that looked perfect the day before.
Protect the case from heat and sunlight when you are not using it. Do not leave it on a car dashboard, a sunny windowsill, or near a radiator. Heat can soften adhesives and resin, and sunlight fades natural color. The manufacturer guidance checked for this article notes that its cured resin can soften above about 120 degrees Fahrenheit and can be permanently damaged by higher heat, such as a hot car. That figure is product specific, but the general lesson applies to any version of this project. Store the case in a cool, dry place when you switch to another case, ideally in a soft pouch that prevents scratching.
If a flower edge lifts, you can sometimes repair it with a tiny amount of clear adhesive applied with a toothpick, pressed gently, and sealed with a thin topcoat once dry. If a large area lifts, remaking the case may give a better result. Check the case regularly. A musty smell, dark spots, or soft areas under the seal can mean moisture was trapped during sealing. Discard a case that shows mold or persistent dampness. A new case and fully dry flowers are a safer and prettier solution.
Variations and Gift Ideas
A pressed flower case can be adapted to many styles. A minimalist case uses one bloom and two leaves, centered, with plenty of clear space. A botanical case uses leaves, ferns, and small flowers in a scattered pattern. A monogram case places flowers around a single letter. A seasonal case uses spring violets, summer daisies, autumn leaves, or winter evergreen sprigs.
For gifts, include a small card noting which flowers you used and why you chose them, and add care instructions. Wipe gently, keep out of sun and water, and enjoy it as a seasonal piece. If you are gifting a resin case, note that it should be kept away from young children who might chew or break it. A no resin gift case is easier for the recipient to repair or remake.
Troubleshooting Common Problems
If flowers bubble under the topcoat, moisture is the most likely cause. The flowers were not fully dry, the adhesive was too thick, or the case was sealed before the design dried. Next time, press flowers longer, use thinner adhesive, and allow a full drying time before sealing. If a bubble appears after sealing, a tiny pinprick and a thin reseal can sometimes help, but it may leave a mark, so prevention is better than repair.
If flowers turn brown under resin, they may have been slightly damp, or the resin may have reacted with that flower type. White and pale blooms are more prone to color change. Test a single flower in resin before committing a full design, and seal pale flowers first if your resin brand recommends it. If browning repeats with one flower type, save that flower for the no resin method.
If the topcoat looks cloudy, the product may not suit the case plastic, the coat may have been too thick, or humidity may have affected drying. Test products on a spare case, apply thin coats, and work in a dry room. If cloudiness runs throughout the layer, starting again is usually cleaner.
If flowers shift during sealing, the adhesive layer was too weak or the topcoat was brushed too firmly. Glue flowers more securely, let them set fully, and brush topcoat gently in one direction. For resin, pour slowly and guide resin with a toothpick rather than tilting the case sharply. If a flower moves badly, remove it before the sealant dries, reposition it, and let it set again.
If the case feels sticky after the stated curing time, the resin ratio may have been off, the temperature may have been too low, or the layer may have been too thick. Check the label for temperature guidance, measure carefully next time, and pour thinner layers. A sticky case should not be used until it cures fully, and if it remains sticky after an extended time, discard it and start again rather than carrying a case that transfers resin to hands, pockets, or a phone.
Frequently Asked Questions
Do I need a special phone case for pressed flowers?
You need a clear case made for your exact phone model, with a flat, hard back for the best result. A flexible case can work, but it bends more, which can crack a topcoat or lift flowers. A hard case gives a stable surface and a cleaner finish.
Can I use store bought pressed flowers?
Yes. Purchased pressed flowers are often fully dry, flat, and consistent in size, which makes them a good choice for a first case. Check that they are dry and papery before use, and handle them gently, because they are still fragile.
How long will a pressed flower case last?
With gentle use, a well sealed case can last many months, and often a year or more, before fading or wear becomes noticeable. Daily pocket use, sunlight, heat, and water shorten that life. Treat it as a seasonal, remakeable piece rather than a permanent accessory.
Is resin safe for a phone case?
That depends on the specific product and on following its label exactly. Uncured resin requires gloves, eye protection, and ventilation, and it should be kept away from children, pets, food, and drink. Manufacturer guidance checked for this article evaluates its own product as safe for home use when used as directed, but that evaluation belongs to that product and does not cover other resins. Read the label and safety data sheet for your product, allow the full cure, and if you are unsure, choose the no resin method.
Can I remove flowers and reuse the case?
With the no resin method, you can sometimes peel flowers off a hard case and clean residue with a soft cloth and a mild cleaner, following the case maker guidance. With resin, removal is usually not practical without damaging the case. If you like to change designs often, the no resin method or the double case method is the better choice.
What flowers press best for a case?
Small, flat flowers such as violets, small daisies, pansies, fern fronds, and tiny leaves press well and sit flat on a case. Thick blooms press poorly. Press individual petals from a thick flower if you want its color without its bulk.
Keep reading: How to Make DIY Pressed Flower Bookmarks
Sources & references
- ArtResin, Frequently Asked Questions and safety precautions, manufacturer guidance. Used for the points that this specific manufacturer recommends wearing gloves, washing resin off skin right away with soap and water, avoiding eye contact and rinsing eyes with water and seeking medical attention if resin gets in them, working in a well ventilated space with air circulation and using a respirator if ventilation is limited, measuring resin and hardener accurately and mixing thoroughly, applying the product in thin layers of about one eighth of an inch, sealing porous materials before resin, dry to touch at about 24 hours and full cure at about 72 hours for this product, cured heat tolerance to about 120 degrees Fahrenheit for this product, and the cleanup instruction not to pour leftover epoxy resin down the drain. All of those figures and evaluations are stated in the article as belonging to that manufacturer product example only, not to resin in general.
- Package research sources were read but not relied on for safety claims. The package file listed three secondary craft pages consulted through search summaries, with verification status recorded in the package as not directly fetched from a primary page. Safety claims in this adaptation were therefore re grounded in the manufacturer guidance above and qualified to the specific product label and safety sheet throughout.


