Short answer
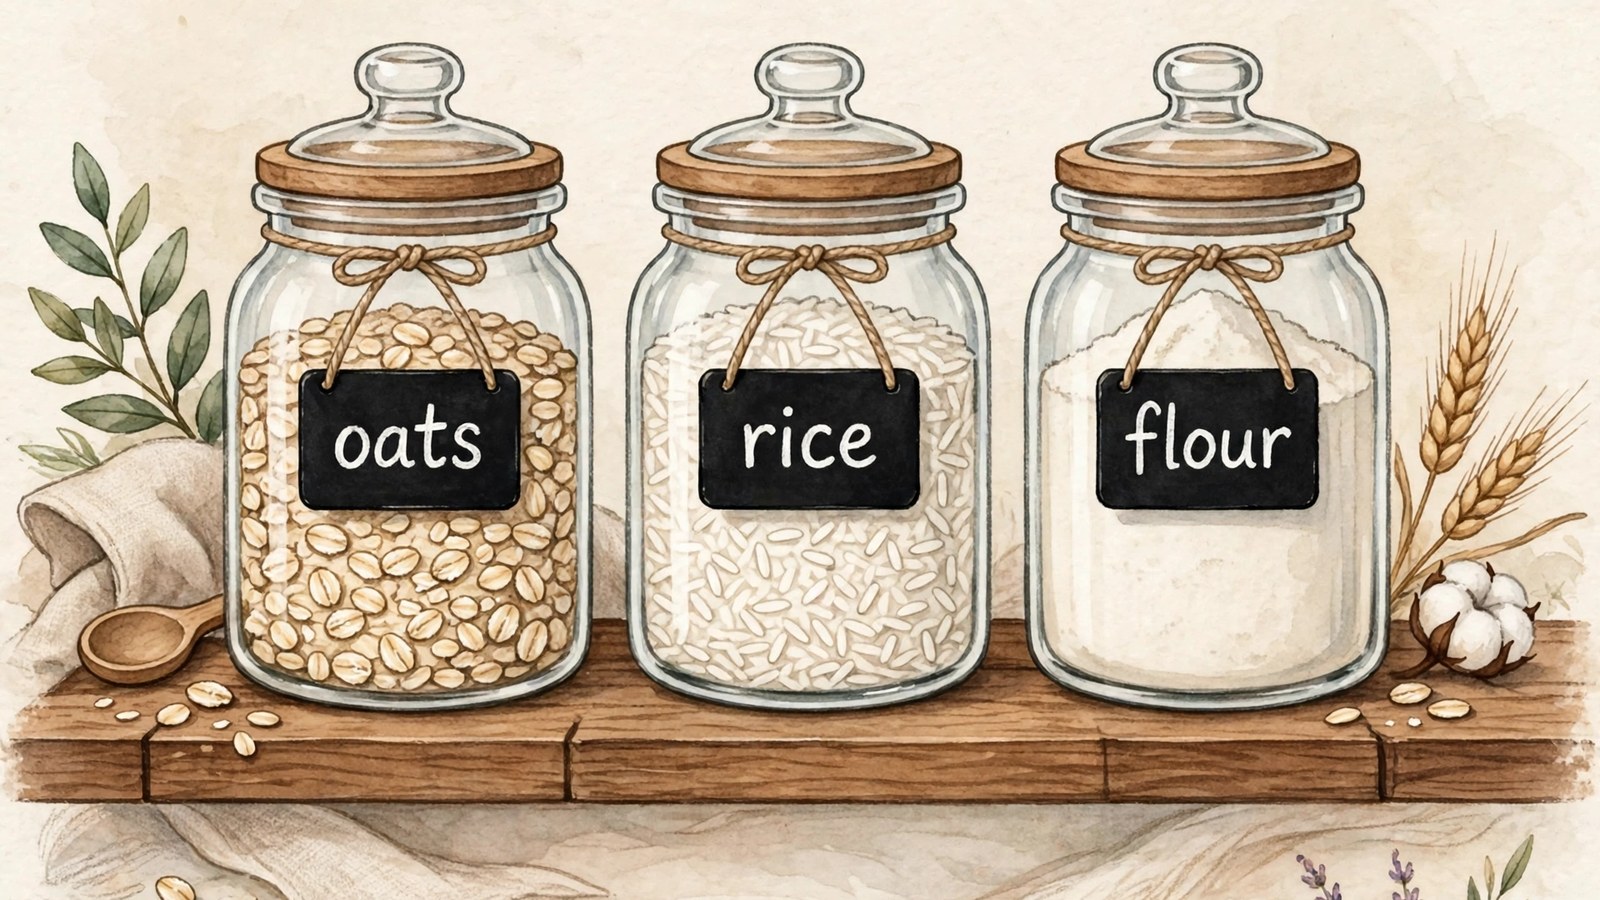
- Wash and dry clean glass jars thoroughly, then choose one of three label methods. For a permanent look, mask a rectangle with painter's tape, apply chalkboard paint in two or three thin coats, let it cure as the manufacturer directs, and condition the surface with chalk before first use. For the fastest result, smooth ready made adhesive chalkboard labels onto clean, dry glass from the center outward. For the most flexible result, paint or buy small chalkboard tags and tie one to each jar neck with twine. Write with chalk for a soft, easily erased finish or with a chalk marker for a crisper line on small labels, test the writing on one jar first, and use the same naming style and label height on every jar. Keep paint and labels on the outside of the jar only, never inside the jar or on a lid sealing surface.
Introduction
A pantry is easier to cook from when you can read it at a glance. Chalkboard labels help because they look consistent from jar to jar and, unlike a printed label fixed to one food, they can be wiped clean and rewritten when the contents change. A jar that holds rice this month can hold lentils next month without a new label, a new jar, or a piece of tape with handwriting that no longer matches anything else on the shelf.
This guide covers three ways to make DIY chalkboard labels for pantry jars: painting a label area directly onto the jar, applying ready made adhesive labels, and tying on hanging tags. It also covers the parts that decide whether the finished pantry stays readable: preparing the glass, choosing between chalk and chalk markers, writing in one consistent system, adding dates where they help, and storing dry foods in the cool, dry conditions that federal food storage guidance recommends. No specialist skill is needed. The method you choose should follow your jars, how often their contents change, and how often you wash them.
What You Will Need
The supply list changes slightly with the method, but most of the basics are shared. Gather everything before you start so you are not handling wet paint or half positioned labels while looking for supplies.
- Clean glass jars with lids, in sizes that suit your staples. Matching jars look tidiest, but mixed sizes work if the labels share one shape, one height, and one writing style.
- Chalkboard paint in a small pot or spray can, if you are painting labels or tags. Choose a product made for the surface you plan to coat, and follow its own drying and curing instructions.
- Ready made adhesive chalkboard labels, if you prefer the no paint option. They come in rectangles, ovals, and other shapes and can be written on with chalk or chalk markers.
- Chalk or chalk markers for writing. Ordinary chalk gives a soft look and wipes off easily. Chalk markers give a crisper line and suit small labels, but products differ in how they erase, so check whether yours wipes off with a damp cloth.
- A pencil, a ruler, and painter’s tape for marking label areas, setting a shared label height, and keeping painted edges neat.
- A small paintbrush or foam brush for brush on paint, plus newspaper or an old sheet to protect the work surface.
- A damp cloth for wiping labels clean and a dry cloth for polishing jars.
- Optional extras: twine or ribbon for hanging tags, small wooden or card tags, and spare adhesive labels for quick replacements.
One safety boundary applies to every method in this guide. Labels and paint belong on the outside of the jar only. Do not paint the inside of a jar, the rim, or the surface where a lid seals, and do not treat a craft paint as approved for direct contact with food unless its manufacturer states that use in writing. This project is for dry pantry storage jars. It is not a method for decorating jars for home canning, and a painted or labeled lid should not be relied on for a canning seal.
Choose the Method That Fits Your Jars
Painted labels suit jars that will stay in the pantry for a long time. The label becomes part of the jar, it will not peel at the edges, and it can be rewritten many times. Its weakness is that it stays with that jar: you cannot move it to a larger jar when you buy a bigger bag of flour.
Adhesive labels suit a first attempt or anyone who wants the look today without paint, drying time, or curing. They are also the easiest method to standardize, because every label leaves the packet the same size and shape. Their weakness is durability at the edges. Frequent washing and a humid pantry can lift an edge over time, and a lifted label collects dust.
Hanging tags suit a pantry where contents rotate often, where jars are washed frequently, or where the same jars serve different staples in different seasons. A tag can be removed before washing, moved to another jar, or replaced without touching the jar itself. Its weakness is movement: a tag can swing or turn around unless you keep tag size, twine length, and tie position consistent.
Many pantries use two methods together, and that is fine if the writing style stays the same: painted labels on large everyday jars for flour, rice, and oats, and hanging tags on smaller jars whose contents change often. What makes a pantry look planned is consistent naming, lettering, and label height.
Prepare the Jars Properly
Preparation decides whether paint and adhesive hold, so do not skip it. Wash every jar in warm soapy water, rinse it, and let it dry completely. Both paint and adhesive fail early on glass that is damp, greasy, or dusty, even when the glass looks clean.
Remove old labels and residue before you start. Soak the jar in warm water to soften a paper label, peel it away, and wash the jar again. If sticky residue remains, rub a little cooking oil on it, then wash in warm soapy water. Finish with a full wash and a complete dry, because any oil left on the glass will prevent the new label or paint from bonding.
Work on one test jar first if you are painting or using a new marker. Paint a small label area or apply one label, let it cure or settle as directed, write on it, and wipe it off. That test tells you whether the surface ghosts, whether the marker erases cleanly, and whether the label size suits the jar, before the same problem appears on a dozen jars.
Decide label placement before any paint comes out. The front center of the jar, at the same height on every jar, reads best on a shelf. Use a strip of painter’s tape or a ruler mark as a shared guide for the bottom edge of each label. On rounded jars, choose a label narrow enough to sit on the flattest part of the curve, because a wide label on a strong curve will crease if it is adhesive and will be hard to read if it is painted.
Option 1: Painting Labels Directly on Jars
Painting gives the neatest and most permanent looking result, and it is more forgiving than it looks. Mark out the label area with painter’s tape on all sides, pressing the tape edges down firmly. The tape creates the crisp border and stops paint from spreading where you do not want it.
Apply the paint in thin, even coats with a brush or foam brush. Thin coats matter more than coverage in a single pass. Two or three thin coats usually give a smoother and more durable writing surface than one thick coat, which can drip, wrinkle, or crack as it dries. Let each coat dry fully before adding the next, using the drying times printed on your product rather than guessing.
Remove the tape at the moment your product’s instructions favor. Many painters peel tape while the final edge is still slightly tacky to keep the line clean. If the paint has dried fully, score lightly along the tape edge with a craft knife before peeling, so the tape does not pull flakes of paint away with it.
Many chalkboard paints then need a curing period before they can be written on. Follow the manufacturer’s instructions for your product. Curing commonly involves letting the paint harden for a day or so, then conditioning the surface: rub the side of a piece of chalk over the whole label area, then wipe it off with a dry or slightly damp cloth. Conditioning fills the surface texture evenly and helps prevent the first word you write from leaving a permanent ghost outline after you erase it.
Let the conditioned label dry fully before writing your final wording. If you plan a full set, paint all the jars first, cure and condition them together, and write on them in one sitting. Writing in one sitting keeps letter height, spacing, and style consistent across the set.
Option 2: Adhesive Chalkboard Labels
Adhesive labels are the quickest option and the best way to test the look before committing to paint. Start with a jar that is clean, dry, and at room temperature. Cold glass can prevent adhesive from bonding well, and moisture or grease under the label will show up later as bubbles or lifting edges.
Peel the label from its backing without touching the sticky side more than necessary. Position it using your shared height guide, then smooth it down from the center outward. Working from the center pushes air out to the edges instead of trapping it as a bubble in the middle, where it would sit behind your writing.
Choose label size by jar size, then keep the shape consistent. A small oval suits a spice jar. A larger rectangle suits flour, oats, or rice. Using the same shape on every jar, even when the jars differ in size, gives a mixed set a deliberate look. If a label lands crooked, lift and reposition it promptly if the product allows it. A label left crooked for days is harder to move without stretching.
Care decides how long adhesive labels last. Hand wash jars with adhesive labels unless the label product states that it is dishwasher safe, and dry around the label rather than soaking the jar. If an edge starts to lift, replace the label rather than trying to restick it. Restuck edges rarely sit flat again, and the gap traps moisture and dust. Spares in a kitchen drawer make replacement a one minute job.
Option 3: Hanging Chalkboard Tags
Hanging tags are the most flexible option. A small tag tied to the jar with twine can be moved from jar to jar, removed for washing, and replaced without touching the jar itself. That suits seasonal baking ingredients, bulk foods you buy in changing varieties, and any jar that is washed often.
You can buy ready made chalkboard tags or make your own by painting small wooden or card tags with chalkboard paint. If you make your own, paint both sides so the tag looks finished from any angle, and let the paint cure fully, following the same manufacturer guidance as for painted jars, before you write on it. Condition a painted tag the same way you condition a painted jar label.
Tie the tag to the neck of the jar or to a lid handle with a loop long enough to read easily and short enough that the tag does not dangle into neighboring jars or catch when you slide the jar forward. Keep tags consistent in size, shape, and twine length. A row of tags at different lengths looks accidental, while a row at one length looks like a system.
Check ties when you refill a jar. Replace frayed twine before it breaks, and retie any tag that has twisted so its blank back faces outward. If a tag swings too freely on a smooth jar neck, a shorter loop usually fixes it.
Writing on Your Labels
Good lettering makes a bigger difference to how a pantry reads than the label method does, and it does not require calligraphy. Write slowly, keep letters at the same height, and leave a margin around the edge so the word does not crowd the border. If you are unsure of your handwriting, practice the word on paper first at the size the label allows. You can also write it lightly in pencil on the label, trace over it in chalk or marker, and wipe away any visible pencil afterward.
Choose your writing tool by label size. Chalk markers give the neatest result on small labels, because the line stays consistent and does not smudge as easily as chalk dust. Ordinary chalk gives a softer, more rustic look and is usually easier to wipe off completely. Test your tool on one label first and confirm that it erases to your satisfaction, because some markers are designed to stay put until removed with a damp cloth, and a few leave stronger ghosting on some surfaces.
Use one naming style on every label. Pick full names or short names and stay with them: for example, write Rolled Oats rather than Oats on one jar and Rolled Oats on another. Use the same case style throughout, either all capital letters or a capital first letter with lowercase following. Consistency in naming is what makes a pantry look organized, even more than identical jars.
Keep extra information brief and in the same place on every label, in smaller writing below the name. Useful additions include the date you filled the jar and a short note that changes how you use the food, such as Gluten Free on a separate flour kept for a household member who needs it. If a food needs detailed instructions, keep those on a separate pantry list rather than crowding the jar label.
A Simple Labeling System for Dates and Rotation
Labels can do more than name a food. With one small habit, they can also help you use older food first. When you refill a jar with a new purchase, add the filling date in small writing under the name. When you have two jars or packages of the same staple, the dated label tells you at a glance which one to finish first.
That habit follows the first in, first out principle: store newer packages behind older ones and use the older stock first. The United States Department of Agriculture Food Safety and Inspection Service advises checking the pantry every few weeks and using canned goods you have had on hand for a while, and the same rotation habit suits jarred dry goods. A date on the label makes that check fast.
Be precise about what a date on your label means. A date you wrote when you filled the jar is a filling date, not a safety deadline you calculated. Federal guidance makes a similar distinction for printed dates: the Food and Drug Administration notes that a use by date is the manufacturer’s recommendation for best flavor or quality, not a food safety date, with infant formula as the exception that must be used by its date. Copy a package date onto your label only if you mark it clearly as the package date, and discard any food that looks or smells suspicious regardless of any date, which is also the Food and Drug Administration’s advice.
If you decant food from its original package into a jar, keep the information you would otherwise lose. Note the product name exactly as printed if a variety matters, any allergen wording you rely on, and the package date, on the label or on a pantry note kept with the jars.
Organizing the Pantry Around the Labels
Labels work best inside a simple storage system. Group similar items together, with baking ingredients in one area, grains and pasta in another, and snacks in a third. Place the items you use most at eye level and within easy reach, and put heavier jars on lower shelves, where they are easier to lift safely.
Storage conditions matter as much as grouping for shelf stable foods, which the United States Department of Agriculture defines as foods that can be safely stored at room temperature, including rice, pasta, flour, sugar, and spices. Its Food Safety and Inspection Service advises storing canned foods and other shelf stable products in a cool, dry place, at temperatures below 85 degrees Fahrenheit where possible. It advises never storing them above or beside the stove, under the sink, in a damp garage or basement, or anywhere exposed to high or low temperature extremes, and notes that temperatures over 100 degrees Fahrenheit are harmful to canned goods. The same cool and dry logic protects jarred dry goods, whose quality falls fastest with heat and damp.
The Food and Drug Administration adds two cupboard rules worth applying here. Keep food away from poisons, and do not store nonperishable foods near household cleaning products and chemicals. Also check stored goods for damage when you rotate them. For canned goods, the Food and Drug Administration describes damage as swelling, leakage, punctures, holes, fractures, extensive deep rusting, or severe crushing or denting, and such cans should not be kept or used.
For dry foods sold in bags or boxes, the United States Department of Agriculture notes that they may mold if exposed to dampness, advises checking packaging for holes that could let in moisture or insects, and suggests placing such foods in plastic or glass containers for extra protection. That is exactly the job your labeled jars are doing. The system only works if the lid closes fully, the jar goes back in a dry place, and the label is updated the moment the contents change. A jar labeled Rice that actually holds lentils will cause confusion sooner or later, usually when you are in a hurry.
For specific storage times for a particular food, use FoodKeeper, the food storage resource on FoodSafety.gov, which offers storage tips for hundreds of foods and beverages. Use it for the food itself. Use this guide for the jar and the label.
Cleaning and Rewriting Labels
To rewrite a label, wipe it with a damp cloth and let it dry fully before writing again. Writing on a damp surface gives a weak and streaky line, so give the label a minute to dry even when you are mid recipe. If you are changing the contents rather than just refreshing the same word, rewrite the full label, including any date, when you refill the jar.
If ghosting remains, meaning a faint outline of the previous word is still visible, wipe the label with a cloth dampened with a little white vinegar, then with plain water, and let it dry. For stubborn ghosting on a painted label, recondition the surface by rubbing chalk over the whole area and wiping it off, as you did when the label was new. Test any cleaning approach on one label first, because surfaces vary.
Avoid abrasive scrubbers on painted labels. They can wear the surface and make it harder to write on cleanly. A soft cloth is enough for regular cleaning. Wash jars by hand where you can, since dishwasher heat and detergent can wear paint and loosen adhesive labels over time, and remove hanging tags before washing their jars.
If a painted label becomes badly worn after many rewrites, repaint it. Clean and dry the jar, tape off the area again, apply fresh thin coats, cure, and condition the surface before writing. Repainting one jar is also a good moment to check the other labels for lifting edges, faded writing, and dates that no longer match the contents.
Troubleshooting
If chalkboard paint peels or flakes, the jar surface was probably not clean or dry enough, or the paint went on too thickly. Remove the failed area, clean the jar thoroughly, and repaint in thin coats with full drying time between them.
If adhesive labels will not stick, check for grease or moisture on the glass and confirm the jar is at room temperature. Press the label down again from the center outward. If it still lifts, replace it on a freshly washed and fully dried jar rather than pressing harder, because pressure cannot fix a contaminated surface.
If chalk writing smudges easily, switch to a chalk marker for that label and avoid handling the written area while you move the jar. If a marker will not erase cleanly, check its product guidance before scrubbing harder. Some markers need a damp cloth rather than a dry one, and aggressive scrubbing can damage a painted surface.
If labels look uneven across the shelf, the cause is usually placement rather than handwriting. Remeasure the shared label height, use a tape guide for the bottom edge on every jar, and rewrite the worst label rather than the whole set. One crooked label draws the eye more than slightly imperfect lettering on every label.
If a pantry still feels hard to read after labeling, look for naming problems. Shorten long names to the form you actually say aloud, move the most used jars to eye level, and remove any label note you never act on. A system you maintain in a few seconds per refill will outlast a detailed system you abandon after a month.
Frequently Asked Questions
Can I put chalkboard painted jars in the dishwasher?
Hand washing is safer. Dishwasher heat and detergent can wear chalkboard paint and loosen adhesive labels over time. Remove hanging tags before washing, and let painted labels dry fully before rewriting them.
Will chalkboard paint work on plastic jars?
Some chalkboard paints are made for multiple surfaces, but adhesion varies by plastic and by product. Check the paint manufacturer’s guidance for plastic, prepare the surface exactly as directed, and test on one jar first, including a write and wipe test after curing.
Is chalkboard paint safe to use on a jar that holds food?
Use it on the outside of the jar only, and do not paint the inside, the rim, or any surface that touches food or forms the lid seal. This guide does not treat craft chalkboard paint as approved for direct food contact. If a manufacturer states a specific food contact use in writing for its product, follow that statement and its conditions. Otherwise, keep the paint fully on the exterior and keep food inside clean, unpainted glass.
How do I remove a chalkboard label I no longer want?
For adhesive labels, peel slowly and remove residue with warm soapy water, then wash and dry the jar fully before applying anything new. For painted labels, the paint can usually be scraped off glass carefully with a razor scraper, followed by a wash. Work slowly and keep hands clear of the blade edge.
Can I use chalkboard labels on spice jars?
Yes. Use small labels and chalk markers for legibility, since spice names need to be read quickly while cooking. Keep the naming style identical to your larger jars, and place spice jars where you can read them without handling every jar, because lines can smudge with repeated handling.
What should I write on the label?
Write the item name in one consistent style, and add only brief notes you genuinely use, such as a filling date or a short dietary note. If you decant food from its original package, preserve the package information you rely on, including the exact product name and its date, on the label or on a pantry note.
How long will pantry foods in labeled jars keep?
It depends on the food, and a label does not extend storage life. Shelf stable foods keep best in a cool, dry place, and specific times vary by product. Check the food in FoodKeeper on FoodSafety.gov, rotate older stock forward, and discard anything that looks or smells suspicious.
Sources & references
- U.S. Food and Drug Administration, Are You Storing Food Safely? Used for storing food properly to help prevent foodborne illness, checking storage directions on labels, a use by date being a manufacturer's recommendation for best flavor or quality rather than a food safety date with infant formula as the exception, discarding food that looks or smells suspicious and discarding moldy food, checking canned goods for damage shown by swelling, leakage, punctures, holes, fractures, extensive deep rusting, or severe crushing or denting, and keeping food away from poisons and not storing nonperishable foods near household cleaning products and chemicals.
- U.S. Department of Agriculture, Food Safety and Inspection Service, Shelf-Stable Food Safety. Used for the definition of shelf stable foods that can be safely stored at room temperature, including rice, pasta, flour, sugar, spices, and oils, storing canned foods and other shelf stable products in a cool, dry place and never above or beside the stove, under the sink, in a damp garage or basement, or in places exposed to high or low temperature extremes, temperatures below 85 degrees Fahrenheit being best, high temperatures over 100 degrees Fahrenheit being harmful to canned goods, and checking the pantry every few weeks and using canned goods held for a while.
- U.S. Department of Agriculture, AskUSDA, How do I store dry goods? Used for shelf stable foods not requiring refrigeration, dried mixes, rice, cereal, and pasta not harboring harmful bacteria but possibly molding if exposed to dampness, checking packaging for holes that could let moisture or bugs in, placing such foods in plastic or glass containers for extra protection, storing canned goods in a cool, clean, dry place away from extreme heat or cold, and using FoodKeeper for recommended storage times.
- FoodSafety.gov, Cold Food Storage Chart. Used for FoodKeeper providing storage tips for over 650 food and beverages, as the route to food specific storage times.


