Short answer
- Painting is the no-carve way to decorate a pumpkin. Choose a clean, dry pumpkin with unblemished skin and a stem still attached, wipe it clean, and let it dry fully. Use acrylic craft paint in thin coats, letting each coat dry before you add the next, with two to three coats usually giving solid coverage. Sketch a face, pattern, or lettering lightly in pencil or chalk first, paint the base color before the detail, and use paint pens, fine brushes, sponges, or cotton swabs for small work. For young children, use paint labeled as non-toxic and made for children, read the label, and keep an adult in charge of spray paint and sealer. Seal a finished, fully dry design with a clear acrylic sealer if you want extra protection, and display the pumpkin cool, dry, and out of direct sun. Do not paint a pumpkin you plan to eat: once paint has touched it, it is a decoration, not food.
Introduction
Not everyone wants to carve a pumpkin. Knives, scooping, and a pumpkin that softens within days put plenty of people off, especially families with young children. Painting a pumpkin avoids all three problems: there are no sharp tools, there is no pulp to clear out, and the decoration lasts considerably longer than a carved one because the skin stays intact.
This guide covers pumpkin painting ideas for every confidence level, from easy designs that need no drawing skill to white pumpkin painting ideas, cute and simple designs, and no-carve decorating with small ornamental squash such as sweet dumpling squash. It also covers which paint to use, how to prepare and seal your work, how to involve children safely, and how to display painted pumpkins so the design and the pumpkin last as long as they reasonably can.
Why Paint Instead of Carve
Painting has clear practical advantages. A painted pumpkin is not cut open, so it does not dry out or rot as quickly as a carved one. Homes and Gardens makes the same point: carved pumpkins deteriorate quickly, while painting can give you longer lasting Halloween decor. That claim is comparative, not a promise. An uncut pumpkin kept cool and dry lasts considerably longer than a carved one, but warmth, damp, and damage to the skin all shorten its life.
Painting is also the safer route for children, since there are no knives involved. Banner Health presents no-carve decorating, including painting, as an option that is perfect for younger kids, and it advises using non-toxic paint for painted pumpkins. Painting also suits pumpkins of almost any shape, including small, flat, or oddly shaped pumpkins that would be awkward or unsafe to carve.
Painting opens up designs carving cannot do: soft color gradients, fine patterns, lettering, faces with real detail, and whole color changes, turning an orange pumpkin white, pastel pink, or matte black. If you change your mind, a painted pumpkin can often simply be repainted once the earlier paint is dry. For a porch display, a mix can work well: carved pumpkins for glow, using a battery operated light rather than a candle, and painted pumpkins for color and detail. Banner Health advises battery powered LED lights or glow sticks instead of candles, which it describes as a fire hazard.
What Paint and Pumpkins to Use
Choosing the pumpkin
Choose a pumpkin with a clean, dry, unblemished skin and a stem still attached. Homes and Gardens advises that the best pumpkins for painting have smooth, even sides with little to no scratches or blemishes, that soft spots should be avoided because they may be a sign of rot, and that a flat bottom helps a design sit well in a display. Check the bottom as well as the front.
Wipe or wash the pumpkin clean and let it dry fully before painting. Homes and Gardens recommends cleaning with a cloth soaked in warm soapy water to remove dirt and debris, then drying completely with a dry cloth or towel, and avoiding a harsh bristled brush that could scratch the surface. Paint sticks poorly to a damp or dirty skin, so drying is part of why the paint stays on.
Choosing the paint
Acrylic craft paint is the standard choice. Homes and Gardens advises that it is best to use acrylic paint for pumpkins, and ChefsResource describes acrylic as durable, available in many colors and finishes, and suitable for indoor and outdoor pumpkins. Use thin coats and let each coat dry before adding the next. ChefsResource gives the usual working figure: two to three coats of acrylic or craft paint are generally sufficient. White and other pale colors over a strong orange skin are most likely to need the full two to three coats.
For fine detail, paint pens or fine tipped brushes work better than a large brush, and sponges or cotton swabs are useful for dotting and blending. Homes and Gardens likewise suggests cotton swabs, sponges, or cotton balls for different effects, and keeping a damp cloth nearby to wipe away a mistake before it dries.
Paint choice changes when young children are painting. Banner Health advises non-toxic paint for pumpkin painting, so for a child check that the label says the paint is non-toxic and intended for children, rather than assuming any craft paint in the house is suitable. Washable paint is often chosen for young children because cleanup is easier, but treat it as a short term finish: it will not last as long as acrylic or survive rain in the same way. ChefsResource makes a similar point about tempera, a water based paint with easy cleanup that is not waterproof, is prone to chipping, and is best for indoor, short term display. Keep paint containers with an adult, wash hands when painting ends, and keep small glued on decorations away from children who still mouth objects.
Spray paint can give an even base coat quickly, but it is an adult job. ChefsResource advises using it with adequate ventilation, away from open flames or heat sources, using a product made for crafts or similar surfaces, and following the product instructions. Let the pumpkin dry and air fully before children handle it.
If you are painting a pumpkin you later plan to eat, do not paint it at all. Painted pumpkins are decorations, not food, even when the paint is labeled non-toxic, because that labeling is about the paint product used as directed, not about turning a painted skin into an ingredient.
Primer, testing, and sketching first
A light coat of craft sealant or primer before painting is optional. Homes and Gardens says priming is optional but might help a paint job last longer, and that a sealant should be applied evenly and allowed to dry thoroughly. Always test a new paint on a small, inconspicuous area first if you are unsure how it will behave on the skin, as Homes and Gardens also advises.
Sketch the design lightly in pencil or chalk first, especially for faces and lettering. Homes and Gardens recommends deciding on the design before you start and sketching its outline to help prevent mistakes. If the design has a base color, paint that layer first, let it dry fully, and only then add the detail.
How to Paint a Pumpkin, Step by Step
The workflow is the same for almost every design in this guide, whether the finished pumpkin is a one color piece or a detailed white pumpkin with gold lettering.
First, set up a covered work surface, put out only the colors the design needs, and keep water and a cloth within reach. A limited setup stops a simple design from growing extra motifs halfway through. Second, clean and dry the pumpkin, and check once more for soft spots. Third, apply the optional primer or sealant coat if you are using one, and let it dry fully. Fourth, sketch the design lightly, or mark guidelines for stripes, dots, or a dipped edge. Fifth, paint the base color in a thin coat, let it dry, and add a second or third thin coat only if the skin still shows through. Thin coats give a smoother finish than one thick coat, which is more likely to look uneven and to lift or flake.
Sixth, add the pattern or motif, then the smallest details last, using a paint pen or fine brush for eyes, mouths, lettering, and outlines. Let each layer dry before the next one touches it, because wet on wet detail is where faces smudge. Seventh, leave the pumpkin until the paint is completely dry, then seal it if you plan to. Finally, move it by supporting its base rather than lifting it by the stem, and check it every few days for softening.
Easy Painting Ideas
Easy pumpkin painting ideas start with a single bold move: change the color, add a pattern, or paint one big feature. These designs need no drawing skill and suit beginners and children alike.
One color pumpkins are the simplest of all. Paint a whole pumpkin a single unexpected color, such as matte black, cream, dusty blue, or metallic gold, and group several together. A set looks deliberate and stylish with almost no effort, and the only skill involved is applying thin, even coats.
Stripes and dots use the shape of the pumpkin instead of fighting it. Follow the natural ribs with painted stripes, using the ribs as guidelines, or cover the pumpkin in dots of different sizes using a cotton swab, a sponge, or the end of a brush handle. Dots forgive wobbles, which makes them reliable for children and for anyone painting a round surface for the first time.
A painted face is the classic easy design. Two eyes, a nose, and a smile, painted in black on a white or orange pumpkin, is quick and friendly. Children can help by drawing the design on paper first, a paper first habit Banner Health also suggests in its pumpkin guidance.
Dipped pumpkins give a modern two tone effect. Paint the bottom half in a contrasting color and let the natural skin show on top, marking the dividing line lightly first so the edge stays level around the ribs. Splatter and marble finishes are the loosest options: flick paint from a brush for a speckled finish, or swirl two colors together while wet for a marbled effect. Do splatter work over a covered surface, and accept that the result is meant to look free rather than precise.
White Pumpkin Ideas
White pumpkin painting ideas are popular for a reason: a white pumpkin is a blank canvas that suits almost any style, from elegant to spooky. You can buy naturally white pumpkins, or paint an orange pumpkin white as a base, using two to three thin coats of white acrylic for solid coverage.
Botanical designs work particularly well on white. Painted leaves, vines, and small flowers in soft greens, golds, and dusty pinks look elegant and suit a fall table as well as a porch. Keep the work loose and repeated rather than detailed and crowded, because a vine that follows the ribs reads clearly from a distance.
Gold and black is the refined option. Metallic gold patterns, such as dots, lines, and crescent moons, on a white base look polished and photograph well, while black gives the strongest contrast for silhouettes and lettering. Ghost faces are the playful version: a white pumpkin needs only two dark eyes and a small mouth to become a friendly ghost.
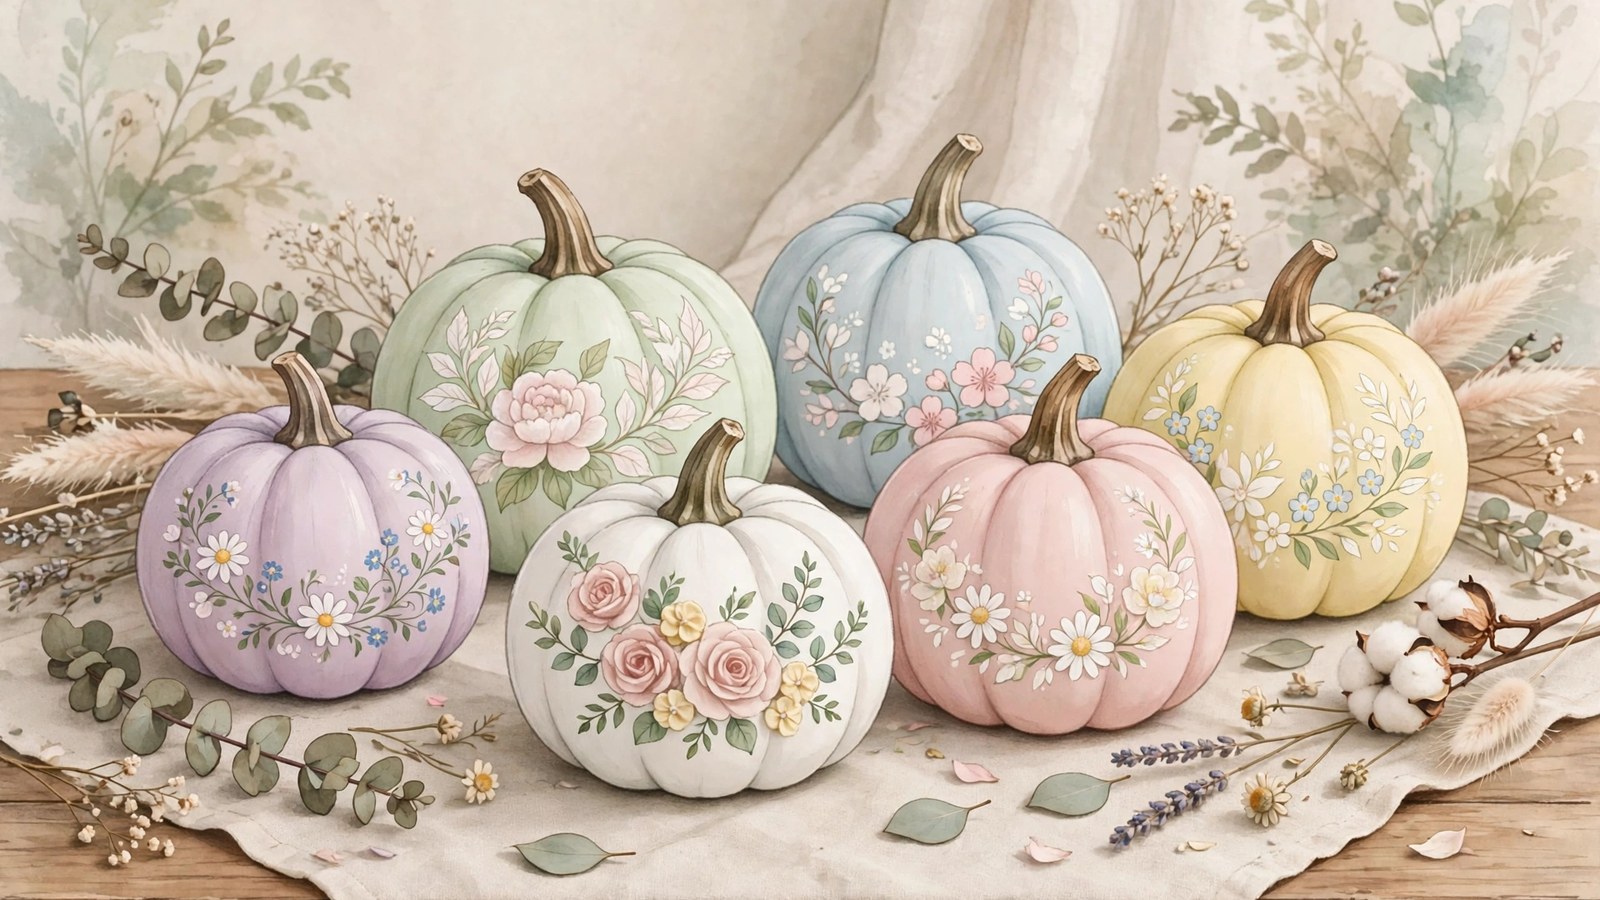
Lettering and messages are easiest on white. A seasonal greeting, a house number, or a single initial in black or gold all work, and a paint pen gives cleaner lettering than a brush for most painters. Pastel pumpkins are the soft version: blush pink, sage green, and pale blue painted over white look gentle and modern, and suit indoor displays.
White pumpkin designs also pair well with natural decorations. Place painted white pumpkins with dried leaves and pine cones for a display that can last beyond Halloween, with a battery operated light nearby rather than a real candle.
Cute and Simple Designs
Cute simple pumpkin painting ideas are about small, cheerful details rather than complicated artwork. Think of the pumpkin as a face or a character, and keep the design to a few bold elements that still read clearly from the sidewalk.
Animal faces are the most flexible cute design. A cat face, with triangle ears, whiskers, and a small nose, a fox, or a friendly owl can all be painted with basic shapes. Paint the base or ears first, then the face, then the details, and stop before adding a second character to the same pumpkin.
Rainbow and unicorn pumpkins suit children’s parties. Pastel rainbow stripes, or a simple painted horn and ears on a pale base, turn a pumpkin into a unicorn. Paint the horn rather than attaching one if young children will handle the pumpkin.
Polka dot pumpkins are simple, cheerful, and hard to get wrong: large, evenly spaced dots in two or three colors over a base coat. A pumpkin sweater is a variation on pattern rather than character: paint a band of stripes or a zigzag around the middle, like a knitted sweater, and leave the top and bottom plain. Mini pumpkin faces scale the idea down: paint a family of mini pumpkins with different expressions, so each pumpkin carries only one simple idea.
Cute designs work best with a limited palette, two or three colors plus black for outlines, and with paint pens for the small details that make a face read clearly. Limiting the palette is also practical: fewer open pots means fewer spills, and a set of pumpkins that looks like a set.
No-Carve Decorating, Including Dumpling Pumpkins
No-carve decorating goes beyond paint. For texture and variety without cutting anything, add materials to the surface: glued on felt shapes, ribbon, twine, dried flowers, or small fabric leaves. Banner Health lists the same family of ideas, including stickers made for pumpkins, felt and other craft supplies, and wrapping a pumpkin in fabric or gauze. Keep any small or glued on piece away from young children who could pull it loose and mouth it, and supervise children during decorating.
Air dry clay details, such as ears, horns, or a crown, can be attached before painting. Let them dry fully first, typically a full day or longer depending on the product and thickness, and follow the product instructions rather than treating that timing as exact for every clay.
Small ornamental squash are a big part of no-carve decorating, and one variety stands out: the sweet dumpling squash, often searched for under the phrase dumpling pumpkin decorating. Specialty Produce describes it as a small winter squash averaging four inches in diameter, about the size of an extra large apple, and usually weighing less than one pound. Its skin is most often white, mottled with green, yellow, and orange markings, and its bold, scalloped lobes give it a miniature pumpkin appearance. It belongs to the genus Cucurbita pepo, and Specialty Produce describes its smooth textured, tender, orange flesh as offering a sweet flavor, so an unpainted dumpling squash is an edible squash as well as a decoration. That food point stops at the unpainted squash: once you paint one, treat it as decoration only. Specialty Produce also notes that this hard winter squash keeps well at room temperature for weeks, which helps a small group hold a display together.
For decorating, the charm of dumpling squash is size and pattern. Group several in a bowl or along a windowsill, painted or natural, for a display that needs no carving. Because each squash is small, a single dot pattern, initial, or tiny face is enough: covering a patterned skin completely hides the markings that made it attractive.
Other no-carve ideas include stacking small pumpkins into a topiary shape, wrapping a pumpkin in fabric or burlap for a rustic look, or tying a ribbon and a dried flower to the stem. These are also practical options for very young children, with adult supervision, and for households that want decorations to last longer than a single night.
Sealing and Display
Sealing helps a painted pumpkin hold up as a decoration rather than only as a weekend craft. Once the paint is completely dry, apply a clear acrylic sealer in thin, even coats. A spray sealer is quickest, while a brush on sealer gives more control on detailed designs. ChefsResource advises a clear acrylic sealant or exterior varnish for outdoor pumpkins and a craft sealant indoors, with each coat allowed to dry completely before the next. Homes and Gardens likewise describes sealing a dried design as a vital step if you want a painted pumpkin to last. Choose matte for a soft look or gloss for shine. Do not apply sealer too thickly, or the paint can bubble or flake, and have an adult apply spray or sealer products in a well ventilated space, following the product instructions.
Display matters just as much. Keep painted pumpkins cool, dry, and out of direct sun, and avoid wet spots underneath, because standing water shortens the life of a pumpkin. VegPursuits gives the same direction: store the pumpkin in a cool, dry place away from direct sunlight and high humidity. As a general precaution, leave a little air around each pumpkin and avoid damp staging materials, since trapped moisture can encourage rot. Indoors, painted pumpkins are sheltered from rain and frost; outdoors, bring them under cover in heavy rain or frost.
Check the display every few days. When a pumpkin softens, leaks, or shows mold, retire it. A painted pumpkin should not be eaten, and it should not be composted with food waste unless the paint used is confirmed safe for that purpose. When in doubt, dispose of it with household waste, removing any battery light or decoration first.
Common problems and simple fixes
Most problems come from preparation rather than design. If paint looks streaky over orange skin, let the coat dry and add another thin coat rather than pressing harder. If detail smudges, the layer underneath was probably still wet, so let the pumpkin dry fully and repaint the detail on top. If paint peels, check the basics at the next attempt: was the skin clean and fully dry, were the coats thin, and was the design sealed once dry? If a design looks crowded, remove one motif rather than adding more paint. A pumpkin with a base color, one motif, and one detail is finished.
Frequently Asked Questions
What paint should I use on a pumpkin?
Use acrylic craft paint for most painted pumpkins. It sticks well to pumpkin skin, is available in many colors and finishes, and is applied in thin coats, with two to three coats usually giving solid coverage. Use paint pens or fine brushes for detail, and seal a fully dry design with a clear acrylic sealer if you want extra protection. For children, use paint labeled as non-toxic and intended for children, and read the label before painting starts.
Is pumpkin painting safe for young children?
Painting is safer than carving for young children because no knives are involved, and Banner Health presents no-carve decorating, including painting with non-toxic paint, as suitable for younger kids. An adult should still supervise, choose paint by its label, handle spray paint and sealers away from children, keep small glued on decorations out of reach of children who mouth objects, and wash hands afterward.
Can you eat a pumpkin after painting it?
No. Treat a painted pumpkin as a decoration, not food, whatever paint was used. If you want to cook or eat a pumpkin or a sweet dumpling squash, keep that one unpainted, and paint a separate pumpkin for display.
How do I paint an orange pumpkin white?
Clean and dry the pumpkin, then apply white acrylic paint in thin coats, letting each coat dry before the next. Two to three coats usually give solid coverage over orange skin. Once the white base is fully dry, sketch or paint your design on top, using a paint pen for lettering and fine detail.
What are the easiest pumpkin painting ideas for beginners?
Start with one color pumpkins, dots, stripes that follow the ribs, a dipped two tone pumpkin, or a simple painted face. Each uses one bold move, needs no drawing skill, and can be finished in layers. Sketch lightly first, paint the base color before the detail, and stop at one motif.
What is a dumpling pumpkin?
In decorating searches, the phrase usually points to sweet dumpling squash, a small winter squash in the genus Cucurbita pepo. Specialty Produce describes it as averaging four inches in diameter, usually weighing less than one pound, with white skin mottled with green, yellow, and orange and bold scalloped lobes that give it a miniature pumpkin appearance.
How long will a painted pumpkin last?
Longer than a carved pumpkin, because the skin is not cut, but there is no fixed number for every pumpkin. Life depends on its condition when bought, warmth, damp, sun, and handling. Keep it cool and dry, check it every few days, and retire it when it softens, leaks, or shows mold.
Do painted pumpkins need to be sealed?
Sealing is optional, but it helps a design last, especially outdoors. Apply a clear acrylic sealer only after the paint is completely dry, in thin, even coats, letting each coat dry before the next, and do not apply it so thickly that the paint bubbles or flakes.
Keep reading: Easy Pumpkin Painting Ideas and Designs
Keep reading: Baby Pumpkin Ideas: Safe Painting, Footprint Art, and Photo Setups
Keep reading: Best Pumpkin Carving Ideas for 2026: Creative, Cool, and Contest Ready Designs
Keep reading: Pumpkin Carving Ideas: Easy, Cute, Funny and Scary Designs for Every Skill Level
Keep reading: Pottery Painting Ideas: Easy Designs, Techniques and Finishing Tips
Sources & references
- Homes and Gardens, How to paint a pumpkin? Page opened and read 29 October 2026. Covers choosing smooth, unblemished pumpkins and avoiding soft spots, cleaning with warm soapy water and drying fully, optional priming or sealant before painting, sketching a design first, testing an unfamiliar paint on an inconspicuous area, acrylic paint as the recommended paint for pumpkins, using cotton swabs, sponges, or cotton balls for effects, and sealing a dried design to help it last.
- Banner Health, Halloween Pumpkin Carving and Decorating Safety Tips. Page opened and read 29 October 2026. Covers no-carve decorating, including painting with non-toxic paint, stickers, felt and other craft supplies, and wrapping a pumpkin in fabric, as options perfect for younger kids, adult supervision during pumpkin activities, and battery powered LED lights or glow sticks instead of candles, which are described as a fire hazard.
- Specialty Produce, Sweet Dumpling Squash. Page opened and read 29 October 2026. Covers sweet dumpling squash averaging four inches in diameter, about the size of an extra large apple, usually weighing less than one pound, with skin most often white and mottled with green, yellow, and orange markings, bold scalloped lobes giving a miniature pumpkin appearance, genus Cucurbita pepo, smooth textured and tender orange flesh with a sweet flavor, and the squash keeping well at room temperature for weeks.
- ChefsResource, What Is the Best Paint to Use on a Pumpkin? Page opened and read 29 October 2026. Covers acrylic paint as a durable, wide ranging choice, two to three coats of acrylic or craft paint generally being sufficient, tempera as a water based paint that is not waterproof and is best for indoor, short term display, spray paint requiring ventilation and distance from flames or heat, and clear acrylic sealant or exterior varnish for outdoor pumpkins with craft sealant indoors, applied in thin, even coats.
- VegPursuits, What Paint Do You Use to Paint Pumpkins? Page opened and read 29 October 2026. Covers acrylic paint applied in thin layers with each layer allowed to dry, finishing with a clear sealant, and storing a painted pumpkin in a cool, dry place away from direct sunlight and high humidity. Broader durability claims on that page were not relied on for this article.


