Short answer
- Pottery painting means decorating a ready-made ceramic piece, often called bisqueware, with underglaze, glaze, or paint. The easiest beginner designs are dots, stripes, simple flowers, fruit, initials, and stars, painted in a limited palette of three or four colors with some empty space left around them. Three techniques cover most effects: sponging for soft texture, stencils for crisp shapes, and layering for clean color built up in stages. The finishing route decides what the piece can do. A piece that is kiln-fired with a glaze intended for food use can be suitable for food and drink, subject to the studio or product guidance for that exact clay, glaze, and firing. A piece painted with acrylics and sealed at home is decorative only. It is not food-safe, it is not fully waterproof, and it should not be presented to anyone else as food-safe. If you want a mug or bowl to use every day, paint it at a studio or have it fired by a firing service. If you want a relaxed afternoon decorating ornaments, trinket dishes, and plant pots, acrylics at home are simpler and need no kiln. For a first piece, pick one simple shape, choose three colors, and repeat one motif, such as dots around a rim or a five-petal flower on the side. Let each layer dry before adding the next.
Introduction
Pottery painting is one of the most forgiving crafts you can try. You start with a ready-made ceramic piece, decorate it with paint or glaze, and end up with something useful or beautiful: a mug, a plate, a vase, or a keepsake. It suits complete beginners, family craft sessions, and anyone who wants a creative afternoon without shaping clay first. This article is about painting pre-made pieces. It is not about forming the piece itself, which is a separate craft with its own methods.
This guide covers how to get started, easy design ideas for different kinds of pieces, techniques worth trying, the difference between kiln-fired and no-kiln finishes, and how to look after what you make. The most important decision comes before the first brushstroke, because the finishing route you choose decides whether a piece can be used for food and drink or should stay decorative.
Getting Started: Studio or at Home
At a paint-your-own-pottery studio, you pick a ready-made ceramic piece, paint it with the studio underglazes or glazes, and leave it there to be clear-glazed and kiln-fired. This is the easiest first route. Materials, advice, and firing are included, staff can tell you how their colors look after firing, and the finished piece is durable.
At home, you can buy bisqueware, ceramic paints or underglazes, and brushes from craft suppliers. If you use true ceramic glazes, you will still need access to a kiln. Many local studios, community centers, and colleges fire outside work for a fee. Check what temperature a firing service uses before you glaze, and make sure your clay and glaze suit it, because a mismatch can leave a glaze underfired or damaged.
The no-kiln route is simpler: paint with acrylics and seal the piece. It needs no firing, and its limits are real. The sections below on finishes and food safety explain them in full.
Painting a pre-made piece is decoration, not pottery making from raw clay. The piece arrives already formed and, for bisqueware, already fired once. Your job is surface, color, and pattern, which is what makes the craft accessible in a single session.
What You Need
- A ceramic piece: mugs, plates, bowls, tiles, and plant pots are all good first choices.
- Paints or glazes suited to your finishing route: underglazes for kiln firing, acrylics for a no-kiln finish.
- A few brushes: one broad brush for covering areas, one medium brush for shapes, and one fine brush for details.
- Pattern tools: a pencil for sketching, the handle end of a brush for dots, a small sponge, and painter tape or adhesive paper for masks or stencils.
- Water, a cloth for wiping mistakes, and paper to protect the table.
Rinse brushes as you change colors so old color does not muddy the next one. Cost is planning context only: a studio session usually bundles the piece, paints, and firing into one price, while home paints and brushes can be reused.
Preparing the Piece and Planning the Design
Wash and dry the piece first so dust and grease do not stop the paint from sticking, and keep food and drink away from the painting area.
Sketch your design lightly in pencil. On a kiln-fired piece, light pencil marks are commonly reported to burn away during firing, and on an acrylic piece they can be painted over. Keep the sketch light either way, because a heavy line can show through pale colors.
Paint in thin layers, letting each layer dry before adding the next. Thick, heavy paint is more likely to crack, peel, or fire unevenly. If a color looks weak after one coat, add a second thin coat after drying rather than one thick coat.
Plan the hero area: the side of a mug facing outward when held, or the center or rim of a plate. Put the main motif there and let smaller repeats support it.
Easy Design Ideas for Beginners
Simple designs usually look best. A mug or plate is a curved surface with limited space, so bold shapes and repeated patterns work better than fiddly detail.
- Spots and dots: rows of dots in one color, or scattered confetti dots in several. Use the end of a brush handle for neat, even dots.
- Stripes and bands: stripes around the rim of a mug or the edge of a plate. Slightly wobbly stripes look handmade in a good way.
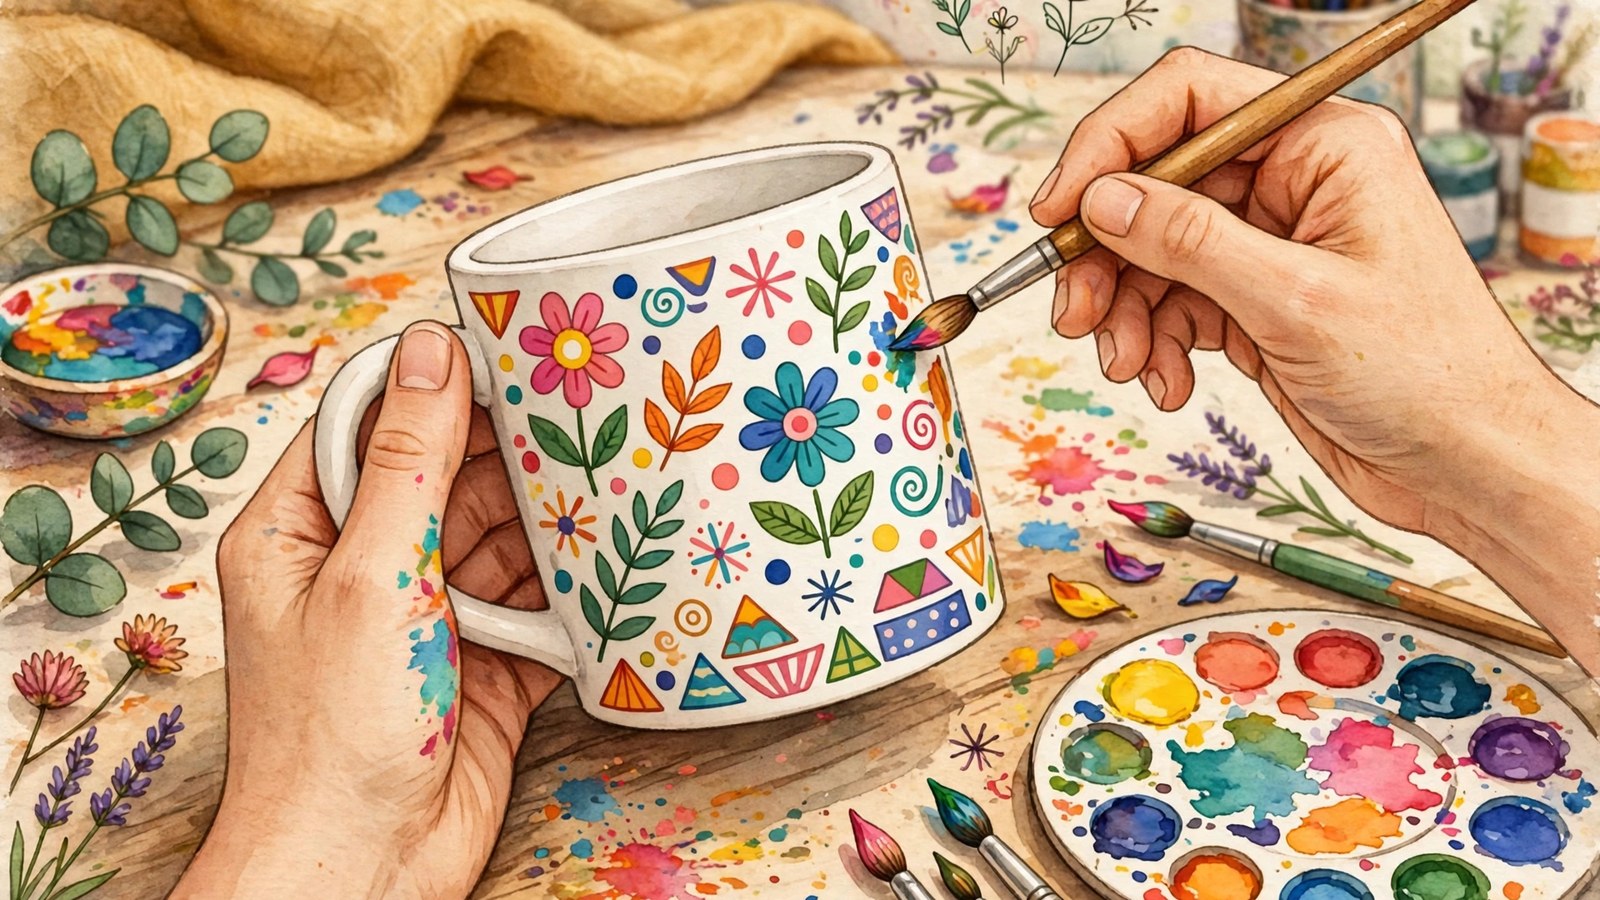
- Simple flowers: five petals around a dot center, repeated around a bowl or up the side of a vase.
- Fruit and leaves: strawberries, lemons, or leafy sprigs around the rim of a plate. Keep each fruit to two or three shapes: a body, a leaf, and a highlight.
- Initials and names: a single letter, a name, or a short word in the center of a plate or on a mug: a classic personalized gift. A stencil or light pencil guide helps keep lettering even.
- Stars and moons: scattered stars, crescent moons, and clouds on a deep blue background for a night-sky effect.
- Checker and scallop bands: alternating squares or overlapping half-circles around a rim. Mark the spacing in pencil first so the repeat stays even around the curve.
Limit yourself to three or four colors, because a restricted palette looks more considered than every color at once. Leave some empty space, because a design that breathes looks more finished than one crammed edge to edge.
Design Ideas by Piece
Matching the motif to the shape makes a simple idea look intentional.
Mugs. A mug has a small, tall hero area and a handle that interrupts the pattern, so avoid wrapping a detailed scene all the way around. Dots around the rim, a stripe band near the base, a single initial, or one small animal face all fit.
Plates. A plate offers a flat center and a rim that can carry a repeat. A central motif with a plain rim looks classic, while a patterned rim frames the middle. Fruit around the rim, a ring of leaves, or a scallop edge are reliable choices.
Bowls. A bowl can carry a design on the inside base, the inside wall, or the outside wall. A single motif in the inside base is a pleasant surprise on a properly fired bowl. On a decorative bowl, a sponged sky or sea effect inside, with a plain exterior, is simple and effective.
Vases and plant pots. Tall pieces suit vertical designs: a stem winding upward, stripes that follow the height, or a landscape band around the widest point. Plant pots are forgiving because the plant becomes part of the display, though water and soil test any finish.
Tiles and trinket dishes. Flat pieces are the best place to practice, and a tile can be a test piece for colors and techniques before a larger item. Trinket dishes suit a single motif: a bee, a moon, a flower, or an initial, with a colored rim.
A Step Up: Designs That Build on the Basics
- Botanical sprigs: a single stem with leaves winding around a mug, in two or three shades of green. Paint the stem first, then add leaves alternately.
- Geometric patterns: triangles, diamonds, or scallops repeated in a band, in two contrasting colors. A pencil grid keeps the repeat honest.
- Animal portraits: a simple cat face, a bee, a fish, or a bird. Keep shapes bold, colors limited, and use a fine brush only for last details.
- Seasonal designs: holly and berries for winter, daffodils for spring, pumpkins for fall.
- Landscapes in miniature: a mountain range, a row of houses, or a seascape around a bowl, built in horizontal bands: sky, distance, foreground.
- Lettering with decoration: a short word framed by sprigs, dots, or a border. Short text works better than long text on a curve.
Test colors first. Underglazes can look different after firing than in the pot, so paint a test tile or ask the studio how their colors fire. That habit prevents the commonest disappointment in kiln-fired painting: a color that returns weaker, darker, or different.
Techniques: Sponging, Stencils, and Layering
Sponging. Dab paint on with a small natural sponge or a piece of sponge cut to shape, rather than brushing it on. Sponging creates a soft, mottled texture that suits skies, sea, foliage, and backgrounds. Layer two colors, for example a pale blue over a deeper blue, for depth. Load the sponge lightly and dab off the excess first, because a soaked sponge leaves blobs instead of texture. Unevenness reads as texture, not mistakes.
Stencils. Ready-made stencils, or shapes cut from adhesive paper, give crisp shapes even if freehand drawing is not your strength. Press the stencil flat so paint cannot seep underneath, sponge or brush paint over it lightly, and peel it off while the paint is still slightly damp. Letters, stars, leaves, and geometric shapes work well. On a curve, use a small stencil and press it in sections.
Layering. Build a design in stages: a background wash, dried; large shapes, dried; outlines and small details last. Layering keeps colors clean, because painting wet on wet tends to muddy them. With underglazes, darker colors over lighter ones generally show through a clear glaze, while pale colors over dark ones may disappear. Ask the studio about your specific paints if in doubt.
More Techniques to Try
Dotting and banding. A brush handle or cotton swab makes even dots: dip, dot, and reload for identical dots. An even band comes from turning the piece slowly while holding a loaded brush steady against it.
Sgraffito. Scratch a design through a layer of paint or underglaze to reveal the surface beneath, using a blunt point while the layer is dry enough not to smear. Practice on a tile first, because a slip here is harder to cover than a brush slip.
Splattering. Flick paint from a stiff brush for a speckled effect on backgrounds and night skies. It is messy, so protect the table and clothing and practice over paper first.
Masking and resist. Cover areas with tape or adhesive shapes so they stay unpainted, then remove the mask to reveal clean shapes. Press edges down firmly, because paint creeping under a loose edge is the usual failure.
Kiln-Fired Versus No-Kiln Finishes
This is the most important practical decision in pottery painting, because it determines whether a piece is decorative or genuinely usable.
Kiln-fired pieces. In a kiln, ceramic glaze melts onto the clay surface at very high temperatures. The source opened for this article, PotteryFAQs, puts true glaze at roughly 1,830 to 2,380 degrees Fahrenheit (1,000 to 1,300 degrees Celsius), a heat no home oven approaches. The result is a hard, glassy, waterproof finish. A piece made this way, with clay fired to maturity and a properly formulated glaze intended for food use, can be used for food and drink. This is why paint-your-own studios fire your work, and why many home painters pay a local studio to fire pieces they glazed at home.
Air-dry and acrylic finishes. Air-dry clay hardens by evaporation rather than firing, and acrylic paint sits on the surface rather than melting into the clay. Sealing an acrylic-painted piece with a clear varnish or sealant gives it a glossy, finished look and some splash resistance, but it will not survive soaking, scrubbing, or the dishwasher, and it is not food-safe. Treat acrylic-painted pottery as decorative: pen pots, dried-flower vases, display plates, and ornaments.
Which route should you choose? If you want functional pieces, go through a studio or a firing service. If you want a relaxed craft session with children, or you are decorating ornaments and plant pots, acrylics at home are simpler and perfectly satisfying. Many people do both: studio pieces for gifts and daily use, home-painted pieces for decoration and practice.
Food Safety, Lead, and the Limits of Sealants
The rule in short: if you want a mug, bowl, or plate to eat or drink from, it needs to be kiln-fired with a glaze intended for food use, on a clay body fired to maturity. Never present a sealed, air-dry, or alternative-fired piece as food-safe, and do not use varnishes or sealants on surfaces that will touch food. If you are unsure about a finish, use the piece for decoration only.
Lead deserves a specific mention. The U.S. Food and Drug Administration explains that lead may be present in the glazes or decorations of some traditional pottery, and that if pottery is not manufactured properly, lead can leach into food and drink prepared, stored, or served in it. The FDA also explains that glazing fuses a thin, glass-like coating onto clay in a kiln, and that proper firing binds lead into a glaze, while improper firing can leave it able to contaminate food.
In practice: use studio paints and firing as directed, ask the studio whether the finished piece is intended for food use, and follow product labeling on paints bought for home use. For older, antique, damaged, or unknown pottery, the FDA advises caution about food use, notes that lead testing kits exist, and states that no amount of washing or boiling can remove lead from pottery. If a piece is marked not for food use, do not use it for food or drink. A child-painted acrylic mug is likewise a display keepsake, not a drinking mug, unless it was fired through a studio route intended for food use.
Sealing and Finishing Decorative Pieces
For a no-kiln piece, sealing is the finishing step. Let the paint dry fully first, because sealing over damp paint can trap cloudiness. Apply a clear sealant in thin coats, letting each dry before the next and following the product instructions. Spray sealants and resin-type finishes need outdoor or well-ventilated application, a point the PotteryFAQs source stresses for sealants and resins in general.
A sealed finish gives gloss and splash resistance. It does not give food safety, dishwasher safety, or waterproofing, and it should never be described as doing so, especially on a gift.
Gloss deepens colors and imitates glaze most closely, while matte can mute bright colors slightly, so test on the base or a test tile first. Resin coatings can yellow over time in direct sunlight, so keep resin-finished pieces out of sunny windowsills.
Caring for Finished Pieces
- Kiln-fired, glazed pieces: wash by hand where possible, especially if the design is detailed, because even durable glaze lasts longer without harsh dishwasher cycles. Avoid sudden temperature changes, such as pouring boiling water into a cold mug, which can stress any ceramic.
- Acrylic and sealed pieces: wipe gently with a soft, damp cloth and mild soap. Never soak them, scrub them abrasively, or put them in the dishwasher, because water, heat, and detergent lift and fade the paint over time.
- Display pieces: keep resin or varnish finishes out of constant direct sunlight, which can yellow them.
- Plant pots: use a saucer, avoid standing water, and consider a plastic liner to reduce contact between wet soil and the painted surface.
- Repairs: a small chip in a decorative piece can be touched up with matching acrylic paint and resealed. A chipped food-use piece should be retired from food contact, because damage to a food surface is a reason for caution, and sharp edges can cut.
Troubleshooting Common Problems
Paint looks streaky or patchy. The coat was too thick, too dry, or applied over a dusty surface. Clean and dry the piece first, and build color in thin coats.
Colors look muddy. Colors were mixed on the piece while wet, or a dirty brush carried one color into another. Layer with drying time between coats, and rinse brushes well.
A stencil shape has fuzzy edges. Paint seeped under the stencil, usually because it was not pressed flat or the brush was overloaded. Press edges down, load lightly, and dab rather than drag.
A pale color disappears over a dark one. With underglazes, pale over dark may not show after firing. Paint the pale area first, or reserve a space for it.
Paint cracks or peels on a sealed piece. It was applied too thickly, sealed before it was fully dry, or soaked or scrubbed afterward. Thin coats, full drying, and gentle wiping prevent most cases.
The fired colors disappoint. Underglaze color can shift in firing. A test tile, or the studio fired color samples, is the reliable guide next time.
Your First Piece: A Simple Plan
Pick a mug at a studio, or a trinket dish or plant pot for a home acrylic session. Choose three colors. Paint dots around the rim and a simple flower on the side, letting each layer dry before the next. Decide before you start whether the piece will be kiln-fired for use or decorative only, and finish it according to that decision.
Then make a second piece using one new technique: a sponged background, a stencil, a band, or a masked shape. Pottery painting rewards repetition more than ambition at the start, and by the third or fourth piece your dots, layers, and color judgment will all be better.
Frequently Asked Questions
What is bisqueware?
Bisqueware is a ready-made ceramic piece that has already been fired once and is ready to decorate.
Can I paint pottery with regular acrylic paint?
Yes, for decorative pieces. Acrylic paint sits on the surface, and a clear sealant can give it gloss and some splash resistance. An acrylic-painted piece is not food-safe, not fully waterproof, and not dishwasher-safe, so use it for display or ornaments rather than food and drink.
How do I make a painted mug safe to drink from?
Paint it through a kiln route: use studio underglazes or glazes intended for food use, or glaze at home and have the piece fired by a firing service at the correct temperature for the clay and glaze. Ask the studio to confirm the finished mug is intended for food use. Do not rely on a home sealant to make a mug drink-safe.
Why do underglaze colors change after firing?
Underglazes can look different after firing than in the pot or on the unfired piece.
How many coats should I apply?
Build color in thin coats, letting each dry before the next. One coat often looks translucent, and later coats deepen the color. Thick, heavy coats are more likely to crack, peel, or fire unevenly.
Can children paint pottery?
Yes. The piece is ready-made and designs can be very simple, so the craft suits family sessions.
What is the easiest design for a complete beginner?
Dots. A row of dots around a rim, made with the end of a brush handle, needs no drawing, looks neat even when slightly irregular, and teaches loading, spacing, and layering in one exercise.
How do I fix a mistake while painting?
Wipe a fresh mistake away with a damp cloth, let the area dry, and repaint. On a dried layer, paint over it once fully dry, keeping the correction thin.
Can a sealed piece go in the dishwasher?
No. A sealed acrylic finish will not survive soaking, scrubbing, heat, and detergent. Wipe sealed pieces gently with a soft, damp cloth instead. Hand washing is still the gentler choice for kiln-fired glazed pieces.
Is pottery painting the same as making pottery?
No. Pottery painting decorates a piece that someone else has formed and, for bisqueware, already fired once. Making pottery from raw clay, including pinch, coil, and slab forming methods, is a separate craft.
Keep reading: Easy Pumpkin Painting Ideas and Designs
Keep reading: Cool Things to Draw: Ideas by Difficulty, Theme and Mood
Keep reading: Hand Building Pottery Techniques
Sources & references
- PotteryFAQs, "Can You Glaze Pottery Without A Kiln?" Published 23 February 2023. Page opened and read 29 October 2026. Covers the points that true ceramic glaze melts at roughly 1,830 to 2,380 degrees Fahrenheit (1,000 to 1,300 degrees Celsius) and requires kiln heat, that acrylic paint with sealant and air-dry clay finishes are decorative only and not food-safe or dishwasher-safe, that food-safe pottery requires clay fired to maturity (vitrified clay) and a stable fired glaze, that firing services at studios, community centers, and colleges fire outside work, that sealants and resins need well-ventilated application, and that resin finishes can yellow in direct sunlight.
- U.S. Food and Drug Administration, "Questions and Answers on Lead-Glazed Traditional Pottery." Page opened and read 29 October 2026. Covers the points that lead may be present in glazes or decorations on some traditional pottery and can leach into food and drink if the pottery is not manufactured properly, that glazing fuses a thin glass-like coating onto clay when fired in a kiln, that proper firing binds lead into a glaze while improper firing can leave it able to contaminate food, that caution is advised for antique, damaged, or unknown pottery, that lead testing kits exist, and that no amount of washing or boiling can remove lead from pottery.


