Short answer
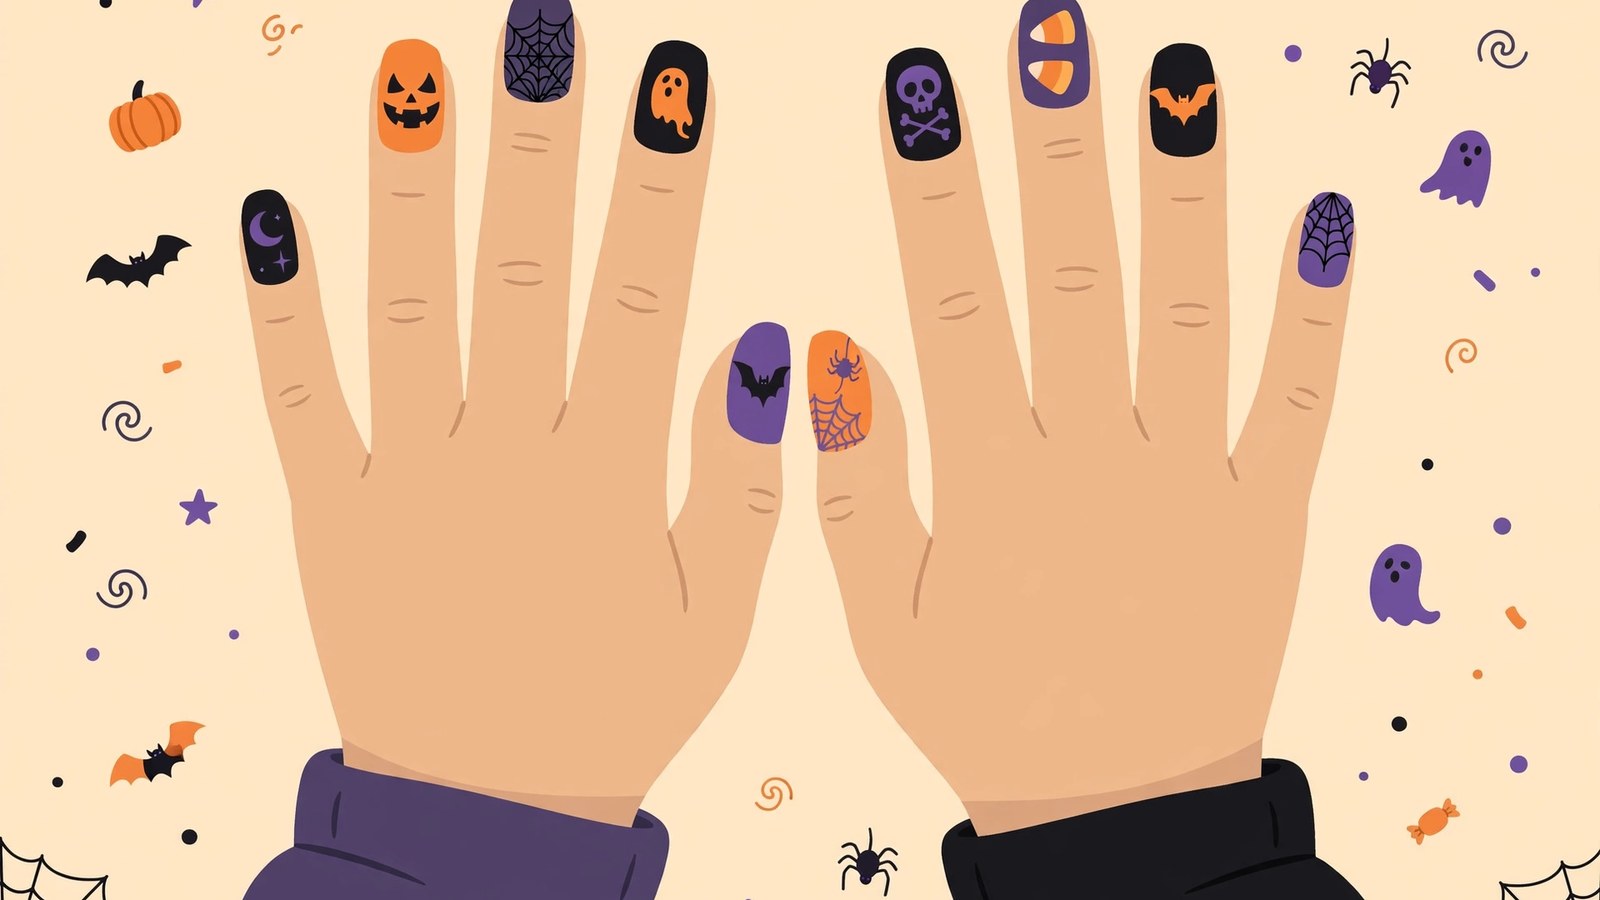
- Halloween nail designs are seasonal manicures built around Halloween colors and imagery. The classic colors are black, orange, white, deep purple, and blood red, with burgundy, plum, and gold used for softer sets. The classic images are ghosts, pumpkins, bats, spiderwebs, and candy corn, plus character-inspired looks drawn from well known Halloween-adjacent figures. The easiest Halloween designs need no drawing at all. A black base with one orange accent nail, an orange base with black tips, or a deep burgundy base with one gold accent nail all read as Halloween as soon as the color goes on. Simple painted designs, such as pumpkin dots, ghost tips, and a single spiderweb accent nail, need only a dotting tool or a thin brush. Spookier designs, such as haunted house silhouettes, bats against a pale moon-colored nail, and blood drips on a nude base, take more time but use the same basic skills. Character-inspired nails, including Jack Skellington, Coraline, and Queen of Hearts looks, work best when you copy a color palette and one signature element, such as button eyes or a stitched smile, rather than trying to reproduce detailed artwork. Plan the set before you start. Decide the base colors first, choose one or two accent nails per hand for detailed work, and keep the rest plain. Work in thin coats, let each coat dry before adding detail, and finish with a top coat. For nail health, keep nails clean and dry, do not cut or remove the cuticle, and follow the label directions on every nail product you use.
Introduction
Halloween nails are one of the easiest ways to join in with the season. You do not need a costume, a party invitation, or a steady hand worthy of a salon professional, just a few polishes, a little patience, and an idea you actually like. Whether you want something subtle enough for work or a full set of tiny ghosts, this guide covers simple Halloween nails, spooky designs, character-inspired looks, and romantic goth nails, plus the tools, techniques, and nail care basics that make them achievable at home.
This is a Halloween-specific guide. Every design here is built around spooky or character-inspired Halloween imagery, such as ghosts, pumpkins, bats, spiderwebs, blood drips, and haunted houses, or around the dark colors that suit the season. It does not cover general fall manicures or Thanksgiving designs, which are a separate topic with a warmer and more restrained color story.
The most useful idea in this guide is also the simplest: let color do most of the work, and save detailed painting for one or two accent nails per hand. That single decision is what makes Halloween nail art realistic for beginners, for people painting with their non-dominant hand, and for anyone doing their nails the night before a party.
How to Choose a Halloween Nail Design
Start with how long you want the set to last and where you will wear it. A design for one party can be bolder than a design you plan to wear to work for a week. Subtle sets, such as a dark base with one small ghost or web accent, suit offices and everyday wear through October. Full spooky sets, with a different motif on several nails, suit parties, costume events, and Halloween night itself.
Next, think about your costume, if you have one. Nails do not need to match a costume exactly, and a direct match can look crowded if the costume is already busy. Borrow one or two colors from the costume, or one element, such as the red and black of a Queen of Hearts outfit. If you have no costume, the nails can carry the whole Halloween effect on their own.
Then be honest about time and skill. A full set of hand painted characters can take an evening. A color based set with two accent nails can take well under an hour, most of it drying time. Short nails are not a barrier: small ghosts, dots, webs in one corner, and French style tips in Halloween colors all fit on a short nail, as long as the design is kept small and uncluttered. Longer nails give more room for scenes, such as a haunted house silhouette, but they also show smudges and chips more clearly.
Finally, choose the finish. A glossy top coat makes dark colors look deep and makes blood drips look wet. A matte top coat softens a set and suits romantic goth designs. Mixing finishes, glossy on most nails and matte on one or two, adds interest without any extra painting.
Simple Halloween Nails
Simple Halloween nails are the best place to start, especially if you are short on time or new to nail art. The trick is to let color do most of the work, and add one small detail per hand rather than decorating every nail.
A classic starting point is a black base with a single orange accent nail, or an orange base with black tips. Both read as Halloween instantly, with no drawing required. If you prefer something softer, try a deep burgundy or plum base with a gold accent nail. That pairing nods to the season without shouting about it, and it is the simple option most likely to stay appropriate the following week.
Other easy ideas include:
- Pumpkin dots: Paint the nails orange, then add a small brown dot near the cuticle for the stalk. A thin green line beside it suggests a leaf. On one accent nail, two tiny black triangles and a small curved line can turn the orange nail itself into a simple pumpkin face.
- Ghost tips: Paint the nails white or nude, then add two small black dots near the tip for eyes. Keep the dots tiny, and uneven spacing will not matter.
- Spiderweb accent: On one nail, paint a black base and draw three or four thin white lines fanning out from one corner, then join them with short curved lines. It looks intricate but takes under a minute once the base is dry. Limiting the web to one corner keeps it readable on short nails.
- Candy corn nails: Paint the nail in three horizontal bands, white at the tip, orange in the middle, and yellow near the cuticle. Use tape or a steady hand and a thin brush to keep the bands separate.
- Halloween French tips: Keep a sheer nude or pale base and paint the tip in black, orange, or deep red instead of white. This is one of the quickest ways to make a neat manicure read as Halloween.
The most common mistake with simple Halloween nails is rushing between coats. Let each layer dry properly before adding detail, or the colors will drag and smudge. If you do smudge a design, a small brush dipped in remover can tidy an edge far more easily than starting again. If a whole accent nail goes wrong, remove the polish from that nail only and repaint it.
Spooky Designs
Once you are comfortable with simple looks, spooky designs are the natural next step. These lean into the darker side of Halloween: haunted houses, bats, blood drips, and eerie skies.
A haunted house silhouette works well on a gradient background. Paint a deep purple to black gradient using a sponge, then paint a small black house shape with a thin brush on one or two accent nails. You do not need architectural accuracy. A square, a triangle roof, and a couple of tiny yellow windows are enough. Add a pale round moon on a neighboring nail, and keep the remaining nails in the plain gradient or in solid black.
Bat nails are similarly forgiving. Paint a dark base, then add a small bat shape in black on a lighter accent nail, or reverse it, with a black bat on a pale moon-yellow nail. A bat can be suggested with a small oval body and two curved wing shapes. If freehand bats feel daunting, a stamping plate or a nail sticker will give you a clean shape without the wobble, as long as you seal it well with top coat.
Blood drip nails suit a nude or pale base with a deep red tip that drips unevenly down the nail. Start with small red dots at different distances from the tip, then join each dot to the tip with a thin line of the same red, so the drips vary in length. The unevenness is the point, so this is a good design for anyone who worries about wonky lines. Finish with a glossy top coat to make the drips look wet.
For a full spooky set, mix designs across your nails rather than repeating one design ten times. A set that combines a spiderweb, a ghost, a bat, and a plain black glitter nail looks deliberate and polished, and it keeps the fiddly work to just a few nails.
Character-Inspired Nails
Character nails take inspiration from well known Halloween-adjacent characters. The designs below describe costume and color elements in general terms. You are painting an homage, not reproducing official artwork, and that is also what makes the designs achievable: a palette and one signature detail carry the reference.
The general method works for almost any character. Name the two or three colors you associate with the character, pick the single most recognizable element, such as button eyes, a stitched smile, or a heart, and put that element on one or two accent nails. Use the palette, in blocks, stripes, or tips, on the rest. A set built this way reads as the character at a glance, even though most nails carry no picture at all.
Jack Skellington Nails
Jack Skellington nails are built around a black and white palette. The classic approach is a white base with a simple black face: two large oval eyes, two small nostril dots, and a long stitched smile made from a thin line with short cross-strokes. Keep the face to one or two accent nails and paint the rest black, or add a thin white pinstripe over black for a suit-inspired effect. The high contrast means even a slightly imperfect face still reads clearly.
Coraline Nails
Coraline nails center on button eyes and a blue and yellow color scheme. Paint most nails a muted blue, then use one accent nail for the button look: a dark base with two round buttons, each with four small holes, in a contrasting color. Yellow accent nails, or a yellow block of color suggesting a raincoat, complete the theme. Buttons can be painted with a dotting tool, which gives rounder, more even circles than a brush. Add the four holes as tiny dots in the base color once the button color has dried.
Queen of Hearts Nails
Queen of Hearts nails use a red, black, and white palette. Paint a white or pale base, then add small red hearts with a dotting tool. Two dots side by side with a small triangle beneath make a recognizable heart shape. Alternate with black nails, red nails, and a gold accent for a royal feel. A single playing card inspired nail, with a small heart in the center and a thin border, makes a good feature nail without requiring detailed painting.
The same method extends to other Halloween favorites without any new skills. A witch set can use green, black, and purple with one pointed hat triangle on an accent nail. A vampire set can use nude, black, and deep red with two small white fang triangles under a red tip. A skeleton set can use a black base with simple white bone stripes, or a white base with a simple black skull face built from two eye sockets and short teeth lines.
Romantic Goth Nails
Romantic goth nails are the softer side of Halloween: dark colors, delicate details, and a vintage feel, rather than outright horror. Think deep burgundy, black cherry, oxblood, and plum, paired with lace-like patterns, tiny roses, velvet style finishes, or fine gold lines.
A good romantic goth set starts with a dark, glossy base. Add a matte top coat to one or two nails for contrast, or use a fine brush to paint a small rose or a thin gold line near the cuticle. A small rose can be suggested with a spiral of a lighter red or pink on a dark nail, with two tiny green strokes beside it for leaves. Black lace patterns can be suggested with a stamping plate, or faked convincingly with a thin brush and a series of small dots and loops. At a normal viewing distance, the suggestion of lace reads just as well as the real thing. Details that suit this style include a single black heart on a burgundy nail, fine gold chains suggested by dotted lines, tiny crescent moons in metallic polish, and a deep red to black gradient. Keep the palette to two dark shades plus one metallic, so the set looks romantic rather than busy.
This style is also the easiest Halloween look to keep wearing. Deep shades with delicate gold detail suit October generally, so romantic goth nails are a good choice if you want a Halloween-appropriate look that will not feel out of place the following week.
A Halloween Manicure at Home, Step by Step
Start with clean, dry hands and bare nails. Remove old polish fully, wash your hands, and dry them well, because polish adheres poorly to damp or oily nails. Push the cuticles back gently if you wish, but do not cut them and do not remove them. File the nails to an even length and a simple shape, and check both hands side by side so the lengths match.
Apply a base coat and let it dry. A base coat gives color an even surface and helps dark colors, such as black, deep red, and purple, come off more cleanly later, which matters with Halloween shades that can leave visible staining.
Apply the base color in thin coats, usually two, letting each coat dry before the next. Thin coats dry faster and smoother than thick ones. Cap the free edge of each nail, which means running the brush lightly across the tip, to reduce chipping at the edge where wear starts.
Add art only when the base color is dry to the touch. Work from the largest shapes to the smallest details: blocks of color first, then shapes such as ghosts and pumpkins, then dots, lines, and faces last. Keep a clean-up brush and a small amount of remover ready, so a mistake can be tidied in seconds.
Finish with a top coat over the whole nail, including the art. A top coat seals the design, smooths small ridges between layers of color, and adds shine. If you use stickers or stamped images, top coat is what holds them in place, so cover them fully, including at the edges.
Tools and Materials
You do not need professional equipment to get good results, but a few inexpensive tools make a real difference. As planning context, most home nail art needs only the basics below.
- Dotting tools: Used for eyes, hearts, buttons, and pumpkin dots. A set with several sizes covers almost every Halloween design in this guide.
- Thin detail brush: For lines, webs, stitches, and drips. Look for a long, thin striper brush rather than a standard polish brush, and clean it in remover straight after use so it keeps its point.
- Makeup sponge: Useful for gradients, such as a purple to black night sky. Dab the colors on in layers rather than painting them.
- Nail tape or striping tape: Helps with clean lines for candy corn bands and French style tips. Remove the tape while the top layer is still slightly wet for the cleanest edge.
- Base coat and top coat: A base coat protects the nail surface and helps dark colors come off cleanly later; a top coat seals the design and adds shine or a matte finish.
- Clean-up brush: A small flat brush dipped in remover tidies cuticles and edges without disturbing the design.
- Stickers or a stamping plate (optional): A shortcut for bats, webs, and other repeated shapes, and a help when you want matching shapes on several nails.
A few habits matter as much as the tools. Work in thin coats, which dry faster and smoother than thick ones. Cap the free edge of each nail with polish to reduce chipping. Paint at a table in good light, with the hand being painted resting flat, because most wobbles come from an unsupported hand.
Nail Care and Safety
Look after the nails underneath the art. Advice from dermatologists at the American Academy of Dermatology, reported by Newswise, is to keep nails clean and dry, cut nails straight across using sharp nail scissors or clippers, and slightly round the tips for maximum strength. Keep nails shaped and free of snags by filing with an emery board, and do not use your nails as a tool, such as opening cans. Never bite your nails or remove the cuticle, because those actions damage the nail and increase the risk of infection. If you notice changes in your nails, or swelling or pain, the same guidance advises seeing a board-certified dermatologist, since these can be signs of serious nail problems, and it is especially important to seek treatment for nail problems if you have diabetes or poor circulation.
Product safety matters as much as nail care. The United States Food and Drug Administration advises consumers to read labels of nail products carefully and follow any warnings, and to make sure there is good ventilation when using nail products. The FDA notes that infections and allergic reactions can occur with some nail products, that some ingredients may be harmful if swallowed, that some nail products can catch fire if exposed to a flame or another heat source, and that nail products can be dangerous if they get in the eyes. If you have a reaction to a nail product, the FDA asks consumers to report it. In practical terms at home, that means working away from candles and other flames, which is worth stating plainly because Halloween decorations and nail products are often in the same room, keeping remover and polish away from children and pets, and stopping use of any product that causes redness, itching, swelling, or pain around the nail.
Two ingredient points from the FDA page are worth knowing. Formaldehyde, found in some nail hardeners and polishes, may cause skin irritation and allergic reactions, and using formaldehyde hardeners often may make nails brittle and more likely to break or peel. If you know you are allergic to formaldehyde, or want to avoid it, the FDA advises reading the ingredient statement on the label, including related names such as formalin and methylene glycol. For artificial nails, traces of methacrylate monomers can cause reactions such as redness, swelling, and pain in the nail bed in people who have become allergic to them, so avoiding skin contact during application matters.
If you choose gel polish, treat removal and curing as part of the safety picture. Dermatology guidance summarized from the American Academy of Dermatology in the sources below advises that gel manicures can cause nail brittleness, peeling, and cracking, and recommends applying a broad spectrum, water resistant sunscreen with SPF 30 or higher to the hands before a gel manicure, or wearing dark, opaque gloves with the fingertips cut out, to protect the skin from the ultraviolet radiation used to cure the polish. Never peel gel polish off when it lifts, because peeling can strip layers from the nail surface. Soak it off following the product directions, or have it removed professionally.
Give your nails a break between elaborate manicures, and remove polish gently rather than peeling it off. If a nail lifts, hurts, changes color, or shows signs of infection, do not cover it with a new Halloween set. Leave it bare and seek advice from a health care professional if the problem persists.
Troubleshooting Common Problems
If a design smudges, the usual cause is detail added before the base was dry. Wait longer between coats, use thinner coats, and add the smallest details last. If lines wobble, brace both hands on the table and make lines in short strokes rather than one long pull. If dots come out uneven, practice the dotting tool on paper first, because the size of the dot depends on how much polish is on the tool, not on how hard you press.
If dark polish stains the nail after removal, a base coat next time is the main prevention. If a sticker lifts at the edge, press it flat and seal it again with top coat. If the whole set chips within a day, check whether the free edge was capped and whether your hands were in hot water or cleaning products soon after painting, and wear gloves for washing dishes and cleaning while you are keeping a set.
If a design goes wrong, remember that Halloween nail art is unusually forgiving. Smudged ghosts become spookier, uneven webs look more organic, and a single accent nail can rescue an otherwise plain manicure. Start with one idea from this guide, keep the rest of the set simple, and build up to more detailed designs as your confidence grows.
Frequently Asked Questions
What are the easiest Halloween nail designs for a beginner?
Start with color, not drawing. A black base with one orange accent nail, an orange base with black tips, or a burgundy base with one gold accent nail all read as Halloween with no art at all. The easiest painted designs are pumpkin dots, ghost tips made from two small black dots, and candy corn bands made with tape.
What colors work best for Halloween nails?
The classic palette is black, orange, and white, with deep purple and blood red for spookier sets. Burgundy, plum, black cherry, and gold suit softer and romantic goth sets. Limiting a set to two or three colors, plus one metallic, usually looks more deliberate than using every Halloween color at once.
How do I do Halloween nails on short nails?
Keep the design small and leave space around it. Small ghosts, single corner spiderwebs, dots, and Halloween colored French tips all fit on a short nail. Put detailed art on one accent nail per hand and keep the rest in a solid Halloween color, so the small nail area does not look crowded.
Can I do character nails without copying official artwork?
Yes. Use the character’s color palette across the set and add one signature element on an accent nail, such as button eyes for a Coraline inspired set, a stitched smile for a Jack Skellington inspired set, or small red hearts for a Queen of Hearts inspired set.
How do I make Halloween nails look elegant rather than scary?
Choose the romantic goth end of the range: deep burgundy, black cherry, or plum, with delicate gold lines, a small rose, a lace effect made from dots and loops, or a matte finish on one or two nails. Keep motifs small and use one accent nail per hand.
How long before Halloween should I paint my nails?
For regular polish, painting them one or two days before the event you care about most keeps the set fresh while leaving time to redo an accent nail if needed. If you are trying a new design, do a practice run on one nail several days earlier.
How do I remove dark Halloween polish without staining?
Remove it gently with remover on a pad, holding the pad on the nail briefly before wiping, rather than scrubbing or peeling. A base coat under dark colors helps them come off more cleanly. Never peel polish off, because peeling can strip layers from the nail surface.
Are Halloween nails suitable for children?
Simple designs in regular polish, such as orange nails with one ghost or pumpkin accent, are the most suitable option, applied and removed by an adult. Follow label directions, use products in a ventilated room away from flames, keep them out of children’s reach when not in use, and avoid elaborate gel or artificial sets for children. Stop using any product that causes redness, itching, swelling, or pain.
Keep reading: Easy Last-Minute Halloween Costumes
Sources & references
- American Academy of Dermatology nail care tips, reported by Newswise in "Keep Your Nails Looking Healthy with These Tips from Dermatologists" (10 September 2013), with advice from board-certified dermatologist Phoebe Rich, MD, FAAD: keep nails clean and dry; cut nails straight across using sharp nail scissors or clippers and slightly round the tips for maximum strength; keep nails shaped and free of snags by filing with an emery board; do not use nails as a tool; never bite nails or remove the cuticle, because doing so damages the nail and increases the risk of infection; and see a board-certified dermatologist if nails change, swell, or cause pain, especially with diabetes or poor circulation. Page opened and read in this writer pass: https://www.newswise.com/articles/keep-your-nails-looking-healthy-with-these-tips-from-dermatologists
- United States Food and Drug Administration, "Nail Care Products": nail products should be used following labeled directions and warnings; consumers should read labels carefully; infections and allergic reactions can occur with some nail products; good ventilation should be maintained; some ingredients may be harmful if swallowed; some products can catch fire near a flame or heat source and can be dangerous in the eyes; reactions should be reported to the FDA; formaldehyde in some hardeners and polishes may cause skin irritation and allergic reactions and frequent use of formaldehyde hardeners may make nails brittle; and traces of methacrylate monomers in artificial nails can cause redness, swelling, and pain in the nail bed in people allergic to them. Page opened and read in this writer pass: https://www.fda.gov/cosmetics/cosmetic-products/nail-care-products
- American Academy of Dermatology, "Gel Manicures: Tips for Healthy Nails": gel manicures can cause nail brittleness, peeling, and cracking; before a gel manicure, apply a broad spectrum, water resistant sunscreen with SPF 30 or higher to the hands, or wear dark, opaque gloves with the fingertips cut out, to protect skin from the ultraviolet radiation used to seal gel polish. The Academy page itself returned only navigation in the text fetch in this writer pass, so these points are recorded from search records and published summaries of the Academy guidance, and QA should open the Academy page directly and confirm the wording before publication: https://www.aad.org/public/everyday-care/nail-care-secrets/basics/pedicures/gel-manicures


