Short answer
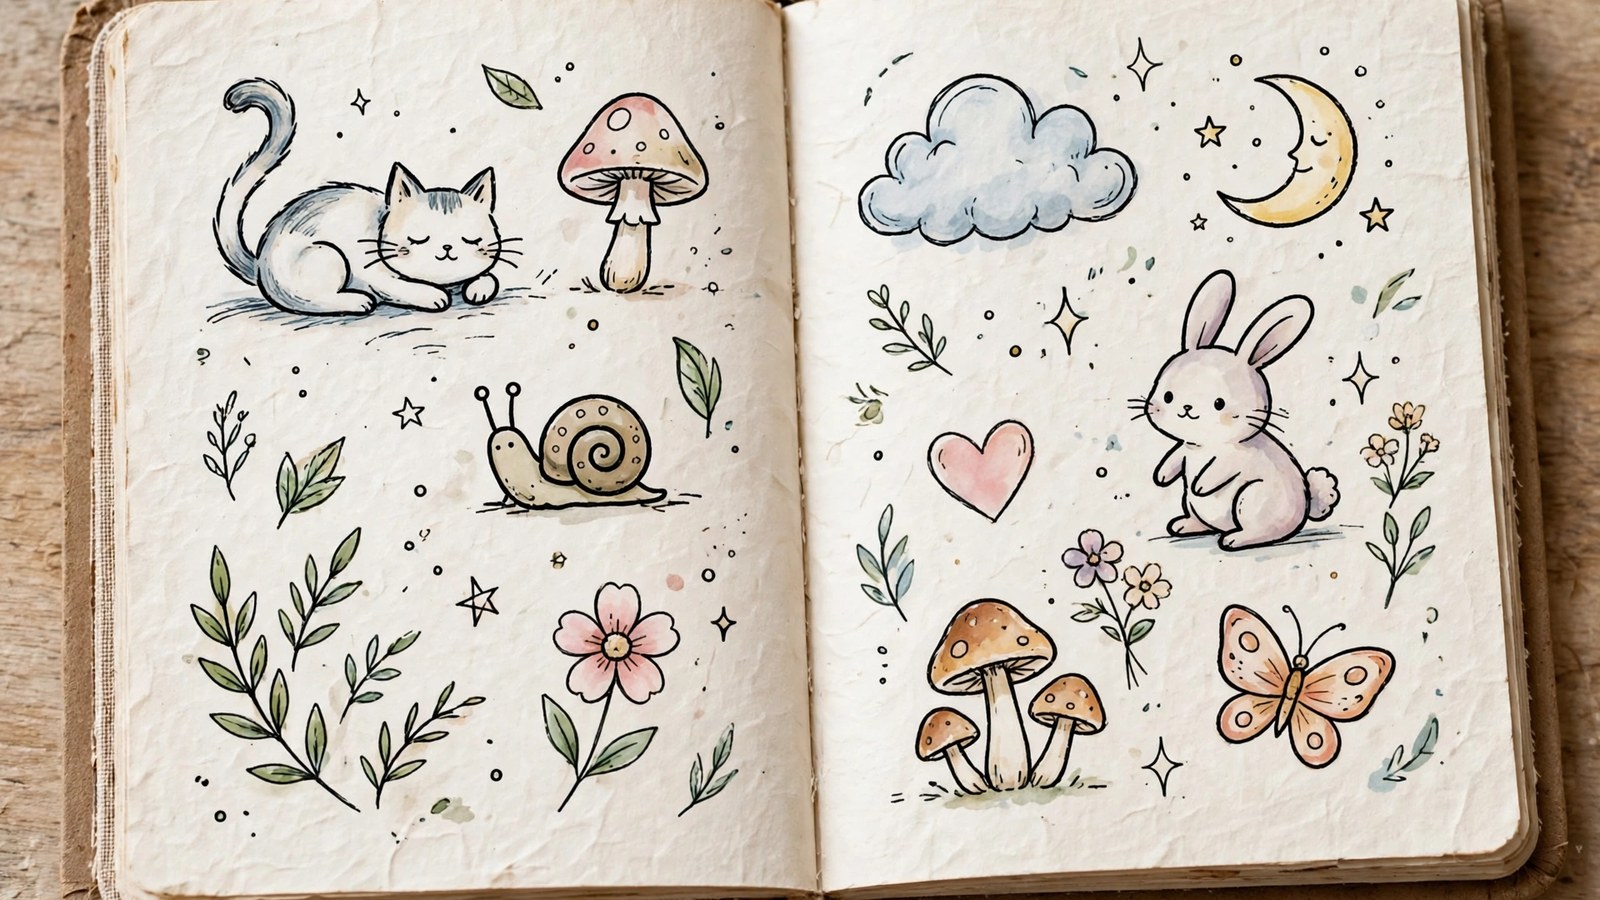
- The easiest drawing ideas are subjects built from shapes you already know how to make: circles, ovals, rectangles, triangles and curves. A mug is a rectangle with an ellipse on top and a curved handle. A cat face is a circle with two triangle ears. A house is a square with a triangle roof. Start by drawing the biggest shape lightly, add the smaller shapes, and only then add details and shading. If you want ideas without any setup, draw one of these now: a mug, a houseplant, an apple, a cat face, a fish, a leaf, a simple house, a snowman or a Christmas tree. If you want something even lower pressure, doodle instead: fill a page with tiny faces, stars, plants in pots or repeating patterns. Doodles have no finished standard to meet, which is exactly why they work so well as a warm up. For seasonal pages, Halloween drawings (a pumpkin, a friendly ghost, a bat, a spider in a web) and Christmas doodles (a tree, a stocking, a string of lights, a gingerbread person) use the same simple shapes and give you drawings you can reuse on cards, tags and decorations every year.
Introduction
Staring at a blank page is often the hardest part of drawing. The problem is rarely a lack of ability. It is the open ended question of what to draw, asked at the exact moment when you have the least to go on. This guide removes that question. It collects drawing ideas that a complete beginner can finish in minutes: easy things to draw built from simple shapes, low pressure doodles for filling a page, Halloween drawings, Christmas doodles including a step by step Christmas tree drawing, and a simple way to turn single drawings into a daily habit.
You do not need expensive materials. A pencil, an eraser and paper you do not mind wasting are enough for everything here. Work through the sections in any order. If you want the fastest possible start, read the Short Answer, pick one subject from the first list, and draw it before you read any further.
How to Begin Any Drawing: Shapes First, Details Last
Almost every subject in this guide follows the same four step order, and learning the order matters more than learning any single subject.
Step 1: Block in the biggest shape. Look at your subject and ask what single shape covers most of it. Draw that shape lightly, at the size you want the finished drawing to be. Light lines are easy to move, erase or draw over, so keep your pencil pressure gentle at this stage.
Step 2: Add the secondary shapes. Attach the next largest parts: a handle on the mug, ears on the cat, a trunk under the tree, wings on the bird. Judge each new shape against the first one. Is it bigger or smaller, higher or lower, wider or narrower? Those comparisons, not talent, are what make a drawing look right.
Step 3: Refine the outline. Go over the construction lines and turn them into the real outline. Round off corners that should be round, straighten edges that should be straight, and erase or ignore the guide lines that are no longer needed.
Step 4: Add detail and shading last. Details such as whiskers, window frames, leaf veins and patterns belong at the end, when the shapes underneath them are settled. Shading also comes last. Decide which side the light comes from, leave that side lightest, and shade the side facing away.
Two habits help at every step. First, draw the whole subject before you perfect any part of it, so one overworked corner does not leave the rest of the page empty. Second, hold the page at arm’s length every few minutes. Errors in proportion are easier to see from a distance.
Easy Things to Draw, by Category
Use this table to choose a subject by the time and confidence you have, then find the detailed steps for the starred subjects in the next section.
| Category | Easy subjects to draw | Main shapes involved |
|---|---|---|
| Everyday objects | Mug*, key, glasses, book, candle, chair | Rectangles, ellipses, straight lines |
| Animals | Cat face*, fish*, bird, snail, frog, butterfly | Circles, ovals, triangles |
| Food | Apple, toast, ice cream cone, cupcake, strawberry | Circles, triangles, soft curves |
| Nature | Houseplant*, leaf, flower, mushroom, mountain, cloud, tree | Ovals, jagged lines, cloud curves |
| Places | Cottage*, lighthouse, tent, row of small houses | Squares, triangles, rectangles |
| People and characters | Simple faces, expressions sheet, snowman figure | Circles, ovals, small features |
A few notes on choosing well. Everyday objects are the most forgiving starting point because the real object can sit in front of you while you draw, so you can keep checking your shapes against it. Animals drawn from basic shapes look intentionally simple rather than wrong, which makes them a good second category. Nature subjects tolerate wobbly lines best of all: a slightly uneven leaf or cloud still looks like a leaf or cloud. Places are the biggest step up, because rows of houses introduce size comparisons between repeated objects, so save them until you have drawn a few single objects.
If a subject defeats you twice, make it smaller and simpler rather than abandoning it. Draw the cat as a face only, the house as a front view only, the tree without individual leaves. A simplified version you finish teaches you the shapes you need for the fuller version later.
Five Easy Drawings, Step by Step
A mug. Draw a rectangle, slightly narrower at the bottom if you want a tapered mug. Add a flat ellipse across the top for the rim: an ellipse is a circle seen from the side, so it should be a smooth closed curve with no pointed ends. Add the handle as a large C curve on one side, with a smaller C inside it. Finish with a soft shadow ellipse underneath and, if you like, steam as two gentle S curves rising from the rim.
A cat face. Draw a circle. Add two triangles on top for ears, with a smaller triangle inside each one. Place two oval eyes level with each other, a small triangle nose below and between them, and a short curved line under the nose for the mouth. Add three whiskers fanning out from each cheek. To change the character, change only the eyes and mouth: closed curved eyes and a small round mouth make a sleepy cat, while wide eyes and an open oval mouth make a surprised one.
A houseplant. Draw the pot as a trapezoid, wider at the top than the bottom, with a thin rectangle for the rim. From the soil line, draw five to seven stems curving outward. Put a pointed oval leaf on the end of each stem, alternating sides so the plant looks full. Shade the leaves that sit behind others a little darker, and add a shadow under the pot.
A fish. Draw a pointed oval for the body: an oval that comes to a soft point at each end. Add a triangle tail at one end and a small triangle fin on top. Draw one round eye near the pointed front end and a curved gill line behind it. Overlapping arcs across the body suggest scales, or you can leave the body plain and add stripes instead.
A cottage. Draw a square for the walls and a triangle for the roof, making the roof slightly wider than the square so it overhangs. Add a rectangle door in the middle, a small square window on each side, and a thin rectangle chimney. A horizontal line under the cottage gives it ground to sit on, and a path of two short converging lines from the door adds a simple sense of depth.
Techniques That Make Simple Drawings Look Finished
Four basic techniques cover most of the improvement you will see in your first months of drawing, and all four appear in the National Gallery of Art’s introduction to drawing basics.
Contour. Contour drawing breaks objects down into simple lines and forms. In practice that means drawing the outline slowly, following the edges with your eyes while your pencil follows on the page. A useful exercise is the three pass method. Draw your subject once quickly, in under a minute, to loosen up. Draw it again slowly, looking carefully at its real shapes. Draw it a third time from memory. The quick version warms up your hand, the slow version teaches you what the subject actually looks like, and the memory version shows you what you have taken in.
Hatching. Hatching uses short or long parallel lines to define form and build tone. The closer together the lines, the darker the area looks. Hatch in one direction across a shadow area, keeping the spacing even, and lift your pencil at the end of each stroke rather than scribbling back and forth.
Crosshatching. Crosshatching layers a second set of parallel lines across the first set at an angle, which deepens the tone and adds texture. Use plain hatching for light shadow and crosshatching for the darkest areas, such as the underside of a mug or the shaded side of a roof. Combining hatching and crosshatching at different densities is how a flat outline gains light, shade and surface.
Pressure, gesture and scribble. Light and heavy pencil pressure build up tone and texture even without hatching: press gently for pale areas and firmly for dark accents. Gesture drawing captures the form of a subject in a loose, quick way, and scribbling, keeping the pencil moving to find the overall shape, works as a warm up for either. None of these needs to look tidy.
A first taste of perspective. Perspective is the technique that makes a flat drawing appear to have depth and distance. In linear perspective, lines that are parallel in real life appear to converge at a single vanishing point on the horizon line, and the horizon line sits at your eye level (Britannica; Humanities LibreTexts). You only need the simplest version here. To draw a road, a path or a row of houses receding into the distance, draw a horizontal line for the horizon, mark one vanishing point on it, and run the edges of the road or path toward that point. Objects placed nearer the vanishing point are drawn smaller. That single idea is why the cottage path in the previous section uses converging lines.
Doodle Ideas and Pattern Prompts
Doodles differ from finished drawings in purpose, not just size. A doodle is small, low pressure and meant to be enjoyable rather than correct. Doodles fill sketchbook margins, decorate journals, and keep your hand moving while you think. Because no single doodle has to succeed, a page of doodles is the safest place to experiment.
Start with these prompts, each of which fills a page on its own:
- A page of tiny faces. Draw a grid of small circles and give each one a different expression: happy, sleepy, surprised, grumpy, curious, proud. Only the eyebrows, eyes and mouth change, so the page becomes a compact lesson in how much expression a few lines carry.
- Patterned eggs or pebbles. Draw a row of ovals and fill each with a different pattern: dots, stripes, zigzags, waves, checks, stars. This is pattern practice disguised as a doodle, and it builds the even spacing that hatching also needs.
- Plants in pots. Draw a shelf of small pots, each holding a plant with a different leaf shape: round leaves, spiky leaves, trailing leaves, a tiny cactus. Vary the pot shapes too.
- Night sky page. Stars, crescent moons, clouds and sleepy animals mixed together. This prompt is forgiving because every element is a simple curve or point.
- Food characters. Give small foods simple faces: a smiling strawberry, a cheerful teacup, a sleepy slice of bread, a proud cupcake. Keep the faces minimal, with two eyes and one mouth line each.
- Borders and frames. Practice rows of leaves, dots, arches, hearts or stars as repeating borders. A border you can draw reliably becomes a reusable decoration for cards, journal pages and gift tags.
- A things I like page. Draw ten small objects that make you happy, from a favorite sweater to a cup of tea to a house key. The page doubles as a prompt list for later, larger drawings.
Doodles also work as a five minute warm up before a bigger drawing. Fill a corner of the page with squiggles, dots or a repeating pattern first, and the main drawing no longer carries the pressure of being the first mark of the day.
Halloween Drawings
Halloween is an unusually kind theme for beginners because its classic subjects are bold, simple and built almost entirely from circles, triangles and curves. Draw them singly for practice, or combine three or four into one scene for a card or decoration.
- Jack o’ lantern. Draw a round pumpkin, slightly wider than it is tall, with vertical curved lines running from top to bottom for its segments and a short rectangle stem. Add triangle eyes, a small triangle nose and a zigzag grin. Leaving the face shapes empty while shading the pumpkin lightly makes the face stand out, or you can do the reverse and fill the face dark.
- Friendly ghost. Draw a rounded dome top that flows into straight sides and a wavy bottom edge. Add two oval dot eyes and a small oval mouth. A little blush, a tiny bow or a small hat turns the same basic ghost into a character.
- Witch hat. Draw a wide, flattened oval for the brim. On top of it, draw a tall triangle that bends slightly to one side near the tip. Add a band across the base of the triangle and a small square buckle.
- Bat. Draw a small oval body in the center, a round head with two pointed ears above it, and a wide wing on each side made from three or four connected scallop curves along the bottom edge. A row of bats at different sizes makes an instant night sky.
- Black cat. Reuse the cat face from earlier, add an oval body sitting upright, a long tail curving around the side, and whiskers. Place a crescent moon behind the cat by drawing one large circle and overlapping it with a second offset circle, keeping only the crescent sliver.
- Haunted house. Draw a tall rectangle, a pointed roof, and windows that are deliberately crooked rectangles and uneven shutters. Add a fence of vertical lines at slightly different heights and a bare tree made from a trunk with branching lines.
- Spider and web. In a corner of the page, draw straight lines radiating out from the corner point, then join them with gentle inward curving lines to form the web. Add the spider as two joined circles, a smaller head and a larger body, with eight bent legs, four on each side. Spiders have eight legs, not six, and getting the count right is the detail viewers notice most (Britannica).
To finish a Halloween page, arrange the subjects as a scene instead of a row: a pumpkin beside a ghost, under a crescent moon, with a bat overhead and the web in one corner. A finished scene transfers directly onto cards, party invitations and window decorations.
Christmas Doodles and a Christmas Tree Drawing
Christmas doodles follow the same simple shape rules, and they repay practice quickly because the same small set of drawings covers cards, gift tags, envelopes and wrapping paper all season.
How to draw a Christmas tree, step by step:
- Draw a small star at the top: two overlapping triangles, one pointing up and one pointing down, make a tidy six pointed star, or draw a simple five pointed star if you prefer.
- Add three or four layers for the branches. Each layer is a wide, shallow triangle or a curved band with a wavy lower edge, and each layer is wider than the one above it. Overlapping the layers slightly hides the joins.
- Add a small rectangle trunk centered at the bottom.
- Decorate in this order: a wavy line draped across each layer for tinsel or garland, small circles for ornaments, and tiny dots or short dashes for lights. Stop decorating while the green still shows through. A crowded tree reads as noise, while a tree with visible layers reads clearly at card size.
Once you can draw one tree, vary it: a tall skinny tree, a short wide tree, a tree in a pot, a tree covered in snow (leave white gaps along the upper edges of each layer and add small dots around it for falling snow), or a tiny forest of trees in different sizes along a shared ground line, with the smallest trees highest on the page to suggest distance.
Other Christmas doodles to pair with the tree:
- Stocking. Draw a large L shape with a rounded toe, add a rectangle cuff across the top, a heel curve, and a candy cane poking out at an angle.
- Snowman. Stack two or three circles, largest at the bottom. Add dot eyes, a triangle carrot nose, a curved smile, stick arms made from branching lines, and a scarf drawn as a band around the neck with one short rectangle hanging down.
- Gingerbread person. Draw a rounded person shape with soft, wobbly edges, then add wavy icing lines at the wrists, ankles and waist, dot eyes and buttons, and a curved smile.
- String of lights. Draw a long drooping curve, then hang small teardrop bulbs from it at intervals, alternating their tilt. Leave every third bulb empty to fill with a different pattern if you are working in black and white.
- Reindeer face. Draw an oval head, two branching antlers made from a main line with short offshoots, oval ears, and a large round nose in the center of the face.
- Wrapped present. Draw a square or rectangle, add a ribbon cross over it, and finish with a bow made from two loops and two short ribbon ends at the top center.
A single tree or snowman doodle centered on a plain card looks personal in a way that a busy design often does not, and because each doodle takes only a few minutes, a set of handmade cards is a realistic one evening project.
Getting Better: Progression, Practice and Drawing With Others
Progress in drawing comes from repetition with slight increases in difficulty, not from jumping to hard subjects. A sensible progression runs like this. First, single objects from observation, such as the mug and the houseplant, where the real thing sits in front of you. Second, simple subjects from memory or imagination, such as the cat face and the fish. Third, combined scenes, such as the Halloween page, where you arrange several known subjects together. Fourth, pages that add shading or a vanishing point, where the same subjects gain depth. Each stage reuses the previous one, so nothing you have practiced is wasted.
Drawing alongside other people helps because it turns practice into a shared activity rather than a test. Take turns choosing the prompt, draw the same subject side by side, and compare the results with interest rather than ranking them. Different versions of the same prompt show children, and adults, that there is no single correct drawing of a cat or a tree, which removes most of the fear that stops beginners. If a child asks you to draw something you find hard, draw the simplified shape version and say so cheerfully. Modeling a simple, finished attempt teaches more than declining.
Keep old sketchbooks rather than throwing away weak pages. Looking back after a month of short sessions is the most reliable evidence of progress there is, because improvement is gradual enough to be invisible day to day and obvious page to page.
Building a Daily Drawing Habit
You do not need an hour a day to improve. Ten minutes on most days is enough to build confidence and keep your eye trained, provided the sessions actually happen. The whole design of a workable habit is about making starting easy.
Keep materials visible. Leave a sketchbook and a pencil on the table rather than packed away in a drawer. Every step between you and starting is a chance to postpone, so remove the steps.
Use prompts, not pressure. A prompt list removes the daily what should I draw question. Write thirty prompts at the start of a month, mixing the categories in this guide: everyday objects and animals, nature subjects, doodles and patterns, seasonal subjects and subjects from your own home or street. Then take the next prompt on the list each day.
Draw the same thing more than once. Returning to a subject you drew last week shows progress you would otherwise miss, and the second attempt is almost always faster. Date your pages so the comparison is easy.
Set a tiny, finishable goal. One page of doodles, or one small drawing before bed, is a goal you can keep on a busy day. A finished small drawing does more for a habit than an unfinished ambitious one.
Keep an ideas list for dry days. Whenever you notice something you would like to draw later, a building seen on a walk, a pattern on a plate, a funny shaped cloud, write it down in the back of the sketchbook.
Begin today, in under ten minutes. Pick one idea from this guide and draw it now: a mug, a ghost, a Christmas tree or a page of tiny plants. Then choose tomorrow’s prompt before you close the sketchbook. That small decision is what turns a one off doodle into a habit, and a habit is what turns a blank page into something you look forward to opening.
Frequently Asked Questions
What are the easiest things to draw for a complete beginner?
Start with a mug, a houseplant, an apple, a cat face and a fish. Each one is built from two or three basic shapes, holds still while you draw it or needs no model at all, and can be finished in under ten minutes. Draw the biggest shape first, lightly, and add details last.
What is the difference between a drawing and a doodle?
A drawing usually aims at a finished result that resembles its subject, while a doodle is a small, low pressure sketch made for enjoyment, decoration or warm up rather than accuracy. The same techniques serve both, and most beginners progress fastest by mixing the two.
What do I need to start drawing?
A pencil, an eraser and paper are enough for every idea in this guide. A sketchbook is useful because it keeps your attempts in order so you can see your progress, and a softer pencil makes darker shading easier, but neither is required. The shape first method matters far more than the pencil.
How do I make a flat drawing look less flat?
Use the techniques in this guide in order: overlap one object in front of another, shade the side facing away from the light with hatching, deepen the darkest areas with crosshatching, and for scenes, run edges toward a vanishing point on a horizon line at your eye level so that distant objects are drawn smaller. Any one of these helps, and together they create a convincing sense of depth.
How long should I practice drawing each day?
Ten minutes on most days is a practical starting point, because a short session you repeat builds more skill than an occasional long one you keep postponing. Treat that as a suggestion rather than a rule. On a hard day, do five minutes of doodles instead of skipping entirely.
How can I help a child who says they cannot draw?
Draw alongside them, choose the prompt together, and both draw the simplified shape version of the subject. Compare the two results with curiosity rather than judgment, and praise specific choices, such as a funny expression or a good pattern, instead of general talent.
What should I draw when I am bored and uninspired?
Use a format that decides for you. Fill a page with tiny faces or patterned ovals, draw the same object three times (quickly, slowly, then from memory), or take the next prompt from a list you wrote earlier. Any rule that removes the decision gets you drawing again.
Keep reading: Easy Pumpkin Painting Ideas and Designs
Keep reading: Halloween Activities and Crafts for Kids
Keep reading: Cool Things to Draw: Ideas by Difficulty, Theme and Mood
Keep reading: Pumpkin Carving Ideas: Easy, Cute, Funny and Scary Designs for Every Skill Level
Keep reading: Christmas Decor Ideas: Trees, Wreaths, Tables, Windows and Crafts for a Festive Home
Keep reading: Pottery Painting Ideas: Easy Designs, Techniques and Finishing Tips
Sources & references
- National Gallery of Art (nga.gov), "Explore the Basics of Drawing": definitions used for scribbling, gesture drawing, contour, hatching (parallel lines to define form), crosshatching (intersecting parallel lines to add tone and texture), and light and heavy pressure building tone and texture. Opened and checked 29 October 2026.
- Encyclopaedia Britannica (britannica.com), "Vanishing point": linear perspective creates an illusion of depth on a flat surface, and parallel lines (orthogonals) converge at a single vanishing point on the horizon line, with objects depicted smaller as they approach the vanishing point. Opened and checked 29 October 2026.
- Humanities LibreTexts, University of the Pacific drawing course (human.libretexts.org), "Perspective": one point and two point perspective, the horizon line at eye level, and the ellipse as a circle viewed in perspective (a foreshortened circle with a continuous curve and no pointed ends). Opened and checked 29 October 2026.
- Encyclopaedia Britannica (britannica.com), "Spider": spiders are eight legged arachnids with eight legs rather than six. Checked via Britannica search record 29 October 2026.
- Pinterest Trends reports dated 25 October 2026, supplied as local project files with the source package (external library ARTICLE-0028, sources.csv and research.md): keyword evidence only, supporting the assignment of the terms drawing ideas, things to draw, halloween drawings, christmas doodles and christmas tree drawing to this topic. These reports were not opened as a public source and support no factual claim in the article body.


