Short answer
- The best pumpkin carving ideas for most people are bold, simple designs matched to your skill level and to the pumpkin you have. Beginners should start with a classic jack-o-lantern face, a moon and stars design, drilled dot patterns, or a simple silhouette such as a cat, a bat or a ghost. Cute designs use round eyes and small smiling mouths. Funny designs use uneven eyes or a crooked grin. Scary designs use slanted eyes, jagged teeth and narrow cuts that throw strong shadows. Choose a firm pumpkin with no soft spots and a flat base, transfer the design before you cut, and let an adult handle the sharp tools while children draw and scoop. Light it with a battery operated LED light or a glow stick rather than a real candle, and carve as close to Halloween as you can, because a carved pumpkin typically lasts only a few days.
Introduction
Carving a pumpkin is the centerpiece of Halloween decorating for many households: one afternoon, a few simple tools, and a porch that glows after dark. The trouble is knowing where to start, especially when you want something better than the same triangle eyed face you made last year.
This guide gathers pumpkin carving ideas for every skill level, from simple designs you can finish quickly to layered, creative designs that look far harder than they are. It covers easy, cute, funny and scary styles, character inspired designs described in generic design elements only, how to use stencils and templates, how to make a carving last longer, and how to carve safely with children. The ideas below are current for the Halloween 2026 season.
The single most useful rule runs through every section: bold shapes glow best. A design that reads clearly from the sidewalk will almost always look better at night than a detailed design that only makes sense up close.
Before You Carve: Tools, Safety and Choosing a Pumpkin
A good carving starts before the first cut. Choose a pumpkin that feels heavy for its size, with firm skin, no soft spots, bruises or cuts, and a sturdy stem. Extension guidance summarized by PlantCareToday adds the preservation reason: pumpkins with soft spots rot much more quickly. A flat base matters more than a perfect round shape. Banner Health makes the same point: a pumpkin with a sturdy stem and a flat bottom will not roll while you work. Tall pumpkins suit vertical designs such as ghosts. Small pumpkins suit windowsills and table displays. White pumpkins give a pale base for ghost and floral designs. When an adult opens the pumpkin, Banner Health suggests cutting the hole in the bottom instead of the top, which it says makes the pumpkin easier to move, clean out and light.
The right tools make the work easier and safer. A pumpkin carving kit, with a small serrated saw and a scoop, is the usual recommendation. Banner Health and Prisma Health both advise that kit saws are designed for pumpkin flesh and give more control than a large kitchen knife, which both advise against using. A sturdy spoon or ice cream scoop removes the insides, a marker transfers your design, and a drill is useful for dot patterns. Keep a towel nearby, because wet hands, tools and pumpkins slip.
Safety guidance from the health sources below is consistent. Adults should handle the sharp tools, and children should never be left alone with them. Children can draw the design and scoop out the insides. Carve on a stable, flat surface in good light, stabilize the pumpkin on a towel, keep hands and tools dry, take your time, and always cut away from your body, keeping your free hand out of the cutting path.
For lighting, battery operated LED lights or glow sticks are the safest choice. Banner Health, Prisma Health and Healthline all prefer them over real candles, and National Fire Protection Association guidance, as reported in the preservation source, calls a flashlight or battery operated candle the safest choice. If you do use a real candle, never leave it unattended, place the pumpkin in a stable, nonflammable area, and keep it away from flammable materials.
If a cut happens, rinse it under clean running water, apply pressure with a clean cloth or towel, and cover it once the bleeding stops. Seek medical care if the cut is deep, if the bleeding does not stop, or if there are signs of infection such as redness, swelling or pus. Banner Health advises applying pressure for at least 15 minutes before deciding the bleeding will not stop.
Easy Pumpkin Carving Ideas
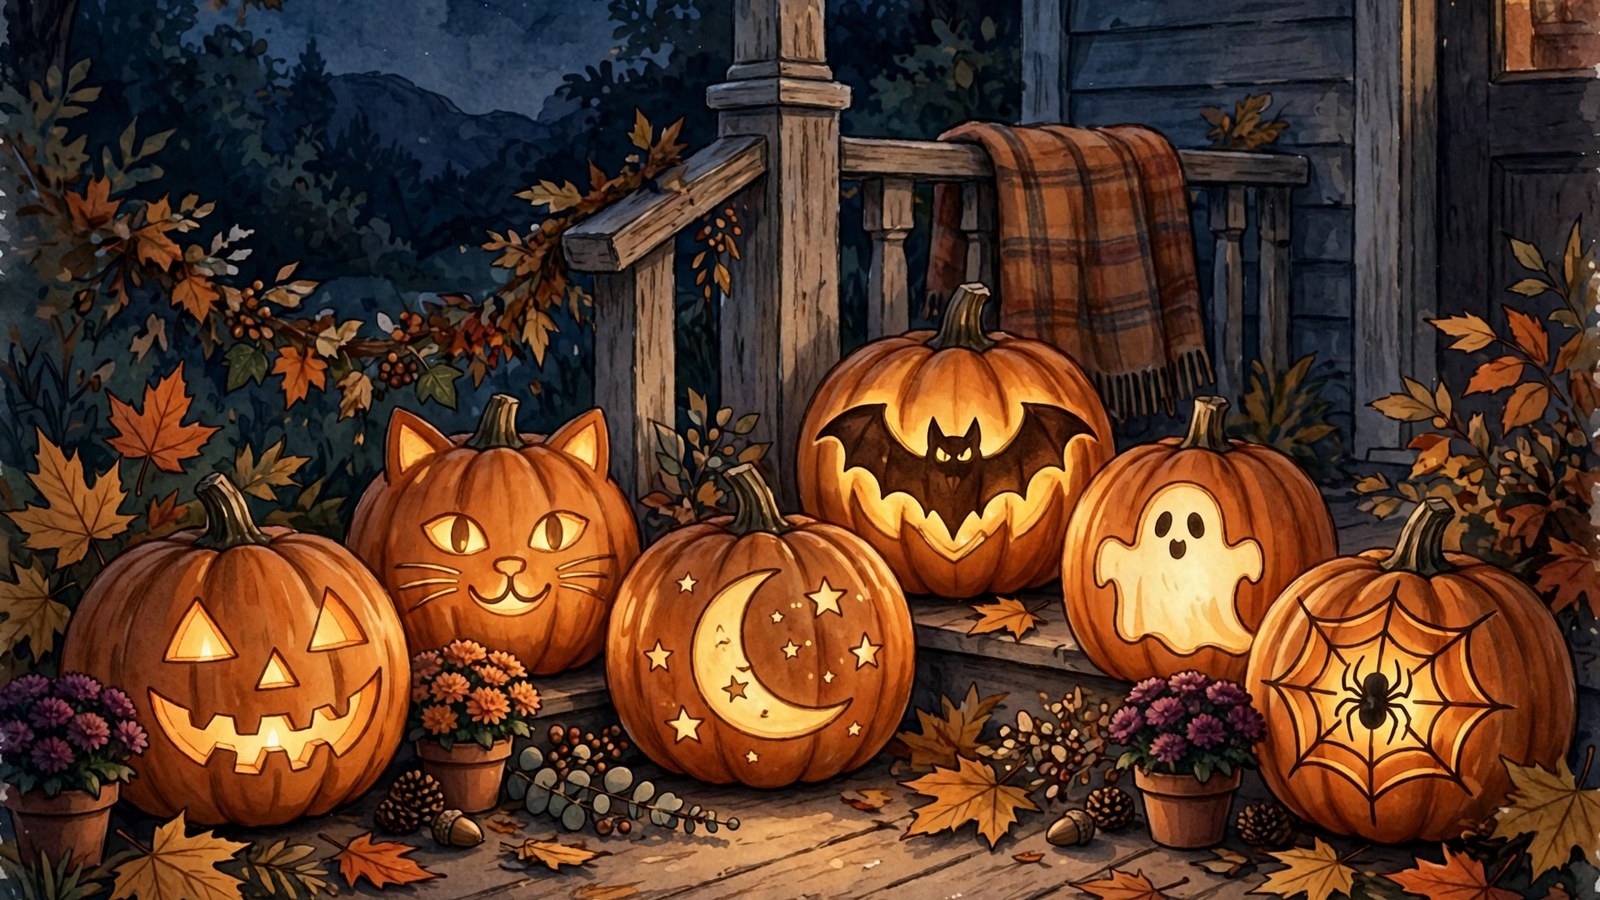
Easy pumpkin carving ideas are the best place to start, and they are often the ones that look best glowing on a porch. The classic jack-o-lantern, with triangle eyes, a triangle nose and a jagged grin, works because the shapes are bold and read clearly from a distance. Big, simple shapes glow better than fiddly detail.
Try these simple designs first:
- Moon and stars. A crescent moon with a few drilled or cut stars is quick, elegant and suits any size.
- Silhouette shapes. A cat in profile, a bat, or a simple ghost shape cut clean through reads instantly at night.
- Cookie cutter shapes. An adult can press a metal cookie cutter into the thinned wall and tap it gently with a mallet to cut shapes such as stars, hearts or bats. Keep this adult led, because the mallet still needs control and supervision.
- Polka dots and patterns. Holes drilled in different sizes create a lantern effect that is almost impossible to get wrong.
- A single word or initial. Carving BOO or a family initial makes a personal display with very little cutting.
Simple designs are also the most forgiving. If a cut goes slightly wrong, a bold shape still looks intentional once the pumpkin is lit.
Cute Pumpkin Carving Ideas
Cute pumpkin carving ideas suit porches that welcome small trick or treaters, and they are a good choice if you prefer charming to chilling. The trick is soft shapes: round eyes instead of triangles, a small smiling mouth, and details that suggest a face rather than a fright.
A cat pumpkin is one of the most searched cute designs: two triangle ears, either carved or added as small pumpkin pieces, round eyes, a small nose and a gentle smile, with whisker lines etched, rather than cut, into the skin. A smiling ghost works the same way, as a rounded, wavy bottomed shape with two oval eyes and a small open mouth. Flower carving is another popular option: carve or etch petals around the pumpkin, or cut a ring of small flower shapes near the top so the light shines through like a crown.
For a softer look, carve a white pumpkin. Its pale skin glows more gently, and it suits a sleeping cat, a friendly ghost or a floral pattern. Cute designs also suit small pumpkins grouped together on a step.
Funny Pumpkin Carving Ideas
Funny pumpkin carving ideas are about expression. Crossed eyes, one eye bigger than the other, a lopsided grin or a tongue sticking out all turn a standard jack-o-lantern into something that makes visitors laugh before they knock.
Some reliable funny designs:
- The surprised pumpkin. Huge round eyes and a small round O shaped mouth. It works on any pumpkin and takes minutes.
- The silly face. A winking eye, a crooked smile and teeth carved at odd angles.
- The pumpkin eating its dinner. Place a small pumpkin beside a larger one with its mouth open, and scatter seeds in front of it, as if the big pumpkin has been snacking.
- The grumpy pumpkin. Heavy angled eyebrows and a downturned mouth. Etch the eyebrows in, rather than cutting them out, to keep the expression readable without weakening the wall.
- A face with glasses. Carve round eyes and etch glasses around them.
Funny carvings are forgiving, because asymmetry is part of the joke. If the eyes do not match, the pumpkin just looks funnier.
Scary Pumpkin Carving Ideas
Scary pumpkin carving ideas rely on sharp angles and shadows. Where cute designs use round shapes, scary designs use jagged teeth, narrow eyes and deep, irregular mouths. The light inside does much of the work: narrow cuts throw dramatic shadows, and a mouth full of pointed teeth looks far more menacing lit from within than in daylight.
A classic scary face starts with slanted, angry eyes and a wide mouth with pointed teeth of different lengths. A skull pumpkin takes this further: hollow looking eye sockets, a nose shaped like an upside down heart or triangle, and teeth etched into the lower wall rather than cut out, which keeps the structure strong. A skeleton design can cover the whole pumpkin, with ribs etched around the sides and a skull face on the front. A witch works as a silhouette: a pointed hat and a hooked nose in profile, cut clean through, reads instantly at night.
For a genuinely unsettling effect, try a scream face: an elongated oval mouth and two deep set eyes, stretched vertically. Keep the wall between features reasonably thick, because very thin bridges between cuts are the first parts to collapse.
Cool and Creative Pumpkin Carving Ideas
Cool pumpkin carving ideas are where technique starts to matter. The most useful technique is shading: instead of cutting all the way through the wall, shave away just the outer skin in some areas. Lit from inside, shaved areas glow softly while cut through areas glow brightly, giving a two tone effect that works well for landscapes and detailed scenes. Shading has a practical bonus too. The preservation reporting in the Sources section notes that a surface etched design lasts longer than one cut all the way through, because less flesh is exposed.
Other creative approaches include:
- Drill dot designs. Different drill bit sizes make patterns of holes, such as constellations or spirals. Varying hole sizes create shading with no drawing skill needed.
- Two pumpkin scenes. Place two pumpkins together to tell a story: a cat and a mouse, a ghost chasing a bat, or a large pumpkin protecting a small one.
- Geometric carving. Triangles, chevrons and lattice patterns cut in bands look modern and work well on tall pumpkins.
- A carved scene, not a face. A haunted house silhouette, a bare tree, or a moonlit graveyard stands out on a street full of faces.
Pick one technique, such as shading, dots or a silhouette, and let it carry the whole design.
Character Carvings in Generic Design Elements
Character carvings are among the most searched pumpkin carving ideas. Reduce the character to its most recognizable features. The themes below are popular search themes only. This guide describes generic design elements in its own words. It does not reproduce copyrighted artwork, offer character templates, or claim any endorsement.
- Wizard inspired. Round glasses and a lightning bolt shaped forehead mark, etched into the skin, with simple eyes cut behind them.
- Blocky video game inspired. A face built from squares, with two square eyes and a square mouth. One of the easiest character style designs to cut.
- Yellow henchman inspired. One or two large round goggle shapes, cut or etched on an orange or painted pumpkin.
- Superhero web inspired. A web pattern etched across the pumpkin, with two large white eye shapes.
- Scream inspired. The long, stretched screaming face described above. Keep the mouth tall and narrow.
- Flat headed monster inspired. A flat topped head shape, a heavy brow, and two small bolt shapes at the sides.
- Clown inspired. A wide grin, a round nose and arched eyebrows, with etched hair curls at the sides.
- Button eyed inspired. Two round, flat button style eyes, each with a cross of thread lines etched in.
- Stitched grin skeleton inspired. Best on a white pumpkin: a stitched grin, two large oval eyes and two small nostril holes.
- One eyed monster inspired. One enormous round eye, a wide smile and two small horn shapes on top.
For any character style design, a stencil is almost essential, as the next section explains. Painting details, instead of cutting every feature, can also make small features read better.
Stencils and Templates
Stencils and templates are the easiest way to move from simple faces to detailed designs. A pattern matters most for character style carvings and intricate scenes, where freehand drawing on a curved surface is hard.
The transfer method is simple. Print the pattern at the size you need, trim the paper to fit, and tape it in place. Poke small holes along the lines with a pin, remove the paper, and join the dots with a marker before you cut. Banner Health describes the same method for families, with an adult or an older child then doing the carving. Keep the pattern flat so the design does not stretch.
Choose a stencil that matches the size of your pumpkin. A detailed pattern shrunk onto a small pumpkin will be frustrating to cut. Start with the smallest cuts first, while the wall is still strong, and leave large cut out areas until last. If a stencil includes islands, meaning pieces that would fall out, such as the middle of an eye, plan how they are held in place, or simplify the pattern. Check that any free printable stencil is offered for personal use, and do not reproduce copyrighted character artwork as a template.
Make It Last Longer
A carved pumpkin is a race against decay. Once cut, the exposed flesh loses moisture and attracts mold. Utah State University Extension guidance, summarized by PlantCareToday, says a carved pumpkin often starts to wither and rot just a few days later. Prisma Health gives a similar porch range of five to 10 days, depending on temperature and humidity. Simple designs last longer than elaborate ones, because less cut surface means slower drying. Treat every figure here as a weather dependent range, not a promise.
To give your carving the best chance:
- Carve as late as you can. Carving a day or two before Halloween is the single most effective step. North Carolina State guidance, summarized in the same source, is simply not to carve too soon.
- Clean it thoroughly. Scoop out all seeds and stringy flesh, because leftover pulp rots first, and dry the inside afterward.
- Keep it cool and shaded. Direct sun speeds decay, and frost damages the tissue, which then decays quickly once thawed. South Dakota State guidance recommends about 50 to 60 degrees Fahrenheit. A covered porch is ideal.
- Consider a dilute bleach treatment, with care. Extension guides from Utah State, North Carolina State and South Dakota State, as summarized by PlantCareToday, agree on treating the finished carving with a 10 percent bleach solution, defined by North Carolina State as 1 part chlorine bleach to 9 parts water, applied so every cut surface gets wet. Follow the bleach label, and never mix bleach with ammonia, acids or other cleaners. Keep a bleach treated pumpkin away from pets and wildlife, and do not eat or compost it afterward.
- Seal the cut edges. A thin coat of petroleum jelly slows moisture loss, according to Utah State guidance in the same source. Petroleum jelly is flammable, a warning attributed there to North Carolina State guidance, so light a treated pumpkin with a battery operated LED only.
- Use LED lights. A candle heats the pumpkin from inside and speeds decay as well as being a fire risk.
The full North Carolina State routine, combining the bleach treatment, sealed cuts, a protected spot and an electric light, is reported at 8 to 11 days. That is the top of the range, not the typical porch result.
When a pumpkin starts to collapse or grow mold, retire it. Compost it only if it has not been treated with bleach or paint.
Carving With Kids
Carving with kids works best when everyone has a job that suits their age. Children can choose the pumpkin, draw the design, and scoop out the insides, the messy part most children enjoy most. Adults handle the knives and the cutting. Banner Health, quoting its trauma outreach and injury prevention coordinator, notes that children between ages 9 and 12 can start to have the strength and skills to help carve. Treat that as one health system’s guidance, not a fixed rule for every child. Any child who helps should use a carving kit, be supervised closely, and never be left alone with sharp tools.
For younger children, no carve options keep them involved without sharp tools. They can paint a pumpkin, draw a face with markers, use stickers, or add craft materials, all of which Banner Health and Healthline suggest as safer alternatives. Keep the workspace dry, and keep small children at a safe distance while an adult is cutting.
A good family approach is one pumpkin per child for drawing and decorating, plus one family pumpkin that an adult carves from a design the children chose together.
Final Thoughts
The best pumpkin carving ideas are the ones you will actually enjoy making. Start simple, choose a design that suits your pumpkin, and remember that bold shapes glow best. A steady surface, a dry pumpkin, an adult on knife duty and an LED light inside will give you a jack-o-lantern worth showing off, with its best chance of lasting until Halloween night.
Frequently Asked Questions
What are the easiest pumpkin carving ideas for beginners?
Start with a classic jack-o-lantern face, a moon and stars design, drilled polka dots, or a simple silhouette such as a cat, a bat or a ghost. These designs use big, bold shapes, forgive small mistakes, and read clearly once lit.
How long does a carved pumpkin last?
Typically only a few days on a porch before it softens and grows mold. Utah State guidance says a carved pumpkin often starts to wither just a few days after carving, and Prisma Health gives five to 10 days depending on temperature and humidity. The full North Carolina State routine is reported at 8 to 11 days, not as a guarantee.
How can I make a carved pumpkin last longer?
Carve late, scoop out all of the insides, keep the pumpkin cool and shaded, and light it with an LED light instead of a candle. Sealing cut edges with petroleum jelly slows moisture loss, but use an LED light only with it, because petroleum jelly is flammable.
Should I use a candle or an LED light in a jack-o-lantern?
Use a battery operated LED light or a glow stick. Banner Health, Prisma Health and Healthline all prefer battery operated lights, and National Fire Protection Association guidance reported in the preservation source calls a flashlight or battery operated candle the safest choice. Never leave a real candle unattended.
Is it safe for children to carve pumpkins?
Children should not handle sharp tools unsupervised. Adults do the cutting, children draw and scoop, and no child is left alone with sharp tools. Banner Health notes that children ages 9 to 12 can start to help carve with a kit, under close supervision. Younger children are better served by painting, markers or stickers.
Should I use a kitchen knife or a carving kit?
Use a carving kit. Banner Health and Prisma Health both advise that kit saws are designed for pumpkin flesh, are easier to control, and are safer than kitchen knives.
How do I use a pumpkin carving stencil?
Print the pattern at the right size, tape it flat to the pumpkin, and poke small holes along the lines with a pin. Remove the paper, join the dots with a marker, and cut, starting with the smallest cuts. Check that any free printable pattern is offered for personal use.
What kind of pumpkin is best for carving?
Choose a firm pumpkin that feels heavy for its size, with no soft spots, bruises or cuts, a sturdy stem, and a flat base so it sits level. Match shape to design: tall for vertical designs, small for windowsills, white for ghost and floral designs.
What should I do if someone gets cut while carving?
Rinse the cut under clean running water, apply pressure with a clean cloth or towel, and cover it once the bleeding stops. Seek medical care if the cut is deep, the bleeding does not stop, or there are signs of infection such as redness, swelling or pus.
Keep reading: Cute Pumpkin Carving Ideas: Easy, Simple, and Creative Designs for 2026
Keep reading: Cat Pumpkin Carving Ideas: Easy Faces, Silhouettes, Moons, and Playful Pairs
Keep reading: Funny Pumpkin Carving Ideas
Keep reading: Ghost Face Pumpkin Carving Ideas: Easy, Hard, and Free Patterns to Try
Keep reading: Coraline Pumpkin Carving Ideas
Keep reading: Minion Pumpkin Carving Ideas: Easy, Funny Designs for Every Skill Level
Keep reading: Pop Culture Pumpkin Carving Ideas
Keep reading: Pumpkin Carving Stencils and Templates: How to Choose, Print, Size, and Transfer Them
Keep reading: Pumpkin Carving Ideas for Kids
Keep reading: Pumpkin Painting Ideas: Easy, Cute and No-Carve Designs
Sources & references
- Banner Health, Halloween Pumpkin Carving and Decorating Safety Tips. Page opened and read 29 October 2026. Supports the carving kit, flat bottom pumpkin, dry hands and tools, supervision, ages 9 to 12 guidance, bottom opening, battery operated light, no carve alternatives, and cut first aid points used in this article.
- Prisma Health, Pumpkin Carving Safety Tips, last updated 5 October 2026. Page opened and read 29 October 2026. Supports the carving kit, stabilizing the pumpkin, cutting away from the body, supervision, LED light, unattended candle, cut first aid, and five to 10 day lifespan points used in this article.
- Healthline, How to Avoid These Top Halloween Hazards. Page opened and read 29 October 2026. Supports the stable and well lit surface, cutting away from the body, keeping knives from children, adults cutting while children scoop, and battery operated candle points used in this article.
- PlantCareToday, 7 Ways To Preserve and Keep Carved Pumpkins From Rotting, summarizing Utah State University Extension, North Carolina State University Extension, South Dakota State University Extension and other extension guidance. Page opened and read 29 October 2026. Supports the few days lifespan, 10 percent bleach solution, 8 to 11 day full routine, petroleum jelly flammability, 50 to 60 degree storage range, electric light, and National Fire Protection Association safest light points used in this article.
- Realtor, How Long Your Carved Pumpkin Really Lasts Before It Starts To Rot, updated 21 October 2026. Page opened and read 29 October 2026. Supports the points that carved pumpkins on a porch spoil or grow moldy within a few days, that direct sun and temperature changes speed decay, and that surface etched designs last longer than designs cut all the way through. Its statement that a dried bleach treated pumpkin is safe around pets was not followed in this article, which uses the more cautious extension based wording instead. See the claim ledger.


