Short answer
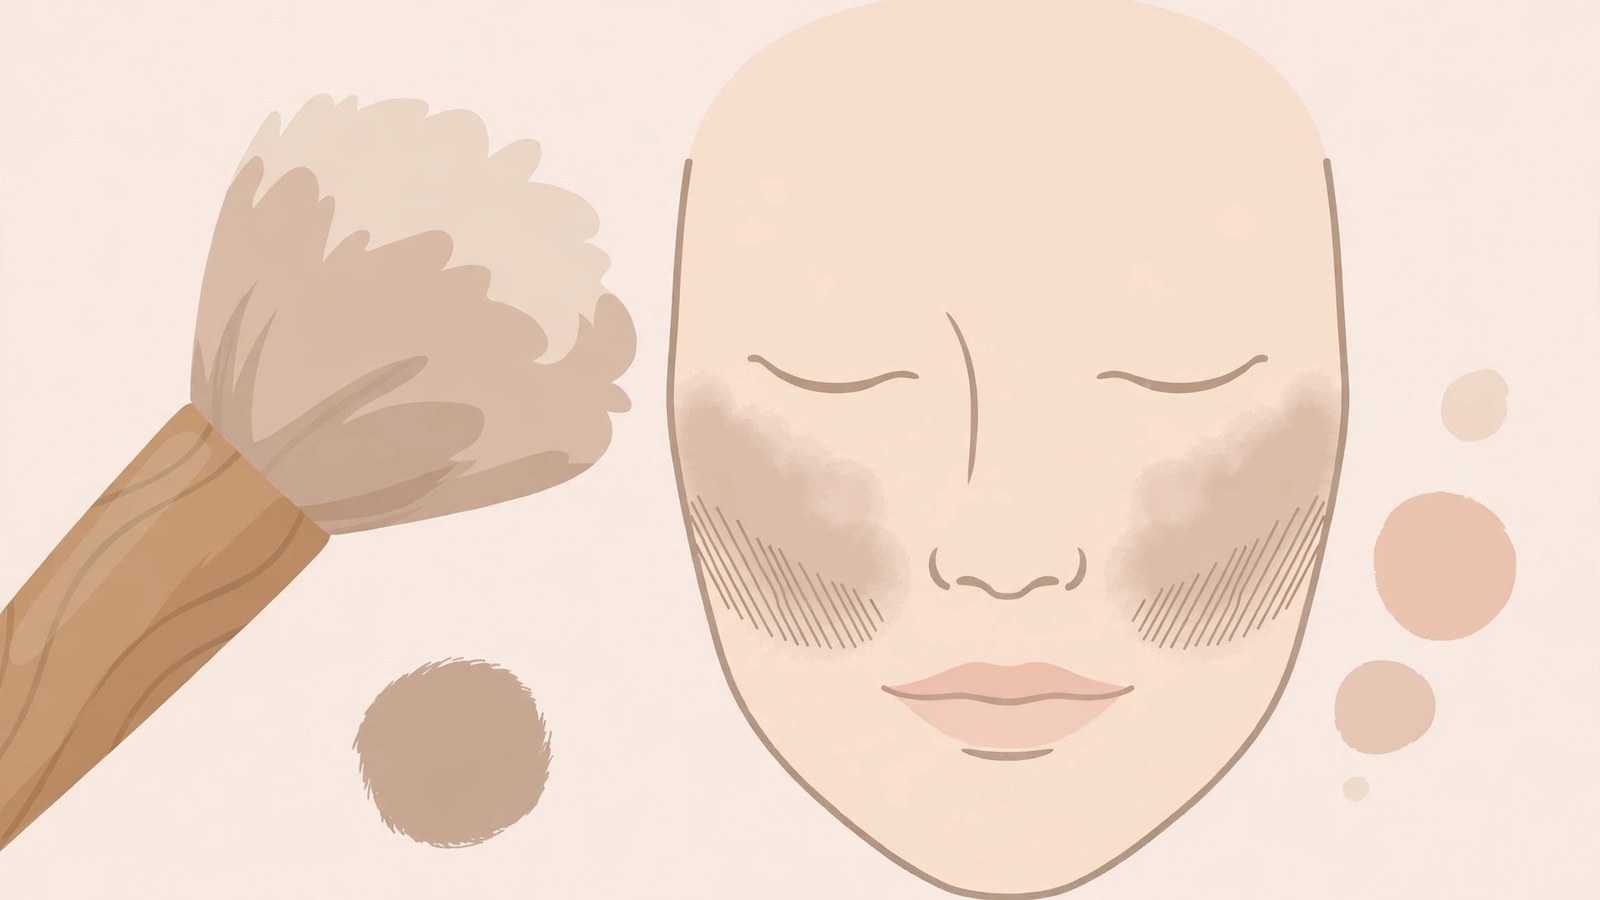
- Start with one matte contour product only one to two shades deeper than your skin, close to the color of a real shadow, not orange and not glittery. Apply your usual base first, let it settle, and place a tiny amount in the hollow under each cheekbone, starting near the ear and stopping well before the mouth. Blend the edges with a clean fluffy brush until no line remains, then check in daylight from a normal distance and from the side. That one area teaches the whole method. Add the jaw, forehead, or nose only later, one area at a time, and only if you want to. Bronzer is not contour: bronzer adds warmth, contour adds the look of shadow, and highlight adds brightness on high points. Keep layers thin, build slowly, and thin an area that looks too dark instead of darkening the other side. Wash your hands before applying makeup, do not share makeup, keep containers clean and closed, and discard products that change in color or smell.
Introduction
Contouring often looks hard to copy because the versions shared most widely use strong lines, thick layers, and a finish made for studio light and a camera. In ordinary daylight that approach can look harsh or striped. A beginner version works the opposite way: a small amount of a soft matte product, a fluffy brush, and thin layers that suggest shadow where shadow already falls and brightness where light already lands. The face keeps its own shape. Nothing is redrawn.
This guide covers that lighter approach, beginner contouring without heavy makeup. It explains what contour, bronzer, and highlight each do, how to choose a shade by depth and undertone, where to place product for different face shapes and where to leave well alone, a clear blending order, how to check the result in honest light, the mistakes behind most beginner problems, and the hygiene and safety habits that keep a routine sensible. It offers general makeup information only. It does not promise a particular appearance or result, and it does not diagnose or treat any skin or eye condition.
What Contouring Actually Does
Contouring uses a product slightly darker than your skin to create the appearance of shadow, and a lighter product to create the appearance of light. Shadow tends to recede visually, so an area looks set back. Light tends to advance visually, so an area looks brighter. A soft shadow under the cheekbone can make the cheekbone above it look a little more defined, and a light product on the high points can make those points look fresher.
The effect stays believable only while it stays soft. Real shadows have blurred edges and fade gradually. They are never a crisp stripe. If you can still see a clear line after blending, the product is too dark, there is too much of it, it is in the wrong place, or it needs more blending. Adding more rarely helps. Blending more, or gently lifting a little away, usually does.
Light contouring adds dimension to makeup you already wear. It does not change bone structure, it does not make a face or nose permanently narrower, and its effect disappears when the makeup comes off. In daylight, a heavy effect mostly reads as visible makeup. A soft effect reads as your face with a little more definition, which is the useful goal.
Contour, Bronzer, and Highlight: Three Different Jobs
Beginners often struggle because three different products get used as if they were the same. Each has a separate job, finish, and place on the face.
Contour creates the look of shadow. It should be matte, with no shimmer or glitter, because real shadow does not sparkle. Its color should be muted and a little cool or neutral, closer to the greyish brown of an actual shadow than to a suntan. It goes in hollows: under the cheekbones, under the jaw, at the temples, and, only with great care, down the sides of the nose.
Bronzer creates the look of warmth, as if sun had caught the skin. It is usually warmer than contour, sometimes with a soft sheen, and it goes where sunlight lands first: the tops of the cheekbones, the forehead, the bridge of the nose, and sometimes the chin. Placed under the cheekbone, a warm bronzer reads as warm color where shadow should be cool and muted, which is why many beginner attempts look muddy or orange. If you wear bronzer, use it as a light wash of warmth after contour, and keep it out of the hollows.
Highlight creates the look of light. For beginners it can be a light concealer, a light matte powder, or a subtle satin highlighter with no visible glitter. It goes on high points: the tops of the cheekbones, the brow bone, the bridge of the nose, the center of the forehead, and the chin. Place it sparingly and blend the edges. Highlight is optional. Contour alone, blended well, already adds dimension. If it looks like a shadow on the skin, it can contour. If it looks like warmth or a tan, it is bronzer. If it catches the light and looks bright, it is highlight.
Choose a Shade by Depth and Undertone
Shade choice causes more failures than brush technique. A well blended application in the wrong shade still looks wrong, while a rough application in the right shade can often be rescued by blending.
Start with depth. Pick a contour only one to two shades deeper than your foundation or bare skin. A shadow deepens skin color a little; it does not replace it with a much darker color. A product three or four shades deeper creates a contrast blending cannot soften. If you are between two shades, choose the lighter one. You can build a light shade in two thin passes. You cannot easily unbuild a dark one.
Next, judge undertone, the underlying hue beneath the surface color: warm with more yellow or golden tones, cool with more pink or blue tones, neutral with a balance, or olive with a muted greenish cast. A contour reads as shadow when its undertone is a little cooler and more muted than the skin, because shadowed skin looks slightly cooler than lit skin. Swatch a candidate on your jawline or inner forearm in natural light, not under warm bathroom bulbs or store lighting, which hide orange. The right swatch looks like a soft shadow across the skin. The wrong one looks like a brown or orange stripe on top of it.
Powder contour is usually easiest for beginners. It builds slowly, blends forgivingly with a fluffy brush, and works best over a lightly set base. Cream contour can look very skinlike and blends well with a damp sponge, but it deposits more color at once and goes on before setting powder. Powder is better for learning control. Cream suits a steadier hand. Start with one product in one formula. For powder, a fluffy medium sized brush diffuses color and makes harsh lines unlikely, while a small dense brush concentrates product in one spot.
Prep the Base and Set the Order
Contour blends best over a smooth, even base. Over bare skin with uneven tone, shadow can cling to drier or redder patches and look patchy. Apply your usual routine first: moisturizer, sunscreen in the morning, and foundation or tinted moisturizer if you wear it. Let the base settle for about a minute so the brush does not lift it.
Follow this order. First, base. Second, concealer where you want it, kept thin. Third, cream contour if you use cream, while the base is still unset. Fourth, a light set with powder if you need it. Fifth, powder contour if you use powder, over the lightly set base. Sixth, blush if you wear it, after contour, so color sits above the shadow. Seventh, highlight if you use it, on high points only. Eighth, a final blend with a clean brush and a daylight check. Cream goes before powder, because powder grabs unevenly on wet cream and cream smears over powder. Thin layers look more like skin than one thick layer, and they wear more evenly.
Find the Shadow Areas on Your Own Face
Before any product goes on, find where shadow already falls. Stand in front of a mirror in natural light with your face relaxed. Do not smile or suck in your cheeks, because both distort the hollows you are trying to find. Look for four areas: the hollow under each cheekbone, the area just under the jawline, the temples, and the sides of the nose. Added shadow can look natural only there, because softer shadow already exists there.
To find the cheekbone hollow, rest a fingertip just below the cheekbone and feel for the dip between the cheekbone above and the lower cheek below. That dip is where cheek contour belongs. Contour on top of the cheekbone, where light hits, reverses the logic of the technique. Jaw contour belongs just under the jaw, not on the jaw itself. Forehead contour belongs at the hairline and temples. Learn one area at a time, starting with the cheeks.
Placement by Face Shape, With Honest Limits
Face shape guides are a useful starting map and a misleading promise. Faces rarely fall into neat categories, most people sit between two shapes, and no powder changes bone structure. Use these notes to decide where to emphasize and where to skip.
For a round face, where width and length look similar and the jawline is soft, add soft contour in the cheek hollow, blended slightly upward, plus a light touch at the temples. Keep jaw contour very light or skip it, and keep blush a little higher on the cheek.
For a long or oblong face, where length exceeds width, keep cheek contour more horizontal and stop it shorter, further from the mouth. A whisper of contour at the top hairline and under the chin is optional. Avoid strong contour down the sides of the face, which lengthens it further.
For a square face, where forehead, cheekbones, and jaw are similar in width, use light contour at the outer corners of the jaw and at the temples, kept small and blended wide, to soften the widest points.
For a heart shaped face, where the forehead is wider and the chin narrower, use light contour at the temples and upper forehead sides. Keep contour away from the chin and keep jaw contour minimal, because shadow on a narrow lower face makes it look narrower still.
For an oval face, where proportions already look balanced, restraint is the honest advice. The standard cheek hollow contour, kept soft, is usually enough.
Two limits apply to every shape. Symmetry is not achievable with powder and should not be the goal, because real faces are asymmetrical. Thin the heavier side instead of darkening the lighter one. And no chart can account for your skin depth, features, glasses, hairstyle, or preferences. The mirror in daylight outranks any guide, including this one.
Apply the Cheeks in Light Layers
Load a small amount of product onto your fluffy brush, tap off the excess, and look at the brush first. If you can see a dense patch of color, there is too much. Place the brush in the hollow near the ear, where shadow is naturally deepest, and blend forward toward the middle of the cheek, stopping well before the mouth, roughly in line with the outer corner of the eye at the furthest. Contour that reaches too close to the mouth drags the face down.
Use light back and forth or small circular motions with gentle pressure. Build in two or three thin passes, checking after each. Blend slightly upward at the top edge so no hard boundary remains, but do not carry color onto the top of the cheekbone, where highlight belongs. Blend the bottom edge just enough to remove any line. If you wear blush, add it after contour, on the apples of the cheeks, and blend back and slightly up so color meets the top edge of the shadow without covering it.
The Optional Areas: Jaw, Forehead, and Nose
Add these areas one at a time and treat each as optional. A finished light look requires none of them.
For the jawline, place a small amount just under the jaw, where the jaw meets the neck, and blend downward toward the neck and back toward the ear. Blending downward keeps the jaw itself looking clean by contrast. Blend thoroughly at the neck, because a visible band there is one of the easiest errors for other people to spot.
For the forehead, place a small amount along the hairline, strongest at the temples, and blend into the hairline rather than down onto the forehead. Keep it very light, because forehead contour covers a wide, visible area. If your forehead is not high, skip this area.
Nose contour is the most precise area and the easiest to get wrong, and skipping it is a complete choice. If you try it, use your smallest brush, a tiny amount of product, and two thin lines down the sides of the nose, blended until the lines disappear. Check from the front and from the side, because nose contour that looks acceptable head on often looks striped in profile. If it looks harsh, remove it or leave the nose alone.
Highlight Lightly and Blend in the Right Order
Apply highlight after contour, sparingly, with a small brush, sponge tip, or clean fingertip, and blend its edges. The standard high points are the tops of the cheekbones just above the contour, the brow bone, the bridge of the nose, a small area at the center of the forehead, and the center of the chin. You do not need all of them. The cheekbone tops alone give most of the balancing effect.
Do not place highlight inside areas you just contoured. Brightening a hollow cancels the shadow and adds thickness where you wanted recession. Avoid heavy shimmer in daylight: glitter particles catch direct light in a way skin never does and draw attention to texture and pores. Keep the daytime version subtle and satin.
Blend in this order: contour first and fully, then blush, then highlight, and finish with one very light pass of a clean fluffy brush over the whole cheek to knit the zones together.
Check in Honest Light
Lighting decides whether contour succeeds. Warm dim bathroom lighting hides orange tones and softens edges that daylight will expose. Bright cool lighting exaggerates contrast. Direct overhead lighting creates its own shadows, which can trick you into placing contour where the light fitting put a shadow rather than where your face does.
Do the final check in daylight: near a window with indirect light, or outside in open shade, facing the light. Check from the front, from both sides in three quarter view, and in profile. Front view shows symmetry and stripes. Three quarter view shows whether the cheek shadow follows the hollow. Profile shows nose contour, jaw blending, and product on the neck. A photo at arm’s length in daylight, without a filter or beauty mode, is a useful second opinion. Make adjustments in that same light.
Fix Problems Without Starting Over
Most contour problems are fixed by softening, not by adding. If an area looks too dark, blend it with a clean fluffy brush and no new product, then press a light dusting of setting powder or a little foundation over the edge if needed. If the sides do not match, thin the darker side down to the lighter side. Do not darken the lighter side upward. If the color looks orange or muddy, the fault is the shade, not the technique. Remove it and change to a cooler, more muted product. If the result looks patchy, the usual causes are powder over an unset base, cream over a set base, or an overloaded brush. Fix the base order next time.
Common Mistakes to Avoid
The most common mistake is a shade that is too dark or too warm. A contour should be muted, only slightly deeper than the skin, and cooler than a bronzer. The second is too much product at once: a loaded brush, no tap off, and one strong stripe that then needs rescuing. Build gradually instead. The third is placement on the wrong landmark, especially on top of the cheekbone instead of in the hollow beneath it, or nose lines placed too wide apart, which makes the nose look wider. Feel for the hollow with a fingertip when you are unsure.
The fourth mistake is blending that stops too early or drags downward toward the jaw or mouth, which pulls the face down visually. Keep blending motions lifting slightly and outward. The fifth is contouring under poor light and never checking in daylight. The sixth is treating every area as compulsory, so the combined effect looks heavy even though each area alone was light. The seventh is skipping basic hygiene, covered in the next section.
Safety and Hygiene for Any Makeup Routine
Poor hygiene can undo a routine through irritation, contamination, and infection risk, and the habits that prevent it cost almost nothing. The United States Food and Drug Administration, the FDA, gives the same core advice across its cosmetics guidance, for contour, foundation, and eye products alike.
Read the label, follow directions, and heed warnings. Wash your hands before applying makeup, because hands carry bacteria that transfer to products and skin. Do not share makeup. Sharing transfers another person’s bacteria to you, and the FDA notes that shared testers at store counters are even more likely to become contaminated than products used at home. Keep containers clean and tightly closed, protect them from temperature extremes, and wash brushes and sponges regularly, letting them dry fully, because a dirty brush also deposits patchy color.
The FDA explains that shelf life is the time you can expect a product to look and act as expected and stay safe for use, varying by type, use, and storage. Over time, preservatives can break down and allow bacteria and fungi to grow. Fingers dipped into a product add microorganisms, applicators are exposed to bacteria and fungi with each use, moisture can encourage growth, and heat, sunlight, and air can change color and texture and cause odor. United States law does not require cosmetics to carry a specific shelf life or expiration date on the label; determining shelf life is the manufacturer’s responsibility. The FDA advises against storing cosmetics above 85 degrees Fahrenheit, giving hot cars as the example where heat breaks down preservatives faster.
Discard products that have changed in color, smell, or texture. If mascara becomes dry, discard it. The FDA says not to add water and never saliva to moisten a product, because that introduces bacteria and dilutes the preservative. Eye area cosmetics tend to have shorter shelf lives and can be linked to eye infections that can be serious. Manufacturers usually recommend discarding mascara two to four months after purchase, and the FDA eye safety guidance says to discard mascara three months after purchase. If you develop an eye infection, stop using eye area cosmetics, discard those you were using when the infection occurred, wait until the area is healed, and talk with a health care provider. If any cosmetic causes irritation, stop using it, and if irritation persists, seek medical advice. The FDA also asks consumers to notify it about a rash, redness, burn, or other unexpected reaction, or a product problem such as a bad smell or color change. Do not use cosmetics near the eyes unless they are meant for the eyes. The FDA notes that it does not define the term hypoallergenic, so do not assume that label prevents a reaction.
A Simple Beginner Routine to Practice
Practice this short routine unchanged several times, in daylight, before you vary it.
Wash your hands. Apply your usual base, settled for a minute and lightly set if you use powder contour. Place contour in the hollow under one cheekbone, near the ear, blend forward, stop well before the mouth, and blend the edges until no line remains. Repeat on the other side, then thin the darker side if the two do not match. Check in daylight from the front and the side. Add blush lightly if you wear it. Add highlight on the tops of the cheekbones only, if you want it. Do one final pass with a clean brush, check once more in daylight, and stop.
That is the complete routine. No nose contour, no forehead contour, no heavy setting, no stack of palettes. Practice until the cheek contour looks soft without rescue work. Then, only if you want more, add one area, most usefully the jawline. Contouring without heavy makeup is restraint practiced on purpose: a muted shade, a fluffy brush, light layers, thorough blending, and an honest check in daylight.
Frequently Asked Questions
Do I need contour, bronzer, and highlight, or can I use just one?
You can use just one, and contour alone is the best single choice for this method. Contour adds the look of shadow, bronzer adds warmth, and highlight adds brightness, in different places, so one cannot fully replace the others, but none is compulsory. Contour on its own, blended well over an even base, already gives most of the visible dimension. Add bronzer later only if you want warmth, and highlight only if you want brightness.
How do I know if my contour shade is too warm?
Swatch it on your jawline or inner forearm in natural daylight. A shade that works looks like a soft shadow across the skin: muted, slightly cool, and a little greyish compared with a tan. A shade that is too warm looks orange or coppery, or like a brown stripe on top of the skin. Warm indoor lighting hides orange, so a shade that seemed fine indoors can reveal itself outdoors. Blending more will not fix a warm shade. Change to a cooler, more muted shade one to two shades deeper than your skin.
Should a beginner start with powder or cream contour?
Start with powder if your priority is control. Powder builds slowly, blends easily with a fluffy brush over a lightly set base, and lets you soften mistakes with a clean brush. Cream contour can look very natural and blends well with a damp sponge, but it deposits more color at once, must go on before setting powder, and is less forgiving while your hand is learning pressure. Pick one formula in one shade and learn it fully first.
How can I fix contour that looks too dark without removing all my makeup?
Blend first with a clean fluffy brush and no new product, working the edges rather than the center. If it still looks too dark, press a little foundation or setting powder over the edge to lift it. If one side is darker, thin the darker side down to the lighter side instead of adding product to the lighter side. Keep checking in daylight at a normal distance, because a close up mirror exaggerates darkness.
Is nose contour worth learning as a beginner?
Not at first, and possibly not at all. Nose contour is the most precise area and goes wrong most easily, because thin lines down the sides of the nose look striped from the side even when they look acceptable from the front. Cheek contour alone already adds clear dimension, and a face without nose contour looks complete. Learn the cheeks, then the jaw if you want it, and only try the nose later with a very small brush and a tiny amount of product.
How long does light contour last during the day?
Wear time depends on your skin, your base, the weather, and how much you touch your face, so no honest fixed number of hours can be promised. Thin layers over a prepared and lightly set base generally wear more evenly than thick layers, which fade in patches and settle into lines. Keep the morning application soft rather than building extra strength to allow for fading. For a touch up, add a tiny amount of powder contour to the cheek hollow only, blend, and check in the best light available.
Sources & references
- U.S. Food and Drug Administration, Using Cosmetics Safely. Used for reading the label and following directions and warnings, washing hands before use, not sharing makeup, keeping containers clean and tightly closed and protected from temperature extremes, discarding cosmetics when color or smell changes, using only eye intended cosmetics near the eyes, not adding saliva or water to mascara, discarding eye makeup after an eye infection, expiration dates not being required by law while improper storage can spoil a product, notifying FDA about a rash, redness, burn, or other unexpected reaction or a product problem such as bad smell, color change, or foreign material, and FDA not defining hypoallergenic.
- U.S. Food and Drug Administration, Shelf Life and Expiration Dating of Cosmetics. Used for the definition of shelf life, the factors that degrade cosmetics including fingers adding microorganisms, preservatives breaking down over time, applicators being exposed to bacteria and fungi with each use, emulsions separating, moisture encouraging growth, products drying out, and heat, sunlight, and air changing color, texture, and smell, eye area cosmetics tending to have shorter shelf lives and eye infections being potentially serious, manufacturers usually recommending discarding mascara two to four months after purchase, there being no United States law requiring specific shelf lives or expiration dates on cosmetic labels with shelf life determination being the manufacturer's responsibility, products that are both cosmetics and drugs requiring stability testing and printed expiration dates, discarding dry mascara without adding water or saliva, stopping eye area cosmetics and discarding those in use if an eye infection occurs, not sharing makeup and using a new unused applicator for testers, keeping containers and applicators clean, and not storing cosmetics where heat can break down preservatives, including in a hot car.
- U.S. Food and Drug Administration, Cosmetics Safety Q&A: Eye Cosmetic Safety. Used for stopping use of an eye cosmetic that causes irritation and seeing a doctor if irritation persists, avoiding eye cosmetics during an eye infection or inflammation and discarding products in use when the infection occurred, bacteria on hands and washing hands before applying eye cosmetics, keeping instruments used near the eye clean, not sharing cosmetics, keeping containers clean and free of dust and dirt, discarding mascara three months after purchase, discarding dried mascara without adding saliva or water because mouth bacteria can grow in it and water dilutes the preservative, not storing cosmetics above 85 degrees Fahrenheit because heat deteriorates preservatives, taking care not to scratch the eye and never applying or removing eye cosmetics in a moving vehicle, and using only cosmetics intended for the eyes near the eyes.


