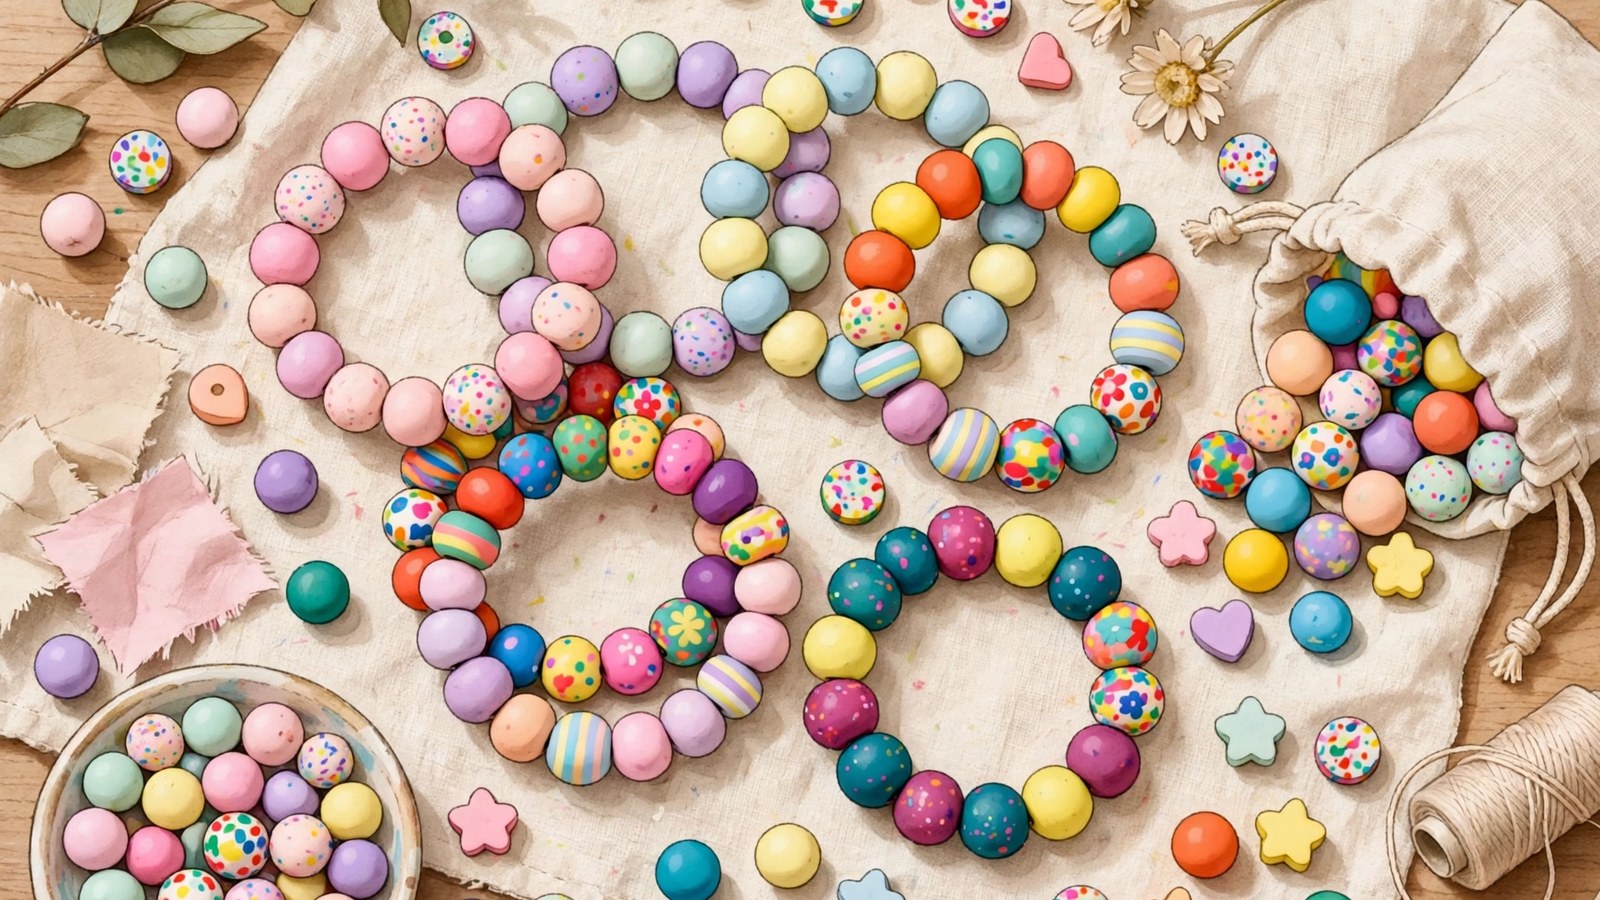
Short answer
- Condition polymer clay by kneading it until it is smooth, pliable, and free of cracks when bent. Roll pieces into balls about 8 to 10 millimeters across, compare each one to a template bead so the sizes match, and pierce each bead straight through the center with a hole large enough for your elastic cord to pass through twice. Bake the beads only in a conventional oven or toaster oven, never in a microwave, at the exact temperature and for the exact time the manufacturer states for your brand, verified with an oven thermometer, in a well ventilated area, and never at the same time as food. Cool the beads completely. String them on 0.7 millimeter or 1 millimeter jewelry elastic, check the fit before knotting, tie two firm overhand knots, tuck the knot inside a bead with a larger hole, and trim the excess without cutting flush against the knot. Small beads are a choking hazard for young children, so keep loose beads, finished bracelets with small beads, and broken bracelets away from babies and toddlers.
Introduction
A clay bead bracelet is a string of colored beads, a secure knot, and a wrist. That simplicity is why it works as a first jewelry project. You do not need a kiln, expensive tools, or prior experience with clay. You need polymer clay, a home oven used exactly as the clay manufacturer directs, elastic cord, and patience for rolling beads that are close in size.
This guide covers the whole process for beginners, including older children working with an adult. It explains how to choose clay, condition it, form round and disc beads, pierce holes that stay open, bake beads safely, and string a bracelet that holds up to being stretched over a hand. It is working guidance, not a tested manufacturing result, and it does not promise professional jewelry durability.
Read the safety section before you open the clay, not after. Polymer clay is a craft material, not a toy and not food. The baking, ventilation, food separation, and small parts warnings in this guide are not optional softening points. They are part of the method.
What Polymer Clay Is, and Why It Suits Beginners
Polymer clay is a modeling material built on a plastic polymer base, usually polyvinyl chloride, mixed with plasticizers, pigments, and fillers. Polyform, the maker of Sculpey, describes its polymer clays in similar terms, as synthetic plastic polymers with resins and fillers for texture and coloring. The material stays soft and workable at room temperature. Unlike air dry clay, it does not begin hardening simply because it is exposed to air. Unlike ceramic clay, it does not need a kiln.
When it is baked at a low temperature in a home oven, polymer clay hardens into a durable, lightweight plastic. That combination is ideal for a first project. A bead that rolls lopsided can be squashed and rolled again as many times as needed before baking, and no special firing equipment is required.
Brands behave differently. Softer brands, often marketed for beginners or for children, condition quickly and forgive mistakes, but they can show fingerprints more easily. Firmer brands hold detail better, but they need more conditioning. If your hands tire quickly, or if you are working with older children, start with a softer brand.
Precolored clay is easiest for beginners because there is no pigment mixing and no painting step after baking. Start with five or six colors that work together, instead of buying every color available. White, black, a few bright colors, and one metallic or glitter clay for accents are enough for a first set of bracelets.
Tools and Materials
For a first bracelet, gather the following:
- Polymer clay in two to four colors, plus white if you want to lighten colors
- A clean, smooth work surface, such as a ceramic tile, a glass board, or a silicone mat
- A craft knife or clay blade for cutting clay, used by an adult or by an older child only with direct adult supervision
- A rolling pin or acrylic roller dedicated to clay, for flattening clay for disc beads
- Toothpicks, wooden skewers, or a bead piercing tool, for making holes
- A baking tray or ceramic tile dedicated to clay, lined with parchment paper
- An oven thermometer, to verify the actual baking temperature
- Stretch elastic cord sold for jewelry, 0.7 millimeter or 1 millimeter thick
- Small scissors
- A ruler, for checking bead size
- Baby wipes or a damp cloth, for cleaning hands between colors
- Optional: spacer beads, bead caps, or a charm, and a water based varnish made for polymer clay if you want a sealed finish
Dedicated tools matter. Household items can work if they are clean, but once a tray, roller, knife, or board has been used for polymer clay, do not return it to food preparation. Polymer clay is not a food material. Keep a separate, inexpensive set of craft tools and label it. Polyform gives the same boundary: do not make items that will be used to hold or serve food or beverages. A pasta machine is not required here, and if you use one for clay it becomes a clay only tool, never to be used for food afterward.
Elastic choice affects whether the bracelet lasts. Cord sold specifically as beading or jewelry elastic stretches over the hand and returns to shape. A thickness of 0.7 millimeter suits smaller beads. A thickness of 1 millimeter suits larger beads and makes a stronger bracelet, but it needs a larger hole. Do not substitute sewing elastic or household elastic, which stretches out and breaks more quickly. Clear cord does not show through translucent beads.
Safety Before You Start
Read this section in full before opening the clay, especially if children are involved.
Polymer clay is not food. Do not eat it, do not taste it, and do not handle food while crafting. Wash hands after handling clay and before eating or touching the face. Keep raw clay, loose beads, and tools away from very young children who may put small pieces in their mouths.
Small beads are a choking hazard for young children. The United States Consumer Product Safety Commission enforces a ban on toys and other articles intended for children under three years old that are, or have, small parts, or that produce small parts when broken, because young children can choke on, inhale, or swallow small objects they mouth. Apply that rule here without exception. Do not give a bracelet with small beads to a baby or toddler. Do not leave loose beads within reach of a young child. If a bracelet for an older child breaks, collect every bead at once, because a bead that was safe on a cord is a loose small part on the floor.
Baking safety is the most important safety topic in this project. Bake polymer clay only according to the manufacturer instructions for the specific brand and product you bought. Brands differ, and the difference is large. Polyform instructs users to bake many Sculpey products at 275 degrees Fahrenheit for 15 minutes per 1/4 inch of thickness, and states plainly: do not microwave, and do not exceed the stated temperature or recommended baking time. Staedtler instructs users to bake FIMO at 230 degrees Fahrenheit for about 30 minutes and not to exceed that temperature. A temperature that is correct for one brand is wrong for another, so the package in your hand governs.
Use an oven thermometer placed near the beads. Polyform warns that many ovens are not calibrated accurately and run hotter than the dial setting. Do not leave baking clay unattended for long periods, and set a timer.
Ventilate the baking area. Polyform advises good ventilation while baking, such as using an oven hood fan, and Staedtler also instructs users to ensure good ventilation when baking its clay in the oven. Open a window or run a fan as well. Overheated or burned polymer clay can release irritating fumes. If clay burns and smells strongly, turn off the oven, ventilate the room, and leave the area until the smell clears rather than opening the oven and leaning over it.
Do not use the oven for clay and food at the same time. Never bake polymer clay alongside food. Do not place food on a tray, tile, or tool that has been used for clay. Keep a dedicated baking tray for clay, lined with parchment paper, and store clay tools separately from kitchen tools that touch food.
Never bake polymer clay in a microwave. Polyform states this as a direct instruction: a microwave heats unevenly, cannot be set to a precise curing temperature, and can leave part of a piece soft while another part overheats and scorches.
Tool safety matters too. Craft knives and clay blades are sharp. An adult should use them, or an older child only with direct adult supervision, cutting away from the body on a stable surface. Handle toothpicks and skewers carefully. If you use a varnish, use it in a ventilated area, follow its instructions, keep it away from children, and prefer a water based product made for polymer clay. Do not use clear nail polish as a bead coating, because products not made for polymer clay can stay tacky over time.
After baking, let beads cool fully before handling them. They are hot, slightly soft while warm, and harden as they cool.
Conditioning Clay: The Step Beginners Skip
Conditioning means kneading clay until it is soft, pliable, and uniform in color and texture. Skipping or rushing it leads to cracked beads, trapped air, and beads that break after baking. Fresh clay can feel firm, crumbly, or stiff, especially in a cool room. Conditioning warms it, distributes the plasticizers evenly, and works out air pockets that can make a bead crack or puff during baking.
To condition by hand, break off a piece about the size of a large marble. Warm it in your hands for a minute, then knead, fold, twist, and roll it for several minutes, until it feels smooth and flexible and no longer cracks when bent. If it crumbles, keep kneading. It usually comes together after a few minutes of warmth and pressure. If it stays very crumbly, mix in a small piece of softer clay or use a clay softener made for that brand. Do not add oil, lotion, or water, which can change how the clay bakes. If the clay feels too soft and sticky, let it rest, or mix in a small piece of firmer clay.
Condition each color separately. Clean your hands and the work surface between colors, especially when moving from a dark color to a light one, because dark residue will muddy light clay. Well conditioned clay gives smoother, stronger, and more even beads.
Forming Beads: Round, Disc, and Patterned
Start with round beads. They are the easiest to make evenly and they string well. Roll a piece of conditioned clay into a smooth ball between your palms with even pressure and a circular motion. If the ball cracks, the clay needs more conditioning. If it feels lumpy, roll longer, or start again with a smaller piece.
Aim for beads about 8 to 10 millimeters in diameter for a first bracelet, roughly the size of a small pea to a chickpea. Larger beads, 12 millimeters or more, make a chunkier, heavier bracelet and are easier to handle. Smaller beads, around 6 millimeters, look delicate but are harder to pierce and string, and they increase the small parts concern around young children.
Consistency matters more than perfection. Make one bead you like and keep it beside your work as a template. Compare each new bead to it and add or remove a tiny piece of clay as needed. Slightly imperfect beads of similar size look intentional. Beads of wildly different sizes look uneven and sit unevenly on the wrist.
Pierce each bead while it is still soft. Push a toothpick, skewer, or bead tool straight through the center, rolling the bead gently as you pierce to help it stay round. Make the hole large enough for the elastic cord to pass through twice, because the ends will be tucked back into a bead after knotting. A toothpick hole is usually large enough for 0.7 millimeter cord. For 1 millimeter cord, a slightly larger tool such as a wooden skewer may be needed. If the bead distorts, roll it gently back into shape while keeping the hole open.
Disc beads, also called rondelles, are a good second shape. Roll a ball, flatten it gently into a disc, and pierce through the center from flat side to flat side. The flat sides give a clear entry and exit point, so disc beads are slightly easier to pierce evenly, and they stack well. Tube beads, made by rolling clay into a short cylinder and piercing it lengthwise, work well as accents.
For pattern, start with marbling. Twist two conditioned colors together lightly and roll them into a ball without fully mixing them. The result is a swirled, stone like effect, and every bead is different. Speckling, made by pressing tiny pieces of a contrasting color into a base bead and rolling gently, gives a confetti effect. Striping, made by wrapping thin snakes of clay around a base bead, gives a bolder effect but takes more patience. Marbling is the most forgiving of the three.
Baking Beads Correctly
Place pierced beads on a parchment lined tray or ceramic tile dedicated to clay, with space between them so they do not touch and fuse together. Baking beads directly on the tray, with the holes running horizontally, works well. Beads pierced on toothpicks can also be baked resting on supports so the holes stay round, but remove the toothpicks carefully after baking because they can stick slightly.
Bake exactly according to your brand instructions. Polyform gives 275 degrees Fahrenheit for 15 minutes per 1/4 inch of thickness for many Sculpey products, while Staedtler gives 230 degrees Fahrenheit for about 30 minutes for FIMO. That contrast is the point. The number to use is the one printed for your clay, not a range remembered from another brand.
Thicker beads need the time the manufacturer assigns to their thickness, because heat must reach the center. Do not overbake in an attempt to make beads extra hard. Overbaking can darken colors, and whites can yellow with excess heat. Underbaking leaves beads weak. Bake beads of very different thicknesses in separate batches rather than forcing one time to fit both.
When the time is up, remove the tray with oven mitts and let the beads cool fully on the tray. Do not string warm beads, because they can distort under pressure. Once cool, a properly baked bead should feel hard, not flexible or rubbery, and should not dent easily under a fingernail pressed into an inconspicuous spot, a check Polyform itself suggests on the underside of a test piece. If a bead feels soft or bends, return it to the oven for additional time at the correct temperature for your brand. Do not raise the temperature sharply, because that risks burning the clay.
If a bead cracks during baking, the usual causes are air trapped during conditioning, uneven thickness, or heating that was too rapid or too hot. Condition more thoroughly next time and confirm with a thermometer that the oven is not overshooting during preheating. For a bracelet, replace a cracked bead rather than patching it, because a repair can remain its weakest point.
Stringing a Bracelet That Lasts
Measure the wrist with a flexible tape or a piece of string wrapped snugly, not tightly, around the wrist bone. Add about half an inch to one inch for comfort and movement. Beads add bulk, because they sit around the wrist rather than flat against it. A bracelet that is too tight puts constant stress on the elastic and breaks sooner. One that is too loose slides off or catches on things. About seven to seven and a half inches is a common starting point for many adults, but measure rather than assuming.
Cut a piece of elastic cord about 12 inches long to leave room for handling and knotting. Lay the beads out on a tray first and check the pattern before stringing. A simple repeating pattern, such as three main color beads followed by one accent bead, is easy to follow and looks polished. A random arrangement can also work, especially with marbled beads, but check from a short distance so one side does not end up carrying all the dark beads.
String the beads, then hold the ends together and wrap the unknotted bracelet around the wrist to check the fit. Adjust now by adding or removing beads. It is much easier before knotting than after.
To knot, tie a firm overhand knot, then a second overhand knot on top of it, pulling firmly without stretching the elastic to its limit. If you use glue, use a small amount of jewelry glue made for elastic cord, follow its instructions, use it with ventilation, and let it dry fully.
To hide the knot, thread one cord end through the bead next to the knot and the other end through the bead on the other side, so the knot tucks inside a bead. Trim the excess close to that bead, but leave a tiny tail tucked inside rather than cutting flush against the knot, because a flush cut can let the knot slip. Plan for this while piercing: keep one bead with a larger hole next to where the knot will sit, as a hiding bead. Stretch the finished bracelet gently over your hand a few times and check that the knot holds before wearing it for a day.
Troubleshooting
Beads that crack after baking were usually under conditioned, contained trapped air, or were baked too cool for too short a time. Condition longer and verify the oven temperature with a thermometer rather than trusting the dial.
Beads that yellow or darken, especially whites, were usually baked too hot or too long. Confirm the real temperature with a thermometer and do not exceed the manufacturer temperature.
Beads with closed holes were usually pierced too small, or the holes narrowed as the clay softened in the heat. Pierce with a slightly larger tool and check the holes once the beads are cool. An adult can reopen a narrowed hole carefully with a hand bead reamer or needle tool. Do not hand a child a sharp tool for this fix.
Bracelets that break quickly usually had elastic that was too thin, a knot that slipped, or sharp hole edges that cut the cord. Use thicker cord for larger beads, tuck the knot as described above, and smooth rough hole edges gently with a small file.
Bracelets that feel stiff usually have beads that are too large, are strung too tightly, or are all one shape. Add smaller spacer beads, leave a little slack, and mix round and disc beads.
Bracelets that look muddy usually mixed too many dark colors or carried residue from one color to the next. Clean hands between colors, limit the palette, and use pale beads as separators.
Variations, Gifts, and Care
Once round beads work, try a gradient. Mix a bright color with white in different proportions to create shades from deep to pastel, then string them in order for an ombre bracelet. Metallic clay makes effective accent beads because it catches light. A charm can be hung from a jump ring between beads, but it must be attached securely so it cannot fall off and become a loose small part.
For gifts, a set of two or three coordinating bracelets looks more intentional than a single bracelet and gives the recipient stacking options. Add a short care note. Keep bracelets away from water, perfume, and harsh chemicals, which can dull a varnish and weaken elastic. Store bracelets flat rather than hanging, so the elastic is not stretched while stored. If the elastic later feels loose or looks frayed, restring the bracelet rather than waiting for it to break and scatter beads.
For seasonal bracelets, keep the same method and change only the colors: pastels for spring, brights for summer, warm oranges and browns for autumn, and deep reds, greens, and metallics for winter holidays.
For children, use larger beads, bright colors, and a simple pattern, and supervise the stringing and knotting. That supervision does not change the small parts rule for younger children in the home. Keep the work, the spare beads, and the finished bracelet out of their reach when the project is not actively supervised.
Frequently Asked Questions
Do I need a kiln?
No. Polymer clay hardens in a home oven at a low temperature when it is baked following the brand instructions. Ceramic clay needs a kiln. Polymer clay does not, which is one reason it is recommended for beginners.
Is polymer clay safe for children?
Polymer clay is a craft material, not a toy. Children should use it only with adult supervision, hands should be washed after use, and baking should be completed by an adult. Keep small pieces and loose beads away from babies and toddlers, because small beads are a choking hazard for young children. Follow the safety information for the specific brand you buy, because recommended ages differ by product.
Can I bake polymer clay in a microwave or with food?
No on both counts. Never bake polymer clay in a microwave. Never bake it at the same time as food, and never use a tray, tile, or tool for food after it has been used for clay. Bake it in a conventional oven or toaster oven, at the manufacturer temperature and time for your brand, with good ventilation.
Can I paint polymer clay beads?
Yes, after baking and cooling, using acrylic paint, with a compatible sealant afterward if you want extra durability. Painting before baking is not recommended, because most paints do not handle baking temperatures well. Precolored clay is easier for a first bracelet.
How long do clay bead bracelets last?
With correct baking, suitable elastic, and a secure knot, a bracelet can last through months to years of regular wear, though elastic eventually stretches and should be replaced. Restring it if the elastic feels loose or frayed rather than waiting for it to break.
Can I use air dry clay instead?
Air dry clay can be made into beads, but it shrinks as it dries, is more fragile, needs sealing to resist water, and its holes can narrow or crack as it dries. The baking instructions in this guide do not apply to it. For a first bracelet, polymer clay is more predictable.
Sources & references
- Polyform Products Company, maker of Sculpey, Frequently Asked Questions and product baking instructions. Used for baking many Sculpey products at 275 degrees Fahrenheit for 15 minutes per 1/4 inch of thickness, the direct instructions not to use a microwave oven and not to exceed the recommended temperature or baking time, the advice to use an oven thermometer because many ovens run hotter than the dial setting, the advice to use good ventilation while baking such as an oven hood fan, the instruction not to ingest clay, and the instruction not to make items that will be used to hold or serve food or beverages.
- Staedtler, maker of FIMO, product instructions for FIMO oven hardening modeling clay. Used for baking FIMO at 230 degrees Fahrenheit for about 30 minutes, for not exceeding the stated temperature, for ensuring good ventilation when baking in the oven, for using an oven rather than a microwave, and for FIMO not being food and not to be ingested. The contrast with the Sculpey temperature is the evidence in this article that baking instructions are brand specific.
- United States Consumer Product Safety Commission, Toys safety education and small parts guidance. Used for the ban on toys and other articles intended for children under three years old that are or have small parts, or that produce small parts when broken, for small parts presenting a choking, aspiration, and ingestion hazard, and for keeping small balls and toys with small parts away from children younger than age three.


