Short answer
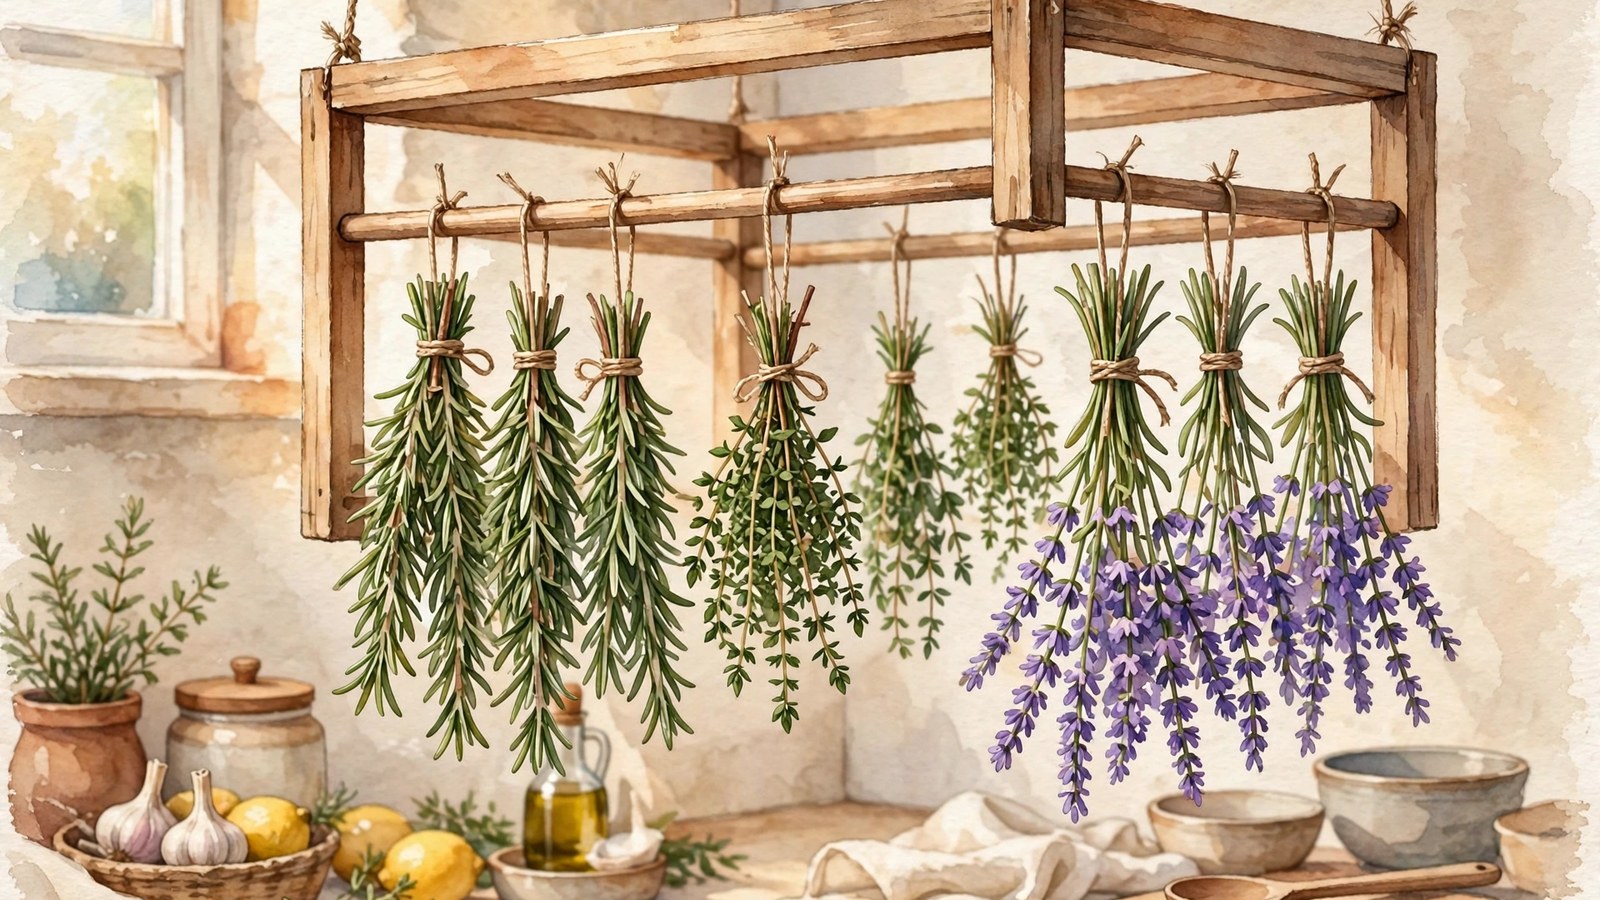
- Build the rack from a clean, sturdy, unfinished wooden frame, stretch three or four taut lines of cotton string across it, and hang it in a warm, dry, shaded spot with steady airflow, away from the stove and the sink. Harvest herbs in mid morning after the dew has evaporated and just before the flowers first open, tie them in small loose bundles of about four to six stems, and hang the bundles upside down without touching each other. Most bundles take one to two weeks to air dry. Herbs are ready when the leaves are crispy and crumble easily between your fingers and the stems break when bent instead of bending. Discard any bundle that shows mold or smells musty. Strip the leaves, keep them whole in clean airtight jars away from heat and light, and label each jar with the herb name and the drying date. Dried herbs keep up to about one year, with the best flavor earlier.
Introduction
A wooden frame herb drying rack turns a spare frame, some string, and a few small hooks into a practical kitchen tool. Bundles hang from lines stretched across the frame, so air can reach them on all sides, they stay out of direct sunlight, and you can see at a glance which bundles look ready. Because the rack hangs on a wall or inside a pantry door, it also stays in use in a way that a tray hidden in a cupboard often does not.
This guide walks through choosing and preparing a frame, building the rack step by step, harvesting and bundling herbs correctly, and judging doneness by touch rather than by the calendar alone. It also covers which herbs air dry well, which ones do better in a dehydrator or the freezer, and how to store dried herbs so the flavor you worked to keep is still there months later. The herb drying and food safety guidance was checked against the National Center for Home Food Preservation, Penn State Extension, NC State Extension, and the University of Minnesota Extension on 31 October 2026.
Why a Frame Rack Works for Air Drying
Herbs dry well when three conditions are met at once: moving air, low humidity, and shade. Penn State Extension sums up the requirement plainly: heat, low humidity, and air movement are needed to dry herbs. A frame rack supports all three. When bundles hang from horizontal lines, air moves around each bundle instead of pooling under a pile of leaves on a tray. That matters because trapped moisture is what leads to musty smells and mold. A frame also lifts herbs off counters, where they can be knocked, splashed, or crowded by other kitchen work.
A frame rack is flexible in a way fixed equipment is not. You can hang two bundles one week and eight the next, move the whole rack to a drier room if the kitchen turns humid, and take it down when the garden season ends. Compared with a dehydrator, it costs little, uses no electricity, and needs no storage space of its own. Compared with laying herbs flat on paper, it saves counter space and dries bundles more evenly, because leaves are not pressed against a surface.
The limit is worth stating plainly. Air drying suits a dry, well ventilated indoor space. NC State Extension advises drying herbs indoors, noting that ultraviolet rays from the sun and moisture from dew and frost can discolor and severely reduce the quality of many herbs. In a very humid home, or during a damp season, bundles can dry too slowly, and slow drying is where mold starts. If leaves still feel cool, limp, or damp after two weeks, or if you see any mold at any point, discard those bundles. Drying does not rescue herbs that were already spoiled, and removing visible mold does not make a moldy bundle safe.
Choosing and Preparing a Wooden Frame
Start with a frame that is sturdy, clean, and large enough for the herbs you actually grow or buy. An old picture frame with the glass and backing removed, a simple wooden frame from a craft store, or a frame built from four lengths of pine can all work. A frame roughly 18 by 24 inches is a good starting size for a household rack. It holds several bundles without crowding and is still light enough to hang safely. A much larger frame becomes heavy once herbs, string, and hardware are added, and it needs stronger wall fixings.
Check the frame before you use it. It should be dry, free of mold, splinters, and peeling paint, and strong at the corners. If you are reusing an old frame, clean it with a damp cloth, let it dry fully, and sand any rough edges lightly. Do not use a frame with chipped or peeling paint of unknown age, a frame that smells strongly of chemicals, or a frame that has been stored somewhere damp and shows mold. Herbs are food, and the rack that holds them should be as clean as any other food contact surface in your kitchen.
The simplest finish is no finish at all. Bare, unfinished wood is fine for a rack that hangs in a dry room, and it avoids any question about a coating near food. If you choose to paint or seal the frame, follow the product label, let the finish cure fully for at least the time the label states, and longer if the frame still smells of finish, and hang herbs from string so leaves do not rest directly on a coated surface. When in doubt, leave the wood bare.
You will also need a few simple supplies:
- Strong cotton string or twine for the lines and for tying bundles
- Small screw in hooks, cup hooks, or eye screws
- A drill or screwdriver, plus a pencil and a ruler
- A wall hook or picture hanging hardware rated for the weight of the finished rack
- Small scissors or garden snips for harvesting stems
- Labels or tags for bundles and jars
Keep all hardware clean and dry, and do not use rusted hooks, which can stain stems and weaken over time.
Building the Rack, Step by Step
Step 1: Mark the lines
Decide how the frame will hang. Most frame racks hang flat against a wall or from two hooks, with the open center facing the room, and that orientation gives good airflow. Lay the frame face down on a clean surface and mark where the horizontal lines will go. Three or four lines, spaced evenly from top to bottom, work well for a medium frame. Leave at least four inches between lines so hanging bundles do not touch the line below. Crowded bundles dry slowly and unevenly.
Step 2: Fit the hooks and string the lines
Screw a small hook or eye screw into the inside edge of the frame at each marked point, one on each side for each line. Turn them in firmly by hand or with a screwdriver, taking care not to split the wood. If the wood is thin, drill a small pilot hole first. Stretch string or twine tightly across the frame from one hook to the other and tie it off securely. The line should be taut enough that a bundle does not pull it into a sag. Trim the excess string and press each line gently in the center. If it gives more than a small amount, tighten it or replace it with a shorter length.
Step 3: Test the empty rack before adding herbs
Hang the empty rack and leave it overnight, then check that the hooks, cords, and wall fixings still hold firmly before you add herbs. Use wall fixings suited to your wall type, because a hook that holds in one wall material may not hold in another, and a falling rack can damage dishes or injure someone below it. If you are unsure about fixings, ask at a hardware store and tell them the weight of your frame and your wall material.
For a ceiling hung variation, attach two cords to the top corners so the frame hangs vertically in the air rather than flat against a wall. Air reaches both sides of the bundles in this version, which suits a pantry well. It needs a secure ceiling hook and a spot where the rack will not swing into a wall or a light fixture.
Step 4: Choose the hanging spot
Hang the rack away from the stove, where heat and steam work against drying, and away from the sink splash zone. A spot with indirect light and steady airflow is ideal. Direct sunlight is not a bonus here. It fades color and flavor, so shade matters more than brightness. For a household with children or pets, hang the rack high enough that small hands and paws cannot reach the bundles. Herbs that fall to the floor should be discarded, not returned to a jar.
Harvesting and Preparing Herbs for Drying
Timing decides much of the flavor. Penn State Extension advises that most herbs are best for drying just before the flowers first open, that new leaves at the tip of the plant carry the most concentrated flavor, and that herbs hold more of their essential oils when harvested on a sunny day in mid morning after the dew has evaporated. NC State Extension gives the same window in shorter form: harvest early in the morning, after the dew dries, but before the heat of the day, and harvest foliage herbs before flowering, because leaf production declines afterward. Use scissors to cut stems just above a leaf or a pair of leaves, and take only healthy stems with no yellowing, spotting, insect damage, or mold. Discard any stem that looks diseased or wilted. Drying concentrates flavor, but it cannot improve poor quality leaves.
Wash herbs only if they need it. If they are clean and dry from the garden, skip washing, because added moisture slows drying. If they are dusty or carry soil, rinse them gently under cool running water, shake off the excess, and pat them dry with a clean towel, following the rinse, shake, and pat dry handling that both the National Center for Home Food Preservation and Penn State Extension describe. Then spread them on a clean towel until no surface moisture remains. Starting dry is one of the simplest ways to get a good result.
Sort herbs by type before you bundle them, and keep different herbs in separate bundles with a label on each. Low moisture, sturdy herbs such as rosemary, thyme, oregano, sage, and bay are the natural rack candidates. NC State Extension lists sage, thyme, summer savory, dill, and parsley as easy to dry. High moisture herbs need more care. Penn State Extension warns that basil, tarragon, lemon balm, and the mints have a high moisture content and will mold if they are not dried quickly, and NC State Extension adds that basil, tarragon, and mints may mold and discolor if they are not dried quickly. Those herbs can still be dried, but they belong in small bundles in the driest spot you have, or in a dehydrator, as the next sections explain.
Bundle size matters more than most beginners expect. Tie small, loose bundles of about four to six stems at the base with string. A thick bundle traps moisture in the center even when the outer leaves look dry, and the center is where mold starts. If a bundle feels dense or heavy, split it in two. Tie firmly enough that the bundle holds together as stems shrink during drying, but not so tightly that air cannot move through it. A loop of string that you can tighten again after a few days works well, because stems narrow as they lose water.
Hanging, Drying Time, and Checking Doneness
Hang each bundle upside down from a line on the rack with a small clip, a loop of string, or a hook. Space the bundles so they do not touch. Where two bundles press together, the contact point stays damp longer than the rest, and that is where problems begin. Leave the rack in a warm, dry, shaded spot with steady airflow. The University of Minnesota Extension gives the working range for this method: allow 7 to 14 days for air drying. A gentle fan on a low setting, pointed near the rack rather than directly at the herbs, can help in a still room without blowing leaves loose.
Do not rush the process with high heat. A rack in a hot attic or above a radiator can dry the outside of leaves while the inside stays moist, and excess heat costs aroma. Patience gives a more even result.
Check bundles every few days. Look at the color, feel the leaves, and smell for any musty or off odor. Judge doneness by the test the primary sources agree on. The National Center for Home Food Preservation states that herbs are dry when they crumble and stems break when bent. Penn State Extension states that herbs are sufficiently dry when leaves are crispy and crumble easily between the fingers, and that making sure herbs are completely dry prevents mold growth during storage. NC State Extension states the same test: herbs are sufficiently dry when they are brittle and crumble easily. If a leaf feels cool, leathery, or soft, it still holds moisture and needs more time. If a stem bends without snapping, give the bundle several more days. The crumble and snap test is more reliable than any date on a calendar.
If you notice mold, a musty smell, or dark damp patches at any stage, discard the affected bundle entirely. Do not pick off moldy leaves and keep the rest, and do not try to save a bundle by heating it. The United States Department of Agriculture Food Safety and Inspection Service explains that some molds can produce poisonous substances called mycotoxins, that mold can grow roots below the visible surface of a food, and that food heavily covered with mold should be discarded. After discarding a moldy bundle, check neighboring bundles carefully and improve airflow before hanging a new batch.
When Air Drying Is Not the Best Choice
Air drying is excellent for sturdy herbs, but it is not the best method for every herb or every home. In a humid climate or a damp house, a food dehydrator gives more consistent results, especially for the high moisture herbs named above. The National Center for Home Food Preservation gives the settings to use: preheat the dehydrator with the thermostat set to 95 to 115 degrees Fahrenheit, and in areas with higher humidity, temperatures as high as 125 degrees Fahrenheit may be needed. Rinse the herbs under cool running water, shake off excess moisture, place them in a single layer on the trays, and expect drying times of about 1 to 4 hours, checking periodically. Penn State Extension gives a closely matching dehydrator range of 95 to 110 degrees Fahrenheit. Herbs dried this way are done by the same test: they crumble, and stems break when bent. Follow your dehydrator manual alongside this guidance.
Freezing is the better choice for herbs whose fresh flavor matters most, such as basil, cilantro, and parsley for sauces, soups, and cooked dishes. The University of Minnesota Extension treats drying and freezing as the two main preservation methods and notes that the best method depends on the herb and its intended use. Frozen herbs go limp when thawed, so they suit cooked dishes rather than garnishes, but they often keep a brighter flavor than an air dried version of the same tender herb.
Some herbs are simply better used fresh. Chives lose much of their character when dried, and delicate flowers kept for garnish hold their color and shape better pressed for decoration than dried for cooking. Knowing when not to dry is part of good herb care. A rack that holds only herbs that dry well gives you jars you actually reach for.
If you grow herbs for tea, such as lemon balm or mint, dry and store them separately from cooking herbs and label them clearly. Tea herbs and cooking herbs can look alike once dried, and a mix up changes a dish or a drink in an unwelcome way.
Stripping, Conditioning, Storing, and Using Dried Herbs
Once bundles pass the crumble and snap test, strip the leaves from the stems over a clean tray or a large bowl. Work gently so leaves stay mostly whole rather than turning to dust. NC State Extension advises storing the leaves in rigid containers with tight fitting lids and, to preserve full flavor, avoiding crushing the leaves until you are ready to use them. Whole leaves expose less surface to air and hold flavor longer. Discard the stems, unless you keep a specific herb stem for a stock or a bouquet garni, in which case store it separately and label it.
Before a large batch goes away for months, condition it. Put the dried leaves in a jar filled about three quarters full, close it, and check it daily for several days, shaking it gently and looking for condensation inside the jar, clumping, or a damp smell. The University of Minnesota Extension gives the underlying rule in short form: re dry herbs if moisture forms. If you see condensation, the batch was not fully dry, so return it to the rack or the dehydrator until it passes the crumble test again. Conditioning takes a little patience, but it catches the one damp portion that could spoil a whole jar.
Store dried herbs in clean, dry, airtight containers away from heat, light, and moisture. Glass jars with tight lids work well because you can see the contents and check for change. Keep jars in a cool pantry or cupboard, not above the stove, where heat and steam degrade flavor. The University of Minnesota Extension states that dried herbs keep up to one year when stored in airtight containers away from heat and light, and NC State Extension gives the matching instruction to store dried herbs in a cool, dry place away from sunlight, moisture, and heat. Label each jar with the herb name and the date it was dried. Flavor fades before safety does, so use the aroma test alongside the date: crush a little between your fingers, and if the smell is faint, musty, or off, replace the jar.
Use dried herbs with a simple conversion as a starting point. Dried herbs are more concentrated than fresh because the water is gone, and extension guidance puts the working ratio at about one teaspoon of dried herb for one tablespoon of fresh herb, roughly three parts fresh to one part dried. Taste and adjust, because strength varies with variety, harvest timing, and drying conditions. Add dried herbs early in cooking so they have time to soften and release flavor, rather than sprinkling them on at the end as you would fresh leaves. For salads and other raw dishes, fresh herbs usually work better.
Variations for Different Spaces
A small frame hung inside a pantry door suits a household that dries only a few bundles at a time. A frame with fine mesh stretched across the back can catch loose leaves that fall from bundles, so nothing is lost, as long as the mesh stays clean and dry. Two frames hinged together like a book double the capacity in a narrow space, but they need careful spacing so air still reaches the inner faces.
For renters, a rack that hangs from a removable hook or a tension rod avoids wall damage. Test the hook weight rating with the empty frame first, and never hang a rack from a curtain rod that was not designed to carry weight. In spring and summer, when the garden is generous, you may fill the rack weekly. In autumn, dry a final batch for winter cooking. In winter, the same frame can hold store bought bundles. If you also use a frame for dried flowers for decoration, keep decorative items strictly separate from food herbs, clean the frame between uses, and label which bundles are for eating and which are for display.
Troubleshooting Common Problems
If bundles dry unevenly, with outer leaves crisp and inner leaves soft, the bundle is too thick or too crowded. Split it, increase the spacing, and improve airflow, then give it more time. If leaves lose color quickly, the rack is probably in too much light, so move it to a shadier spot. If herbs smell musty, humidity is likely too high or a bundle was hung while still damp. Discard any musty bundle, dry the next batch fully before hanging, and use a dehydrator for humid weeks.
If stems slip from their ties as they shrink, retie the bundles after the first few days, when shrinkage is most noticeable. A loop you can tighten handles this better than a fixed knot. If leaves fall constantly, the herb may be over dried or handled too roughly. Strip leaves over a tray so fallen leaves are collected, and handle bundles gently when you check them.
If insects appear, discard the affected bundles and clean the rack before hanging more herbs. Herbs harvested outdoors can carry small insects, and careful inspection before bundling reduces the risk. Do not spray insecticide on herbs meant for eating. Inspection, prevention, and discarding affected material are the safe responses.
Frequently Asked Questions
How long do herbs take to dry on a frame rack?
Most bundles take one to two weeks in a dry, ventilated indoor space, and the University of Minnesota Extension gives 7 to 14 days as the air drying range. Woody herbs and small bundles dry faster. Tender herbs, thick bundles, and humid rooms take longer. Use the crumble and snap test rather than the calendar to judge doneness.
Can I dry herbs in the kitchen?
Yes, if the spot is dry, shaded, and away from the stove and the sink, and the room has decent ventilation. A steamy kitchen without airflow is a poor choice. If your kitchen stays humid, use a drier room such as a pantry or a spare room instead, because slow drying in damp air is what allows mold to start.
Do I need to wash herbs before drying?
Only if they are dirty. Clean, dry garden herbs can go straight onto the rack. If you rinse them, follow the handling the National Center for Home Food Preservation and Penn State Extension describe: rinse under cool running water, shake off excess moisture, and pat dry, then let all surface moisture disappear before bundling. Surface water slows drying and raises the risk of mold.
What herbs dry best on a rack?
Sturdy, low moisture herbs are the reliable choices: rosemary, thyme, oregano, sage, and bay, with dill and parsley also listed as easy to dry by NC State Extension. Basil, tarragon, lemon balm, and mints hold more moisture and can mold if they dry slowly, so give them the driest spot and the smallest bundles, use a dehydrator, or freeze them instead.
How do I know dried herbs are still good?
Crush a small amount between your fingers. If the aroma is strong and fresh, the herb is still useful. If the aroma is faint, dusty, or off, replace the jar. Dried herbs keep up to about one year in airtight containers away from heat and light, according to the University of Minnesota Extension, but flavor is the real test, and many jars are best replaced well before the year is out.
Can I use a dehydrator instead of the rack?
Yes, and for tender or high moisture herbs in a humid home it is often the better tool. Set the dehydrator to 95 to 115 degrees Fahrenheit, up to 125 degrees Fahrenheit in higher humidity, lay the herbs in a single layer, and check after 1 to 4 hours, using the guidance of the National Center for Home Food Preservation. The herbs are done when they crumble and the stems break when bent.
Keep reading: Kitchen Pantry Organization by Zone: A System You Can Actually Keep Up
Sources & references
- National Center for Home Food Preservation, Herbs, drying guidance. Used for dehydrator drying at 95 to 115 degrees Fahrenheit, up to 125 degrees Fahrenheit in higher humidity, rinsing under cool running water and shaking off excess moisture, placing herbs in a single layer on dehydrator trays, drying times of 1 to 4 hours, and the doneness test that herbs are dry when they crumble and stems break when bent.
- Penn State Extension, Let us Preserve: Drying Herbs. Used for heat, low humidity, and air movement being needed to dry herbs, most herbs being best for drying just before the flowers first open, harvesting in mid morning after the dew has evaporated when essential oils are higher, rinsing stems in cool water and patting dry, basil, tarragon, lemon balm, and the mints having a high moisture content and molding if not dried quickly, dehydrator temperatures of 95 to 110 degrees Fahrenheit, and herbs being sufficiently dry when leaves are crispy and crumble easily between the fingers.
- NC State Extension, Harvesting and Preserving Herbs for the Home Gardener. Used for harvesting early in the morning after the dew dries but before the heat of the day, harvesting foliage herbs before flowering, drying herbs indoors because ultraviolet rays and moisture can discolor and severely reduce quality, sage, thyme, summer savory, dill, and parsley being easy to dry, basil, tarragon, and mints molding and discoloring if not dried quickly, herbs being sufficiently dry when brittle and crumbling easily, storing leaves in rigid containers with tight fitting lids, avoiding crushing leaves until use, and storing dried herbs in a cool, dry place away from sunlight, moisture, and heat.
- University of Minnesota Extension, Growing Herbs in Home Gardens and Preserving Herbs by Freezing or Drying guidance as summarized in extension materials. Used for air drying taking 7 to 14 days, dehydrator drying at 95 to 115 degrees Fahrenheit, removing leaves from stems before storage, storing dried herbs in airtight containers away from heat and light, dried herbs keeping up to one year, and re drying herbs if moisture forms.
- United States Department of Agriculture, Food Safety and Inspection Service, Molds on Food: Are They Dangerous. Used for some molds producing poisonous substances called mycotoxins, mold roots being able to grow below the visible surface of a food, and food heavily covered with mold being discarded rather than trimmed and kept.


