Short answer
- Empty the pantry, sort what you own into broad piles, and discard anything damaged, leaking, or clearly spoiled. Then assign each category one zone: everyday cooking, grains and pasta, canned and jarred goods, baking, breakfast, snacks, drinks, and backstock. Place daily zones at eye level, heavy zones low, and light or rarely used zones high. Inside every zone, store food cool and dry, put newer packages behind older ones so the oldest is used first, and label decanted food with its contents and the date from its original package. Choose containers only after the zones are planned, leave about a fifth of each zone empty for the next shop, and hold the system together with a five minute weekly tidy and a seasonal review.
Introduction
Kitchen pantry organization by zone means giving every category of food one home, chosen by how often you use it, how heavy it is, and how it needs to be stored. Most pantries do not fail because they are too small. They fail because everything was stored wherever there happened to be space when it was unpacked. Baking supplies end up beside canned soup, snacks migrate to three different shelves, and the item you need is always behind something else. A zone system fixes that pattern, and it also makes safe storage easier, because rotation, date checks, and container checks happen inside one category at a time instead of across a jumbled shelf.
This guide explains how to empty and sort honestly, how to plan six to eight core zones, where to place each zone, and how to store food inside those zones using guidance from the United States Department of Agriculture Food Safety and Inspection Service, the Food and Drug Administration, and the FoodKeeper resource. It then covers containers, a step by step setup order, a light weekly maintenance habit, and the special cases of small pantries, shared kitchens, and allergy needs. The aim is not a pantry that photographs well for one day. The aim is a pantry you can still use calmly on a busy weeknight, months later.
Start by Emptying and Sorting Honestly
A zone system works best from a clean slate. Choose a time when you can work without interruption for an hour or two, and take everything out of the pantry. Wipe the shelves, and check each package as it comes out. Be honest about items you will never use. A specialty ingredient bought for one recipe two years ago, or a snack nobody liked, is taking space from things you use every week.
As you empty, sort items into broad piles on a table or counter: grains and pasta, canned goods, baking, snacks, breakfast, oils and condiments, drinks, and anything that does not fit those piles. Do not worry about exact zones yet. The goal is to see what you actually have and which categories dominate. Most households discover they own far more of one category, often snacks or canned goods, than they realized, and far less of another. That discovery should shape zone sizes later.
While sorting, note which items you reach for daily, weekly, and rarely. Daily items need the most accessible spot. Weekly items need a clear, easy spot. Rare items can go higher, lower, or further back. A system that puts rarely used items at eye level and daily items on a high shelf will fail, no matter how neat it looks on the first day.
This sorting pass is also the right moment for a safety check. Set aside any can that is bulging, leaking, heavily rusted, or deeply dented, and any package with holes, water damage, or signs of insects or webbing. Food Safety and Inspection Service guidance is direct on this point: do not keep or taste food from containers showing those warning signs. Questionable items do not earn a zone. They leave the pantry during the sort, so they cannot drift back onto a shelf by habit.
Measure your pantry before buying any containers. Note shelf heights, depths, and widths, and any awkward spots such as deep corners or narrow gaps. Containers that do not fit your shelves are worse than no containers, because they waste space and block the items behind them.
The Core Zones
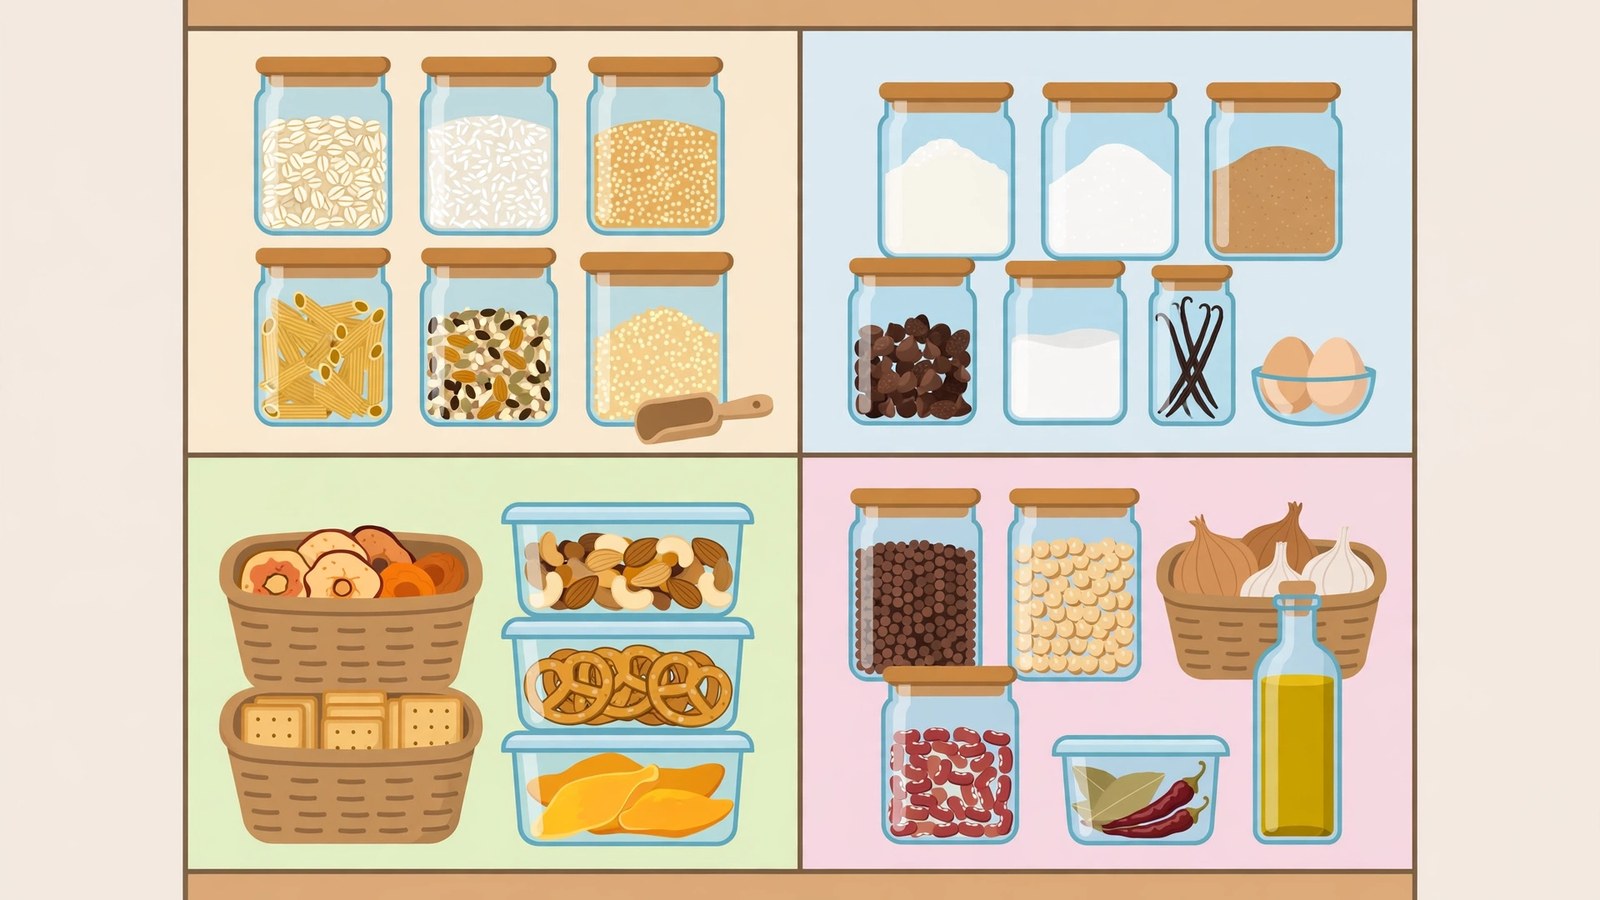
Most home pantries can be organized into six to eight zones. Adapt the list to your cooking habits. A household that bakes weekly needs a larger baking zone than one that never bakes, and a household with children may need a larger snack zone. A typical set is:
- Everyday cooking. Oils, vinegars, salt, pepper, common spices, soy sauce, and other condiments used in most meals. Place this zone near the preparation area, or at the front of the pantry.
- Grains, pasta, and rice. Pasta, rice, oats, and other grains. These items are bulky, so this zone needs larger containers or deeper shelf space.
- Canned and jarred goods. Canned tomatoes, beans, soups, tuna, and jarred sauces. Heavy items belong on lower shelves, for safety and ease of lifting.
- Baking. Flour, sugar, baking powder, baking soda, cocoa, chocolate chips, and extracts, kept together so one baking session does not require searching several shelves.
- Breakfast. Cereal, oatmeal, pancake mix, jam, honey, and peanut butter or a similar spread. If children serve themselves, place this zone at a height they can reach without climbing.
- Snacks. Crackers, nuts, dried fruit, granola bars, and treats. A basket or bin for each person, or each type of snack, prevents snacks from spreading across the pantry.
- Drinks and extras. Tea, coffee, drink mixes, and specialty items such as broth powder or dried mushrooms.
- Backstock and bulk. Extra quantities of items already kept in a main zone, stored separately, higher, lower, or in another area, and used to refill the main zones.
You do not need all eight zones if your pantry is small. Combine zones sensibly, for example breakfast and snacks in one zone, or drinks with baking extras, but keep each combination consistent. The point is that each item has one predictable home, not a perfect number of zones. One home per item also stops duplicate buying: when the rice always lives in one place, an empty space there tells the truth at a glance, instead of a second bag hiding behind the soup.
Placing Zones in the Pantry
Zone placement should follow use, not alphabetical order. Put the zones you use most at eye level and within easy reach. Put heavy zones low, light and rarely used zones high, and zones for children at a height they can reach safely.
In a typical pantry with shelves from floor to ceiling, a workable vertical order is:
- Top shelves: Backstock, rarely used specialty items, and seasonal items such as holiday baking supplies. Keep these light, because lifting a heavy box down from above head height is unsafe.
- Eye level shelves: Everyday cooking, grains, and breakfast, the items reached for most often.
- Middle shelves: Baking and snacks, and the lighter part of the canned goods zone.
- Lower shelves: Heavy canned goods, bulk items, and large containers that are risky to lift from height.
- Floor or bottom shelf: Very heavy bulk items, or large appliances that live in the pantry. If onions or potatoes are stored here, keep them separate from each other, in a cool, dark, ventilated spot, and never in a sealed container.
If your pantry is a cabinet with a door rather than a walk in space, the same principles apply, but depth becomes the main challenge. Items at the back of a deep cabinet are easily forgotten, and forgotten items sit past their best quality. Pull out bins, turntables, or small baskets that slide forward can bring back items within reach. A turntable works well for oils, condiments, and spices, where many small bottles would otherwise hide each other.
For a pantry with doors, consider the inside of the door as a small zone for flat, light items such as a spice rack or small baskets for packets. Check that door mounted storage does not prevent the door from closing or overload its hinges, and follow the weight guidance given by the maker of any rack you fit.
Store Each Zone for Safety, Not Just Tidiness
A zone system is also a food storage system. The rules below come from the federal sources listed at the end of this article, checked on 30 October 2026, and are general information. Product labels and food safety authorities in your area govern any specific item.
Keep the pantry cool, clean, and dry. The Food Safety and Inspection Service describes shelf stable foods as foods that can be safely stored at room temperature, including canned and bottled foods, rice, pasta, flour, sugar, spices, and oils. It advises storing them in a cool, dry place, with temperatures below 85 degrees Fahrenheit best, and never above or beside the stove, under the sink, in a damp garage or basement, or in any place exposed to temperature extremes. It notes that temperatures over 100 degrees Fahrenheit are harmful to canned goods. In zone terms, a shelf above a hot stove may be convenient for oils and spices, but heat shortens quality, so a nearby cool cabinet is the better home.
Rotate with first in, first out. Place newer packages behind older packages of the same item, and use the older package first. This habit, often shortened to FIFO, works in every zone: the new bag of rice goes behind the open one, and the new cans of beans go behind the cans already there. A front row that never changes is a warning sign that older stock is aging at the back. The use first basket described later applies the same idea to opened items and items nearing their date.
Read dates as quality dates, with one clear exception. The Food Safety and Inspection Service states that, except for infant formula, product dating is not required by federal regulations, and that dates are not an indicator of a product safety. A Best if Used By date indicates when a product will be at its best flavor or quality, and it is not a purchase or safety date. A Sell By date tells the store how long to display a product, and a Use By date is the last date recommended for using a product at peak quality. The Food and Drug Administration supports Best if Used By as the standard quality phrase and advises examining foods past that date for signs of spoilage. A product changed noticeably in color, consistency, or texture may be best avoided, and spoiled food with an off odor, flavor, or texture should not be eaten. The exception is infant formula. Federal regulations require a Use By date on it, and the service advises not buying or using formula after that date, so formula does not belong in a casual backstock rotation. For ordinary goods, check dates at the seasonal review, move the soonest dated items to the front or the use first basket, and judge any past date item by its condition rather than by the date alone.
Give canned goods their own time frame and condition check. Unopened canned food stored cool and dry keeps its best quality for 12 to 18 months for high acid foods such as tomatoes and fruit, and for 2 to 5 years for low acid foods such as canned meat and most vegetables. That gap is why the canned zone deserves a date check more often than the grains zone. Condition matters as much as time. Discard cans that are leaking, bulging, heavily rusted, or deeply dented, especially where a deep dent falls on a seam, and never taste food from a suspect can to test it. A small dent on an otherwise sound can is treated differently from a deep dent you can lay a finger into, so look closely. Also read the storage line before shelving an unfamiliar can: some canned hams and seafoods are labeled Keep Refrigerated and are not shelf stable, so they belong in the refrigerator. Once a can is opened, refrigerate any unused portion in a clean glass or plastic container.
Protect dry goods from damp and pests. United States Department of Agriculture guidance on dry goods notes that dried mixes, rice, cereal, and pasta may mold if exposed to dampness, advises checking packaging for holes that could let moisture or bugs in, and recommends placing these foods in plastic or glass containers for extra protection. A tight fitting lid on flour, rice, or cereal is therefore not a styling choice. It is a barrier against damp and insects, and it only works if the container is clean and dry before filling and the food going into it showed no sign of infestation. If you find insects, webbing, or larvae in a dry good, discard that item, check neighboring packages in the same zone, and clean the shelf thoroughly before restocking. Do not spray insecticide in a food storage area. Prevention is the durable fix: inspect new purchases, seal dry goods promptly, and use older stock first. When you are unsure how long a specific item keeps its quality, check that item in FoodKeeper, the storage resource from federal food safety partners, instead of borrowing a time frame from a neighboring item.
Keep food apart from household chemicals. Store food separately from cleaners and other nonfood chemicals, and never place chemical bottles on a shelf above food, where a leak would fall onto packaging below. If your pantry doubles as a cleaning cupboard, give chemicals their own home outside the food zones during the reset.
Containers: Useful, but Not the Starting Point
Containers are often presented as the solution to pantry organization, but they are actually the second step. First decide the zones, then choose containers that fit those zones and your shelves. Buying containers before planning zones usually produces mismatched sizes that fit nothing well.
Useful container principles include:
- Clear containers for dry goods. Clear containers let you see how much is left without opening them, which helps with shopping lists and refilling. Choose containers with tight fitting lids for flour, sugar, rice, and cereal, to protect against pests and damp, for the reasons given in the safety section above.
- One shape, in several sizes. Rectangular containers from the same range stack and line up more neatly than a mix of shapes, and waste less shelf space than round ones.
- Label everything. Label each container with its contents and, where useful, the date from the original packaging. Labels prevent confusion between similar looking items such as flour and powdered sugar, or salt and sugar. Use removable labels so a label can be updated when the contents change.
- Baskets and bins for grouped items. Snacks, packets, and small items that do not decant well into jars are better kept in a labeled basket or bin, which keeps a category together and can be pulled out as one unit.
- Keep the original packaging information. When you decant food into a container, keep its cooking instructions, allergen information, and date. Cut out the relevant panel and tape it to the container, store it inside the lid, or photograph it and keep the photograph in a kitchen file. This matters for allergy safety and for cooking times, especially for rice, pasta, and baking mixes.
Do not decant everything. Items used quickly, or arriving in practical resealable packaging, may be better left in that packaging inside a labeled bin. The goal is a system you can maintain, not a pantry that looks uniform in a photograph but takes twenty minutes to restock after every shop.
Setting Up Each Zone, Step by Step
Once zones are planned and containers are chosen, set up in this order:
- Place backstock first. Put rarely used and bulk items on high or low shelves, out of the way of the daily zones.
- Place heavy zones low. Canned goods and bulk containers go on lower shelves, where they are safer to lift and less likely to cause an injury if they fall.
- Place daily zones at eye level. Everyday cooking, grains, and breakfast go where they can be seen and reached without a step stool.
- Fill containers and label them. Decant dry goods, label each container with its contents and date, and place containers in their zones. Apply first in, first out as you fill: older stock to the front, newer stock behind it.
- Add baskets for loose items. Place snack baskets, packet bins, and turntables in their zones, and label them as clearly as the containers.
- Create a use first spot. Choose a small basket, or the front section of one shelf, for items nearing their date, opened items, and small quantities left over. Check it whenever you plan meals.
Leave breathing room. A pantry packed to the edge looks tidy on day one and becomes chaotic the first time groceries arrive, because there is nowhere to put new items except in front of old ones, which breaks rotation at once. Aim for about twenty percent empty space in each zone, or at least one empty basket or container.
Maintaining the System
A zone system fails slowly, through small exceptions: a snack left on the baking shelf, a can placed in front of the grains, a new item with no zone at all. Maintenance is about catching those exceptions early, not about reorganizing from scratch.
- Put groceries away by zone immediately. Sort shopping bags by zone before putting anything away. This is the moment when first in, first out either happens or does not, because it is easiest to place a new can behind the old cans while your hands are already in that zone.
- One in, one out for backstock. When you refill a main zone container from backstock, write that item on the shopping list. When backstock runs out, the main zone will run out soon after, so the list stays accurate without a separate inventory.
- Quick weekly tidy. Spend five minutes once a week returning stray items to their zones, checking the use first basket, and wiping one shelf if it needs it. This is also when you are most likely to spot a leaking package or a damaged can early.
- Seasonal review. Every few months, check dates across the zones, reassess zone sizes, and adjust for changing habits, for example expanding the baking zone before the holidays. High acid canned foods reach the end of their best quality sooner than low acid ones, so they deserve the closer look.
- Involve the household. Show everyone who uses the pantry the zones and labels. A system only one person understands will be undone by everyone else, however logical it is.
If a zone consistently overflows, it is telling you something: the zone is too small, the household is buying too much of that category, or items from another zone are creeping in. Adjust the zone size, reduce purchasing, or give a subcategory a zone of its own.
Special Cases: Small Pantries, Shared Kitchens, and Dietary Needs
Small pantries need stricter zones, not looser ones. Combine zones but keep them distinct with labeled bins. Use vertical space with shelf risers, stackable containers, and door storage, but do not stack so high that items become unsafe to retrieve. If the pantry cannot hold everything, store rarely used items in another cool, dry cupboard, and keep only daily and weekly items in the main pantry.
Shared kitchens benefit from clear, labeled zones even more than single household kitchens do. Agree the zones together, label them, and keep shared staples in shared zones while personal items go in labeled personal bins. This reduces confusion and makes date and rotation checks a joint habit instead of one person chore.
Dietary needs and allergies require extra care. If a household member has a food allergy, store allergen free items in a separate, clearly labeled zone or bin, above allergen containing items where possible, so crumbs do not fall into safe foods, and use separate containers where appropriate. Keep the original allergen information accessible, as described in the container section. This article offers general organization advice only. For specific allergy management, follow guidance from a qualified health professional and from food safety authorities in your area.
A Simple Starting Plan
If a full overhaul feels overwhelming, start with one zone. Choose the zone that causes the most daily frustration, often snacks or everyday cooking, and organize just that zone: empty it, sort it, check dates and container condition, containerize what needs it, label it, and place it with older items in front. Live with that zone for a week. If it works, organize the next zone. Within a month, the whole pantry can be zoned without a single exhausting day.
Organizing by zone is not about a perfect pantry. It is about making the pantry match how you cook, shop, and eat, so that finding an ingredient, putting groceries away, and planning a meal all become easier, and safe habits such as rotation and date checks happen almost automatically inside each category. The system that survives is the one you can maintain in a normal, busy week.
Frequently Asked Questions
Do pantry dates mean food is unsafe after that date?
For most pantry foods, no. The Food Safety and Inspection Service states that, except for infant formula, dates are not an indicator of a product safety, and that a Best if Used By date marks best flavor or quality rather than a safety deadline. Judge a past date item by its condition: if it has changed noticeably in color, consistency, or texture, or has an off odor or flavor, do not eat it. Infant formula is the exception. Do not buy or use it after its Use By date.
How long do canned goods keep their best quality in the pantry?
Stored unopened in a cool, dry place, high acid canned foods such as tomatoes and fruit keep their best quality for 12 to 18 months, and low acid canned foods such as meat and most vegetables keep it for 2 to 5 years, according to Food Safety and Inspection Service guidance. Discard any can that is leaking, bulging, heavily rusted, or deeply dented. Some canned products labeled Keep Refrigerated are not shelf stable and belong in the refrigerator from the start.
What does first in, first out mean in a home pantry?
It means using the oldest package of an item first. When you unpack shopping, place newer packages behind the packages already in the zone, and cook from the front. It applies to cans, grains, cereal, and baking supplies alike. A use first basket helps for opened items and items nearing their date, because it gathers them in one visible place.
Should all dry goods be decanted into containers?
No. Decant the dry goods that benefit most, such as flour, rice, sugar, and cereal, into clean, dry containers with tight fitting lids, which protect against damp and pests, and keep the original instructions, allergen information, and date with the container. Items you use quickly, or that arrive in practical resealable packaging, can stay in that packaging inside a labeled bin.
Where should a pantry zone never be placed?
Never place food storage above or beside the stove, under the sink, or in a damp garage or basement, and avoid any spot exposed to temperature extremes. Food Safety and Inspection Service guidance puts the best storage temperature for canned and shelf stable goods below 85 degrees Fahrenheit and warns that temperatures over 100 degrees Fahrenheit are harmful to canned goods. Keep food separate from household cleaners, and never store chemical bottles above food.
Sources & references
- United States Department of Agriculture, Food Safety and Inspection Service, Shelf-Stable Food Safety. Used for the definition of shelf stable foods, some canned hams and seafoods being labeled Keep Refrigerated and not safe at room temperature, storing canned and shelf stable products in a cool, dry place with temperatures below 85 degrees Fahrenheit best, never storing them above or beside the stove, under the sink, in a damp garage or basement, or in places exposed to temperature extremes, temperatures over 100 degrees Fahrenheit being harmful to canned goods, checking the pantry regularly, discarding bulging, rusted, leaking, or deeply dented cans, the distinction between a small dent and a deep dent on a seam, refrigerating unused portions of canned food in a glass or plastic container, and product dating being for quality rather than safety.
- United States Department of Agriculture, Food Safety and Inspection Service, Food Product Dating. Used for product dating not being required by federal regulations except for infant formula, dates not being an indicator of product safety, Best if Used By indicating best flavor or quality and not being a purchase or safety date, Sell By being a store display date, Use By being the last date recommended for peak quality, the recommendation of Best if Used By to reduce confusion and waste, food remaining safe and wholesome past its date if handled properly until spoilage is evident, spoiled foods developing an off odor, flavor, or texture, can codes being closed dating for tracking and recall rather than a consumer date, and high acid canned foods keeping best quality for 12 to 18 months while low acid canned foods keep it for 2 to 5 years.
- United States Department of Agriculture, AskUSDA, How Do I Store Dry Goods? Used for shelf stable foods not requiring refrigeration while freshness and quality decline over time, storing canned goods in a cool, clean, dry place away from extreme heat or cold, dried mixes, rice, cereal, and pasta possibly molding if exposed to dampness, checking packaging for holes that could admit moisture or bugs, placing those foods in plastic or glass containers for extra protection, and using the FoodKeeper application for recommended storage times.
- United States Food and Drug Administration, Tips to Reduce Food Waste. Used for confusion over date labeling accounting for an estimated 20 percent of consumer food waste, manufacturers not being required by federal law to place quality based date labels on packaged food except for infant formula, the Food and Drug Administration supporting Best if Used By as the standard phrase for best flavor and quality, examining foods past that date for signs of spoilage, avoiding foods that have changed noticeably in color, consistency, or texture, and using the FoodKeeper App for storage information.
- FoodSafety.gov, FoodKeeper. Used for FoodKeeper providing storage guidance for hundreds of food and beverage items to maximize freshness and quality, as the item level check readers should use instead of applying a general time frame to a specific product.


