Short answer
- Measure your table, then plan a finished runner that runs the length of the table with a drop of about six to twelve inches over each end, or that stops at the table edges, and a width of about a third of the table width. Add one inch at each end and each side for hems. Wash and press the remnant first, following its care label. Cut straight, fold each edge over twice by half an inch, press each fold, and secure the hems with iron-on hem tape or fabric glue, testing the method on a scrap first. Let every hem cool or dry fully, press the runner again, and check each hem for lifting. Use trivets under hot dishes. Keep the runner away from open flame and candles. Never leave a hot iron or a plugged in hot glue gun unattended.
Introduction
A table runner is the quickest way to change the look of a dining table. It adds color down the center, gives the table a finished and dressed feel, and does it without the commitment of a full tablecloth. A no-sew runner made from fabric remnants does all of that for very little money, in an afternoon, with no sewing machine and no sewing skill required.
This guide shows how to turn remnants, the odd lengths left over from other projects or found in remnant bins, into a runner that looks intentional rather than improvised. The secret is not sewing skill. It is measurement, pressing, and neat hems, all of which can be done with an iron, iron-on hem tape, or fabric glue. A well pressed and straight runner with clean edges looks far better than a sewn runner with wobbly seams, and this project is built around getting those basics right.
One correction matters before you start. A fabric runner is a decorative layer. It is not a heat protector and it is not a trivet. Hot dishes still need trivets or hot pads, and the finished runner must be kept away from open flame and candles. Those safety rules are stated in full later in this article and they are not softened there, because fabric, hot irons, hot glue, and candle flames are the real risks in this project.
Remnants deserve a note of appreciation here. Fabric shops sell remnant lengths at a fraction of their original price, thrift shops sell tablecloths and curtains that can be cut down, and most sewing households have a drawer of pieces too good to throw away but too small for a garment. A runner uses those pieces well, because it needs a long and narrow rectangle rather than a large square, and several remnants can be combined into a patchwork or layered runner if no single piece is long enough. The safety guidance in this article was checked against the United States Consumer Product Safety Commission and the United States Fire Administration on 31 October 2026.
What Makes a Good Table Runner
A table runner should relate to its table. As a planning guide, it usually runs the length of the table plus a drop of about six to twelve inches over each end, though a shorter runner that stops at the table edges also works, especially on a round table. Width is usually about a third of the table width, enough to hold a centerpiece and the inner edges of place settings without crowding plates. Measure before you buy or cut.
Fabric choice shapes both look and function. Medium weight cotton, linen blends, and light canvas are practical, because they lie flat and press well. A runner for daily meals should be washable, while a holiday runner can be more delicate. Avoid very stretchy fabrics, which distort when pulled, and very slippery fabrics, which slide off the table, unless you plan to add a non-slip backing.
Pattern and color should work with the room, not compete with it. A bold runner can be the star of a plain table in a plain room, while a busy room usually suits a calmer runner. If your dishes are patterned, pick out one color from them. If they are plain, a patterned runner adds interest. Lay the fabric on the table with your usual dishes before you cut, because a fabric that looks wonderful on a bolt can look wrong next to your plates.
Working with Remnants
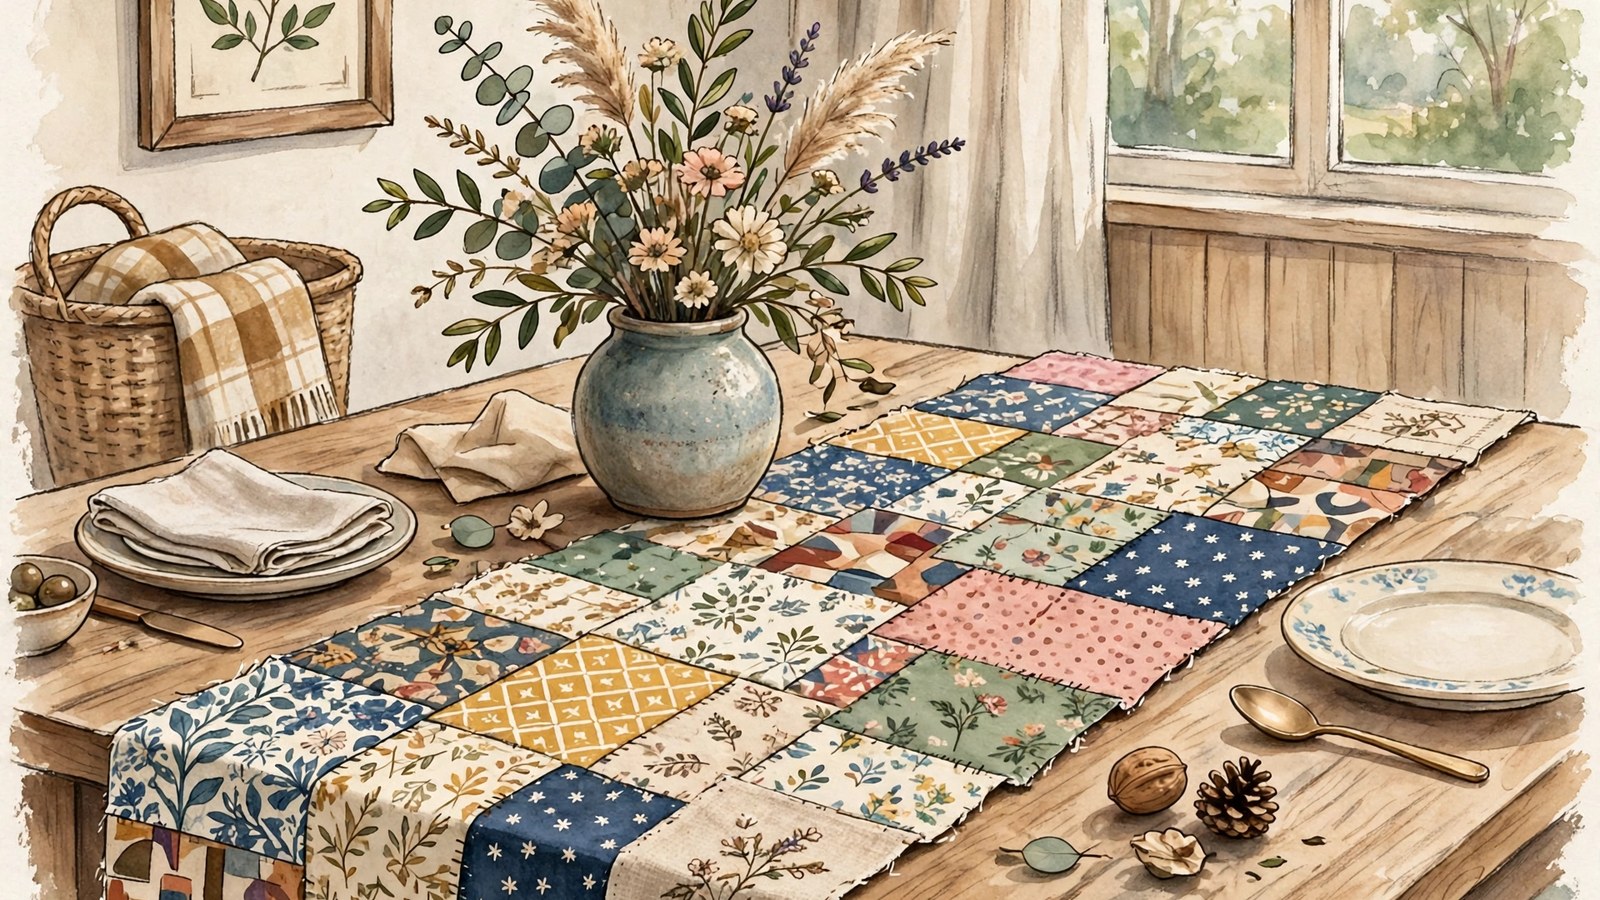
Remnants come in awkward sizes, and part of this project is making peace with that. Measure every piece, noting length, width, and pattern direction, before you decide on a design. A single remnant long enough for a full runner is simplest, but two or three remnants can be joined end to end with overlapping and glued seams, or layered, with a narrower patterned remnant centered on a wider plain one, for a two tone effect.
Check remnants for flaws before you commit. Faded patches, stains, thin spots, and uneven edges all show on a runner, where fabric is viewed up close. A small flaw near an edge can be cut away, and a flaw in the middle can sometimes be hidden under a centerpiece, but a large stain or faded patch in the center will always draw the eye. Wash and press remnants before cutting, following their care labels, so shrinkage happens before the runner is made, not after its first wash. In the United States, care instructions for textile products are governed by the Federal Trade Commission Care Labeling Rule, and the label on a remnant or on a garment you are cutting down is the maker guidance for washing, drying, and ironing that fabric without damage.
Pattern direction matters when joining pieces. Joining two pieces with patterns running in opposite directions looks accidental. Lay pieces side by side, step back, and check that patterns align in direction, even if they do not match exactly. For patchwork, deliberate contrast works, but random direction changes do not.
No-Sew Hemming Methods
Two no-sew methods cover most runners: iron-on hem tape and fabric glue. Hem tape is a strip of heat activated adhesive that bonds a folded hem when pressed with an iron. It is quick and neat, and it suits cotton and linen well. Fabric glue is a flexible adhesive made for fabric, applied in a thin line along a folded hem and left to dry. It suits fabrics that do not press well and gives more working time than hem tape, but it needs drying time and can stiffen a hem if overused.
Test your chosen method on a scrap of the same fabric first. Press or glue a small hem, let it cool or dry fully, then pull it gently, flex it, and, if the runner will be washed, wash the scrap and see how the hem holds. Read the product instructions carefully, especially iron temperature and pressing time for hem tape, because too cool an iron gives a weak bond and too hot an iron can scorch fabric or melt synthetic fibers.
A third option, fusible web, is a sheet version of hem tape that can bond two layers together, useful for a layered runner or for applique. It needs the same testing. Whichever method you choose, use it sparingly, because excess adhesive that squeezes out is hard to remove once set.
Do not treat a hot glue gun as an interchangeable substitute. Some makers use one for trim, but the nozzle and the molten glue are hot enough to burn skin on contact. If you use one, follow the hot glue gun safety rules in the safety section below in full. For hems, hem tape and fabric glue made for fabric are the better tools, because they are designed to flex with fabric.
Tools and Materials
You will need fabric remnants, sharp fabric scissors or a rotary cutter and mat, a ruler or measuring tape, a fabric marker or pencil, an iron and ironing board, iron-on hem tape or fabric glue, and a pressing cloth. Optional extras include non-slip shelf liner for backing, decorative trim, fabric paint or stencils, and a seam roller.
Choose an iron setting to suit your fabric, and always use a pressing cloth on delicate or dark fabrics to prevent shine or scorch marks. A pressing cloth is a piece of clean and thin cotton placed between the iron and your runner. It protects fabric while still letting heat through. Keep a spray bottle of water nearby for dampening cotton and linen before pressing, which helps hems lie flat.
Work on a large and flat surface where the full runner can lie straight. A dining table covered with a towel or a pressing mat works well, and an ironing board alone is usually too narrow for a long runner. Keep the iron on a stable rest, and keep small children and pets away from the hot iron and from fabric glue, which should be used in a ventilated room.
Measuring and Cutting
Measure your table first, then decide the runner length and width, adding hem allowances. A good planning formula is finished length plus one inch at each end for hems, and finished width plus one inch at each side for hems, if you plan to fold each edge over twice by half an inch. Write the numbers down, and mark cutting lines with a ruler and fabric marker, checking each measurement before you cut. Cutting is where a small error becomes permanent, so measure twice and cut once, slowly.
Cut with sharp scissors, following the marked lines, and keep the fabric flat and still. If you are joining remnants end to end, cut the joining edges straight and square, so the join sits flat rather than puckering. For a layered runner, cut the base layer first, then cut the top layer slightly narrower, so it sits centered with an even border showing on each side.
After cutting, press the runner flat and check its shape. Lay it on the table and look along its length for waviness, which usually means the fabric was cut off grain or stretched while cutting. A gentle press with steam often corrects minor waviness. Do not hem until the runner lies reasonably flat, because hems lock in the shape the fabric has when they are made.
Hemming Step by Step
Start with the long sides. Fold each long edge over by half an inch to the wrong side, press the fold with the iron and pressing cloth, then fold it over again by another half inch, press again, and secure the hem. For hem tape, slip a strip of tape inside the second fold, press according to the product instructions, holding the iron still for the specified time rather than sliding it, and let the hem cool before moving the fabric. For fabric glue, run a thin line of glue inside the second fold, press the fold down firmly, and let it dry fully before handling.
Hem the short ends in the same way, taking care at the corners. Fold the corners neatly, trimming any bulk from inside the fold if the fabric is thick, so the corner does not become a lumpy bump. A mitered corner, made by folding the corner diagonally before folding the sides in, gives a tailored finish that is worth the extra minute. Press each corner firmly and let it cool or dry.
Once all hems are secured and fully cooled or dried, press the whole runner again from the wrong side, then press lightly from the right side through a pressing cloth. Check every hem by running a finger along it, feeling for loose spots, and re-press or re-glue any section that lifts.
Adding Ends, Trim, and Layers
The ends of a runner are its most visible feature, since they drape over the table edges and catch the eye. A straight hemmed end looks clean and modern, while a pointed end looks more formal. To make a pointed end, mark a triangle at each end before hemming, cut along the marked lines, and hem the angled edges in the same way as straight edges, taking care at the point. A fringed end, made by pulling threads from the fabric edge, suits linen and loosely woven cotton, but it frays further with washing, so it suits decorative runners better than daily use ones.
Decorative trim can be glued or taped along the short ends. Pom-pom trim, tassel trim, and simple ribbon all work, provided they are attached securely and can handle the runner care routine. Test trim on a scrap, and consider whether it will survive washing. If it will not, the runner becomes a spot clean only piece. Attach trim after hemming, along the very edge of the hem, and press or weight it while it dries.
Layering adds interest without remaking anything. A narrow patterned runner centered on a wider plain runner gives a layered look, and the two can be used separately. Keep layered designs simple. Two layers is plenty.
Styling the Runner on Your Table
Place the runner centered along the table length, with equal drops at each end if it overhangs, or equal margins if it stops at the edges. Center it across the width as well, so it does not drift to one side, which looks accidental. A centerpiece, such as a vase or a bowl, sits on the runner and helps keep it in place, but avoid one so heavy that it dents or creases the runner permanently. Candles need separate care. A candle is not a safe centerpiece weight on fabric. If candles are used on the table at all, they belong in stable holders, on a heat resistant surface that is not the runner, and at least twelve inches away from the runner and anything else that can burn, following the safety section.
A runner usually sits under the inner edges of placemats or just inside them, rather than under plates themselves. Lay out a full place setting before a meal, and check that plates sit flat, glasses do not wobble on a folded hem, and the runner does not bunch under dishes.
Care and Washing
Care depends on the hemming product you used, so keep the packaging or note its washing instructions when you make the runner. Many hem tapes and fabric glues survive gentle machine washing, while others are hand wash or spot clean only. No wash count or durability promise is made here, because longevity depends on the fabric, the product, and the care the runner actually receives. When in doubt, hand wash in cool water with mild detergent, rinse well, and dry flat or line dry, pressing while slightly damp to restore crisp hems. Avoid harsh detergents, bleach, and high dryer heat, which weaken adhesive bonds and fade fabric.
Treat spills promptly by blotting, not rubbing, which spreads a stain and pushes it deeper into fibers. For food spills, rinse with cool water as soon as possible, then wash the runner if the product allows it. For wax drips, let the wax harden, scrape off what you can, and use absorbent paper and a warm iron to lift the remainder, testing on a hidden area first and keeping the iron moving.
Between uses, store the runner rolled rather than folded, because folds leave creases that are hard to press out. Store it in a clean and dry place, away from direct sunlight, which fades fabric, and away from damp. Press it lightly before use and check hems for lifting.
Troubleshooting
If a hem lifts after washing, re-press it with hem tape or re-glue it, following the product instructions, and check whether the washing method was too harsh for the product. A hem that lifts repeatedly may need a different product, or sewing if the runner will be washed often. Adding a few stitches to a well loved runner is a repair, not a failure.
If the runner slides, the fabric may be too slippery, or the table may be very smooth. A strip of non-slip shelf liner under the runner, cut slightly smaller so it does not show, usually solves the problem, and it can be removed for washing. A heavier centerpiece also helps.
If the runner ripples or will not lie flat, it may have been cut off grain, stretched during hemming, or pressed unevenly. Press it thoroughly with steam from the wrong side, let it cool flat under a heavy book overnight, and check that hems are not pulling one side tighter than the other.
Safety: Iron, Hot Glue, and Open Flame
Read this whole section before you plug anything in. The wording here is deliberately direct and is not softened.
Iron safety
Keep the iron on a stable surface and rest it on its heel or on its stand, never face down on fabric. Never leave a hot iron unattended while it is connected. Burns can occur from touching hot metal parts, hot water, or steam, and a steam iron turned over can spill hot water from its reservoir. Close supervision is required for any appliance used by or near children, so keep children and pets away from the ironing area entirely. Use the iron only for its intended use, do not immerse it in water, and do not operate it with a damaged cord. Test the temperature on a scrap first, use a pressing cloth on delicate and dark fabrics, and follow the iron maker instructions for filling, emptying, and temperature settings. When you finish, turn the iron off, unplug it by grasping the plug rather than pulling the cord, and let it cool completely on its rest before storing it.
Hot glue gun safety
If you use a hot glue gun for trim or any other part of this project, treat it as a burn hazard from the moment it is plugged in. The heated nozzle and the molten glue can burn skin on contact. Never touch the nozzle or fresh glue to test whether it is hot. Rest the gun securely on its stand on a heat resistant and non-flammable surface, with a protective mat under the nozzle, because glue drips while the gun sits idle. Never leave a hot glue gun unattended while it is plugged in or hot, and keep it away from children, pets, fabric scraps, paper, and anything else that can burn. Keep long hair, loose sleeves, and cords away from the nozzle. Unplug the gun when you pause, and let it cool completely before putting it away. Do not pull molten glue off skin. If hot glue or an iron burns you, treat the burn right away by putting it in cool water for three to five minutes, cover it with a clean and dry cloth, and do not apply creams, ointments, sprays, or other home remedies. Get medical help right away for a large, blistering, or otherwise serious burn, by calling 911 or your local emergency number.
Fabric, candles, and open flame
Keep fabric runners away from open flame and candles. Do not burn a candle on or near the runner, do not let a runner drape near a stove burner, a fireplace, or any other ignition source, and never leave burning candles unattended. The United States Fire Administration, citing the National Fire Protection Association, advises keeping candles at least twelve inches away from anything that burns, placing lit candles in stable holders where they cannot be knocked down easily, and blowing out candles when you leave a room or home or when you go to bed. The United States Consumer Product Safety Commission gives the same direction in its own words: do not burn candles on or near anything that can catch fire, keep burning candles in sight and away from flammable items, and put them out before leaving the room. Flameless candles remove the open flame entirely and are the safer centerpiece choice on a fabric covered table.
Fabric flammability is not a minor detail. The Consumer Product Safety Commission standard for the flammability of clothing textiles, at Title 16, Part 1610 of the Code of Federal Regulations, exists to keep dangerously flammable textiles out of commerce, and it classifies fabrics by how fast they burn. Class 3 textiles, which burn rapidly and intensely, are described by the Commission as unsuitable and prohibited for use in clothing. That standard governs clothing textiles, not table runners, and no remnant runner is claimed here to have been tested under it. The practical lesson is the caution the standard is built on: fabrics differ in how they burn, any runner fabric can burn if it contacts flame, and no remnant should be treated as flame resistant unless its own labeling says so and you have verified that claim for that fabric. Keep the runner and the flame apart, with no exceptions for a holiday table.
A fabric runner is not a trivet. A hot casserole dish placed directly on it can scorch fabric and melt adhesive hems. Always use trivets or hot pads under hot dishes, set hot dishes on the bare table or on a heat resistant mat, and never on the runner alone.
Keep scissors closed when not in use, cut away from your body, and store sharp tools out of reach of small children. Use fabric glue in a ventilated room, follow the product instructions, and keep adhesives away from eyes and mouth.
Cost and Time
A no-sew runner from remnants is one of the cheapest table transformations available. Remnant fabric is inexpensive, hem tape or fabric glue costs little, and the other tools are scissors, a ruler, and an iron most households already own. No specific price is promised here, because prices vary too much for a single figure to be honest.
Time is about two hours, including measuring, cutting, hemming, and pressing, with extra drying time if you use fabric glue. The work divides naturally: measure and cut one day, hem and press the next. A second runner takes less time, because measuring and testing are already done.
Frequently Asked Questions
Can I make a no-sew runner without an iron?
An iron is very helpful for pressing hems flat and for activating hem tape, and a runner made without one will look less crisp. If you have no iron, fabric glue and firm pressing with a heavy book can make a serviceable hem, but it will not be as sharp. Borrowing an iron for an afternoon is worth it. Never use a hot glue gun as a pressing substitute. It adds the burn risks described in the safety section.
Will a no-sew runner survive washing?
It depends on the product and the fabric. Many hem tapes and fabric glues survive gentle washing, but none survive harsh washing indefinitely, and no specific wash count is promised. Hand washing or a gentle machine cycle, cool water, and line drying give the runner its best chance, and testing a scrap first tells you what to expect.
Can I use different fabrics for the top and backing?
Yes, and a backing can add weight and stability. Glue or tape a backing fabric to the wrong side before hemming, or bond two fabrics together for a double sided runner that can be flipped. Keep both fabrics similar in weight and care needs, or one side will shrink or fade differently. Use the gentler care method of the two.
How wide should a table runner be?
About a third of the table width is a good planning guide, but it depends on the table and on whether placemats will overlap it. Lay out a paper template and test it with your usual place settings before cutting, because a runner that looks right on paper can feel too narrow or too wide once plates and glasses are in place.
Can I make a runner from old curtains or tablecloths?
Yes, and they are excellent sources, because they provide large and often high quality pieces at thrift prices. Wash and press them first, following any care label still attached, check for fading, stains, and worn spots, and cut around any flaws. A curtain panel can make two runners, and a tablecloth can make a runner plus matching napkins. Never assume an old or unlabeled fabric is flame resistant.
What if my remnants are too short?
Join remnants end to end with overlapping and glued seams, or make a patchwork runner from several pieces, arranging them so the joins look intentional. A joined runner can look more interesting than a single fabric runner, especially if the pieces share a color palette. Keep every join flat and test it on scraps first.
Can I put candles or hot dishes on the runner?
No. Keep candles at least twelve inches away from the runner and in stable holders on a surface that is not the runner, never leave burning candles unattended, and blow them out when you leave the room. Put hot dishes on trivets or hot pads, never directly on the runner. A runner can be scorched by a hot dish and can burn if it contacts a candle flame.
Sources & references
- United States Consumer Product Safety Commission, Clothing Business Guidance. Used for the flammability requirements for wearing apparel published at Title 16, Part 1610 of the Code of Federal Regulations, the Standard for the Flammability of Clothing Textiles, for the stated purpose of keeping dangerously flammable textiles and garments out of commerce, for classifying fabrics into three classes based on speed of burning, and for Class 3 textiles being unsuitable and prohibited for use in clothing because of rapid and intense burning. This source governs clothing textiles. It was used here for flammability context only, not as a claim that a table runner is tested or certified under that standard.
- United States Consumer Product Safety Commission, CPSC Urges Fire Safety Vigilance During Burn Awareness Week. Used for not burning candles on or near anything that can catch fire, never leaving candles burning unattended and extinguishing them when leaving the room and before sleeping, keeping all clothing away from flames and ignition sources because loose clothing can catch fire easily, and, citing the Centers for Disease Control and Prevention and the National Fire Protection Association, running cool water on a burn until emergency responders arrive if clothing catches fire, after stop, drop, and roll.
- United States Consumer Product Safety Commission, Holiday Safety. Used for never leaving candles unattended, keeping burning candles in sight and away from flammable items, putting candles out before leaving the room, and using flameless candles whenever possible.
- United States Fire Administration, Candle Fire Safety. Used for candles being dangerous if they tip over or are placed too close to anything that can burn, for an average of twenty home candle fires reported each day with the National Fire Protection Association as the cited source, for considering battery operated flameless candles, for placing lit candles in stable holders where they cannot be knocked down easily, for keeping candles at least twelve inches away from anything that burns, and for blowing out candles when leaving a room or home or when going to bed.
- United States Fire Administration, Pictograph: Treating Burns. Used for treating a burn right away by putting it in cool water for three to five minutes, covering it with a clean and dry cloth, not applying creams, ointments, sprays, or other home remedies, and getting medical help right away by calling 911 or the fire department.


