Short answer
- Make DIY reusable beeswax wraps by scattering food-grade beeswax over clean, tightly woven cotton, melting it with low heat in an oven or under an iron between sheets of parchment paper, spreading it evenly, and hanging the wrap to cool and set. Start with three sizes: small at about 7 by 8 inches, medium at about 10 by 11 inches, and large at about 12 by 14 inches. Use wraps only for cool or room-temperature foods such as bread, firm produce, cheese, sandwiches, and covered bowls. Never use them for raw meat, raw poultry, raw fish, or raw seafood, never use them on hot food or in a microwave, oven, or dishwasher, and wash them only in cool water with mild soap, then air-dry fully. A wrap does not change official storage rules: keep the refrigerator at 40 degrees Fahrenheit or below, refrigerate perishable food within 2 hours, and use refrigerated leftovers within 3 to 4 days. Retire a wrap when it shows mold, a strong odor that washing does not remove, dark stains, or flaking wax.
Introduction
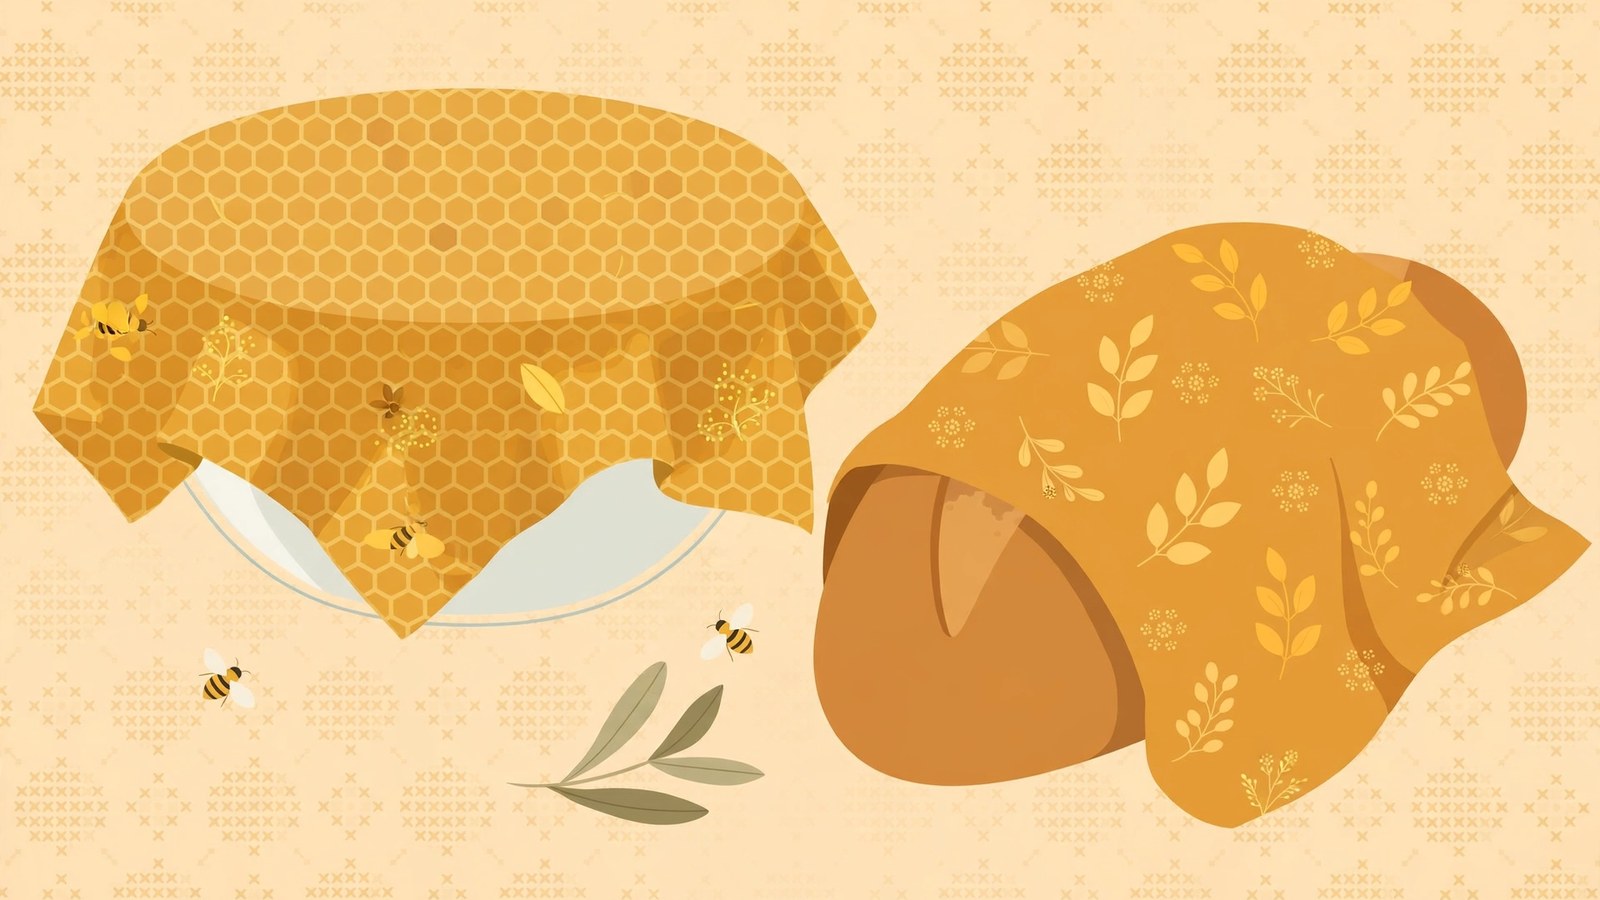
A beeswax wrap is a piece of cotton fabric coated with a thin layer of beeswax. Warmth from your hands softens the coating just enough to shape the wrap around food or over the rim of a bowl, and the coating firms again as it cools, holding that shape without tape or a rubber band. The wrap can then be washed in cool water, dried, and used again. That simple cycle is the whole appeal: one reusable cover for bread, firm produce, sandwiches, and bowls, instead of a fresh sheet of single-use wrap each time.
DIY reusable beeswax wraps are also easy to overstate. A wrap is not plastic wrap, not an airtight lid, and not a food-safety device. It cannot be washed in hot water without losing its coating, so it cannot be sanitized the way a hard container can. It does not extend the safe storage life of any food, and it does not make food that was left out too long safe to eat. Used inside those limits, it is a practical, low-waste tool. Used outside them, it creates risk that a lidded, washable container would not.
This guide covers the full job in order: what to buy, which sizes to make first, the oven method and the iron method step by step, how to use and wash a wrap, and the food-safety boundaries that decide which foods should never touch one. The storage times and temperatures in the safety sections come from United States federal guidance, checked on 30 October 2026, because a wrap changes how food is covered, not how long food stays safe.
What a Beeswax Wrap Is, and What It Is Not
A finished wrap is two materials working together. The cotton gives it strength, shape, and a washable surface. The beeswax gives it a light grip: it softens with hand warmth, takes the shape of a bowl rim or the folds of a sandwich, and holds that shape once it cools. A wrap made well feels slightly tacky, bends without cracking, and shows no dry, pale patches.
Beeswax itself has a regulated place in food use. Under Title 21 of the Code of Federal Regulations, section 184.1973, the Food and Drug Administration lists beeswax, yellow and white, among direct food substances affirmed as generally recognized as safe. The regulation describes beeswax as a product secreted by honey bees and prepared from honeycombs after the honey is removed, and its listed uses include surface-finishing agent, the same family of use as a coating that touches food. That listing needs an honest boundary: it covers beeswax as an ingredient used in line with good manufacturing practice. It is not an approval, certification, or test of any homemade wrap or any batch of wax you buy.
A wrap is also not airtight. The Food Safety and Inspection Service advises covering leftovers, wrapping them in airtight packaging, or sealing them in storage containers, practices that help keep bacteria out, retain moisture, and stop odor pickup. A wrap does only part of that job: it covers, but it does not seal air out. For short, covered refrigerator storage it is a reasonable cover. For anything needing a true seal or a long storage time, use a lidded container.
What You Need: Fabric, Wax, and Optional Additions
Start with clean, tightly woven cotton that is 100 percent cotton. Quilting cotton, plain pillowcases, and plain tea towels can all work if they are clean, dry, and free of stains and strong detergent scent. Pre-wash and fully dry the fabric first, so shrinkage happens before waxing. Avoid stretch fabric, very loose weaves, and fabric with a heavy waterproof coating, because wax cannot coat them evenly: it pools on a coating, gaps across a loose weave, and cracks when stretch fabric moves.
For the coating, buy beeswax sold for food use, in pellets or in a block. Pellets scatter more evenly, so they suit a first batch. A block needs grating first, and grated wax melts more evenly than chunks. Some makers add a small amount of tree resin for grip and a few drops of jojoba oil for flexibility. Both are optional: a beeswax-only wrap still works, although it may feel stiffer at first. If you add resin or oil, use far less than the wax, note what you used, and label the wraps, because some households need to know what touches shared food. Candelilla wax is sometimes used instead of beeswax for a vegan wrap, but it handles differently and this guide gives no tested candelilla formula.
For equipment, gather parchment paper, a baking sheet, scissors or pinking shears, a grater for block wax, a brush or flat tool for spreading, and a drying rack or clothesline. Work in a ventilated kitchen, keep the area clear, and never leave melting wax unattended: wax can burn if it gets too hot, so low, patient heat matters more than speed.
Sizes Worth Making First
Make one of each size first, use all three for a week, and only then make more of the sizes you actually reach for. A set built on guesswork usually contains several wraps that never leave the drawer.
| Size | Approximate cut size | Jobs it suits |
|---|---|---|
| Small | About 7 by 8 inches | Half a lemon, half an onion, a small snack, a jar top |
| Medium | About 10 by 11 inches | A sandwich, a block of cheese, a medium bowl |
| Large | About 12 by 14 inches | A loaf of bread, a large bowl, a plate of leftovers |
| Extra-large | Sized to your largest bowl, plus rim room | A salad bowl or a baking dish you cover often |
Cut with pinking shears if you have them: the zigzag edge limits fraying without sewing. A narrow hem sewn before waxing also works, but a thick hem can trap wax unevenly. Trim loose threads after cutting, because a loose thread can pull wax into a drip.
Before You Start: Clean Hands, Clean Surfaces, Ready Food
Food safety for this project starts before the oven is on. FoodSafety.gov sets out four steps for preventing food poisoning at home: clean, separate, cook, and chill. Clean and separate shape how you set up for making and using wraps. Cook and chill shape the storage rules covered later.
For the clean step, wash your hands with plain soap and water and scrub the backs of your hands, between your fingers, and under your nails for at least 20 seconds, then rinse and dry with a clean towel. Wash hands before, during, and after preparing food, and again after handling raw meat, poultry, seafood, or eggs, after touching garbage, and after touching an animal. Wash cutting boards, dishes, utensils, and countertops with hot, soapy water after each use, especially after they have held raw meat, poultry, seafood, or eggs. Rinse fruits and vegetables under running water without soap, scrub firm produce such as melons and cucumbers with a clean produce brush, and dry produce with a paper towel or clean cloth towel. Food going under a wrap should be clean and surface-dry, because a wrap over wet produce traps moisture against the food and the coating.
For the separate step, use one cutting board for fresh produce and foods eaten without cooking, and another for raw meat, poultry, or seafood, with separate plates and utensils for cooked and raw foods. The wrap version is simple: wash a wrap before it touches a different food where flavor or contamination matters, and never let any wrap carry raw animal food.
Method 1: The Oven Method, Step by Step
The oven method gives the most even coating for beginners, because the heat reaches the whole sheet at once instead of one iron-width strip at a time.
- Heat the oven to a low setting and line a baking sheet with parchment paper. Do not use wax paper, which is a different product.
- Lay one piece of cut fabric flat on the parchment. Scatter grated or pellet beeswax evenly across the surface in a light, even layer. Avoid a thick pile in the middle: the goal is full coverage, not depth. If using resin, scatter a much smaller amount of finely ground resin with the wax. If using jojoba oil, dot a few drops sparingly across the fabric.
- Put the sheet in the oven and watch it closely. The wax turns clear and glossy as it melts, usually within a few minutes. Take the sheet out as soon as the wax has melted across the fabric. Do not let the fabric brown or smoke, and do not leave the sheet unattended.
- While the wrap is still warm, spread any pooled wax toward pale, dry-looking spots with a clean brush, or with a second sheet of parchment and a flat tool. Work quickly and carefully, because the sheet and wax are hot.
- Lift the wrap by two corners, peel it from the parchment while warm, and hang it over a rack or line until it cools and sets. A finished wrap feels slightly tacky but not wet or drippy. If it drips, that fabric got too much wax.
- Once cool, fold the wrap and check it in good light. Pale patches usually mean a thin spot. Reheat that single wrap with a small sprinkle of extra wax and repeat the spreading step.
Let the first wrap cool completely before you judge it: warm wax looks glossier and feels more flexible than the finished wrap will. Make the other sizes only after the first passes the cool check: even color, no drips, no dry patches, and a light tack between warm hands.
Method 2: The Iron Method, Step by Step
The iron method suits a single wrap or a single repair, and it keeps the mess contained between two sheets of parchment.
- Lay the fabric on an ironing board or another heat-safe surface, protecting the surface with parchment paper first if needed.
- Scatter wax evenly over the fabric, then lay a second sheet of parchment over the top, so the fabric sits between two sheets.
- Set the iron to low with no steam. Press slowly across the top parchment, moving from the center outward, until the wax melts and spreads. Lift the iron often to check progress instead of holding it in one spot, because a parked iron overheats one patch and leaves the rest dry.
- Peel back the top parchment while the wrap is warm, then hang the wrap to cool and set. If dry patches remain, add a little more wax to those spots only and press again.
The iron method takes more patience, because you melt the coating in strips and blend the joins. Its strength is precision: it is the better tool for refreshing one thin spot on a wrap you already own.
How to Use a Wrap Well
Warm the wrap with your hands for a few seconds before shaping it. Hand warmth softens the wax just enough to mold it around food or over a bowl rim. Press the edges together, or fold them under the bowl, then let the wrap cool for a few seconds so the shape sets. The seal should hold on its own, without tape or a rubber band. For a sandwich, fold the wrap like an envelope: bottom edge up, sides in, top down last.
Wraps work best on food that is already cool or at room temperature: let cooked food cool before wrapping it, and never wrap food straight from a hot pan. Match the wrap to the job in three checks: the food is cool, the food is not raw meat, poultry, fish, or seafood, and the storage time is short. If any check fails, the wrap is the wrong tool.
Food-Safety Limits: What Never Belongs in a Wrap
These limits are not preferences. Each follows from one fact: a wrap can only be washed in cool water, so it can never be cleaned the way food-safety guidance requires for higher-risk foods.
Do not use wraps for raw meat, raw poultry, raw fish, or raw seafood. FoodSafety.gov directs cooks to wash boards, utensils, and surfaces with hot, soapy water after they have held raw meat, poultry, seafood, or eggs, and to keep those raw foods separate from ready-to-eat foods. A wrap cannot meet that standard: hot water strips its coating, it cannot go through a dishwasher, and it cannot take a boiling-water sanitation step. Raw animal foods belong in a washable container or under a single-use cover, every time.
Do not use wraps on very hot food, or in a microwave, an oven, or a dishwasher. Heat melts the coating, can transfer wax to food, and damages the wrap. The same rule covers hot pans, a wrap left in a hot car, and a wrap draped over steaming food. Let food cool first, and reheat food in a suitable container, never under a wrap.
Do not rely on a wrap for long-term freezer storage. A wrap is not airtight, so it cannot protect food from freezer burn over weeks or months the way proper freezer packaging does.
Keep flavors and foods apart where it matters. Use a separate clean wrap for cheese and for strongly scented foods such as onion, so flavors do not transfer, and wash a wrap between different foods.
Think about sensitivities before shared food is wrapped. Beeswax comes from bees, and wraps may also contain tree resin or added oils. If anyone in your household has a known sensitivity to bee products, resin, or an oil you used, check before homemade wraps touch shared food, and label wraps with additions so they are never mixed up with plain beeswax wraps. This guide makes no claim about how common such sensitivities are: a homemade wrap has ingredients, and the people eating the food should be able to know what they are.
Cold-Storage Rules a Wrap Does Not Change
A wrap changes what covers the food. It changes nothing about time or temperature, and treating it as if it did is the most common safety mistake with reusable covers.
Keep the refrigerator at 40 degrees Fahrenheit or below and the freezer at 0 degrees Fahrenheit or below, checked with an appliance thermometer. Bacteria that cause food poisoning multiply quickest between 40 and 140 degrees Fahrenheit, the range FoodSafety.gov and the Food Safety and Inspection Service call the danger zone. Keep hot food hot at 140 degrees Fahrenheit or warmer if it is being held.
Follow the 2-hour rule. Never leave perishable food out of refrigeration for more than 2 hours, and if it has been above 90 degrees Fahrenheit, such as in a hot car or at a summer picnic, refrigerate it within 1 hour. The Food and Drug Administration gives the same rule for leftovers and take-out food. Food left out longer should be thrown away, not wrapped and saved, because refrigeration cannot undo growth that has already happened.
Use leftovers within 3 to 4 days. The Food Safety and Inspection Service states that leftovers keep 3 to 4 days in the refrigerator or 3 to 4 months frozen, and that frozen leftovers, while safe indefinitely at 0 degrees Fahrenheit, lose moisture and flavor over time. To cool leftovers fast, divide large amounts into shallow containers. Reheat leftovers to 165 degrees Fahrenheit as measured with a food thermometer, and bring sauces, soups, and gravies to a rolling boil. None of that reheating happens under a wrap: move the food to a suitable container first.
Trust time and temperature over appearance. The Food and Drug Administration warns that food can make you very sick even when it does not look, smell, or taste spoiled, because illness-causing bacteria differ from the spoilage bacteria that make food go bad. Anything that looks or smells suspicious should be thrown out, and mold is a sign of spoilage. For wrapped food: discard food that smells or looks off even if the wrap looks fine, and discard food past its time limit even if it smells fine. When in doubt, throw the food out. The wrap can be washed and reused. The food cannot be rescued by a wrap.
The Freezer: Why a Wrap Is Only a Short Cover
The Food and Drug Administration explains that food properly handled and stored at 0 degrees Fahrenheit will remain safe, that freezing does not kill most bacteria but stops them from growing, and that food stays safe indefinitely at that temperature while its quality slowly falls. It also explains freezer burn: dry, grayish-brown leathery spots that appear when food is not securely wrapped in airtight packaging. Freezer burn is a quality problem, not a safety problem, but it is exactly the problem a wrap cannot prevent, because a wrap is not airtight packaging.
So the freezer rule for wraps is narrow. A wrap can cover a bowl for a short chill, for example while a dessert sets. For storage measured in weeks or months, move the food to a freezer container or proper freezer packaging, labeled with the contents and the date.
How to Wash, Dry, and Store Wraps
Wash wraps in cool water only, with a small amount of mild soap. Wipe gently instead of scrubbing hard, rinse in cool water, and air-dry fully on a rack or line before folding or storing. Hot water strips the coating, harsh scrubbing scrapes it thin, and storing a damp wrap invites musty smells. Never put a wrap in a dishwasher, a washing machine, or a microwave to clean it: each uses heat the coating cannot survive.
Store clean, fully dry wraps flat or loosely folded in a drawer, away from heat and direct sunlight. Let each wrap cool fully before stacking, because warm wraps can stick together. Keep wraps with resin or oil additions in a separate, marked stack from plain beeswax wraps.
With cool-water washing and air-drying, a well-made wrap can last for months of regular use. Treat that as a range, not a promise: life depends on washing frequency, storage, and what the wrap touches. Very wet, oily, or strongly acidic foods loosen the coating faster, so for those foods cover a bowl with the wrap rather than wrapping the food directly.
Refreshing a Wrap, and Troubleshooting Common Problems
Refresh a wrap that has stopped sealing well or developed thin patches with the iron method: lay it between parchment sheets, add a small sprinkle of wax to the thin spots only, and press on low with no steam until the new wax melts and blends in. Do not keep adding thick layers: a heavy wrap becomes stiff, stiffness leads to cracking, and cracking ends its useful life faster than a thin spot would have.
If a wrap feels stiff, it may carry too much wax or resin. Blotting excess wax onto parchment during a gentle refresh can help, but a very stiff wrap is often easier to remake with a lighter coating. If a wrap will not seal, warm it longer in your hands, and check that the bowl rim is dry and clean, because a greasy or wet rim prevents a seal. If a wrap cracks along fold lines, it has likely been folded while cold many times, or stored folded tightly in the same place: store it flat or rolled loosely instead. A faint wax scent usually fades with washing and airing. A persistent rancid or sour smell is a retirement sign, covered next.
When to Retire a Wrap
Stop using a wrap instead of trying to refresh it if the coating has started to shed small flakes onto whatever it touches, if a sour or stale smell stays after a cool wash and a good airing, if discoloration remains worked into the cloth after washing, or if you can see mold growing on it. Each sign means the cool-water wash the wrap allows is no longer enough to keep it clean, and new wax cannot fix a hygiene problem underneath it.
For disposal, match the method to the wrap and your local rules. A fully natural retired wrap can be cut into strips and used as a fire starter only where that is safe and allowed, or composted if your local composting accepts waxed cotton. If neither fits, or you are unsure what a wrap contains, use household waste.
A Simple First Project: Three Wraps and One Week of Use
Make three wraps: one small, one medium, and one large. Use the medium for sandwiches for a week, the large for a loaf of bread or a mixing bowl, and the small for half a lemon or a small bowl. Notice which size you reach for most, which foods seal well, whether any food was a poor match for a wrap, and whether your washing routine feels easy or fiddly. That week of real use shows whether beeswax wraps fit your kitchen before you spend money on a larger batch.
Keep lidded containers for raw foods, hot foods, reheating, and long storage, and use wraps for the jobs they do well: covering a bowl, wrapping bread and firm produce, and packing a cool, dry lunch. General information only: this guide does not replace official food-safety guidance, and it does not claim that beeswax wraps sanitize food or extend safe storage times.
Frequently Asked Questions
Can I use a beeswax wrap for raw meat, chicken, or fish if I wash it well afterward?
No. Washing well is exactly what a wrap cannot take: the hot, soapy washing FoodSafety.gov requires for surfaces that held raw meat, poultry, seafood, or eggs would strip the wax coating, and the wrap cannot be dishwashed or sanitized in boiling water. Use a washable container or a single-use cover for raw animal foods.
How long can food stay under a wrap in the refrigerator?
Only as long as the food itself stays safe: the wrap sets no time limit. Keep the refrigerator at 40 degrees Fahrenheit or below, refrigerate perishable food within 2 hours (1 hour above 90 degrees Fahrenheit), and use refrigerated leftovers within 3 to 4 days. For longer storage, use an airtight, lidded container.
Can beeswax wraps go in the microwave, oven, or dishwasher?
No. Heat melts the coating in all three, can transfer wax to food, and damages the wrap. The same rule applies to hot food, hot pans, and a hot car. Reheat leftovers in a suitable container instead, to 165 degrees Fahrenheit as measured with a food thermometer, and wash wraps by hand in cool water.
Is beeswax safe to use on food at all?
Beeswax has a recognized place in food use: 21 CFR 184.1973 lists beeswax, yellow and white, as a direct food substance affirmed as generally recognized as safe, with uses that include surface-finishing agent. That listing covers beeswax as an ingredient used in line with good manufacturing practice. It does not certify any homemade wrap, so buy wax sold for food use and follow the limits in this guide.
Keep reading: Kitchen Pantry Organization by Zone: A System You Can Actually Keep Up
Sources & references
- FoodSafety.gov, 4 Steps to Food Safety. Used for the four steps (clean, separate, cook, chill), handwashing with plain soap and water for at least 20 seconds including backs of hands, between fingers, and under nails, washing boards, dishes, utensils, and countertops with hot, soapy water after they have held raw meat, poultry, seafood, or eggs, rinsing and scrubbing produce, using separate cutting boards and plates for produce and for raw meat, poultry, and seafood, keeping hot food at 140 degrees Fahrenheit or above, the danger zone of 40 to 140 degrees Fahrenheit, refrigerator temperature of 40 degrees Fahrenheit or below, freezer temperature of 0 degrees Fahrenheit or below, and refrigerating perishable food within 2 hours, or within 1 hour above 90 degrees Fahrenheit.
- United States Department of Agriculture, Food Safety and Inspection Service, Leftovers and Food Safety. Used for bacteria growing rapidly between 40 and 140 degrees Fahrenheit, refrigerating leftovers within 2 hours (1 hour above 90 degrees Fahrenheit), cooling food rapidly by dividing large amounts into shallow containers, covering leftovers or wrapping them in airtight packaging or sealing them in storage containers to keep bacteria out, retain moisture, and prevent odor pickup, leftovers keeping 3 to 4 days in the refrigerator or 3 to 4 months frozen, and reheating leftovers to 165 degrees Fahrenheit as measured with a food thermometer, with sauces, soups, and gravies brought to a rolling boil.
- United States Food and Drug Administration, Are You Storing Food Safely? Used for the 2-hour rule (1 hour above 90 degrees Fahrenheit) for perishables, leftovers, and take-out food, refrigerator temperature at or below 40 degrees Fahrenheit and freezer temperature at 0 degrees Fahrenheit checked with appliance thermometers, discarding anything that looks or smells suspicious, mold as a sign of spoilage, food being able to cause illness even when it does not look, smell, or taste spoiled, freezing not killing most bacteria but stopping their growth, food remaining safe indefinitely at 0 degrees Fahrenheit while quality decreases, and freezer burn as a food-quality issue that occurs when food is not securely wrapped in airtight packaging.
- Title 21, Code of Federal Regulations, section 184.1973, Beeswax (yellow and white). Used for beeswax as a secretory product of honey bees prepared from honeycombs after honey removal, yellow beeswax and white beeswax, the listing of beeswax among direct food substances affirmed as generally recognized as safe, and its listed uses as a flavoring agent and adjuvant, a lubricant, and a surface-finishing agent, at levels not to exceed good manufacturing practice.


