Short answer
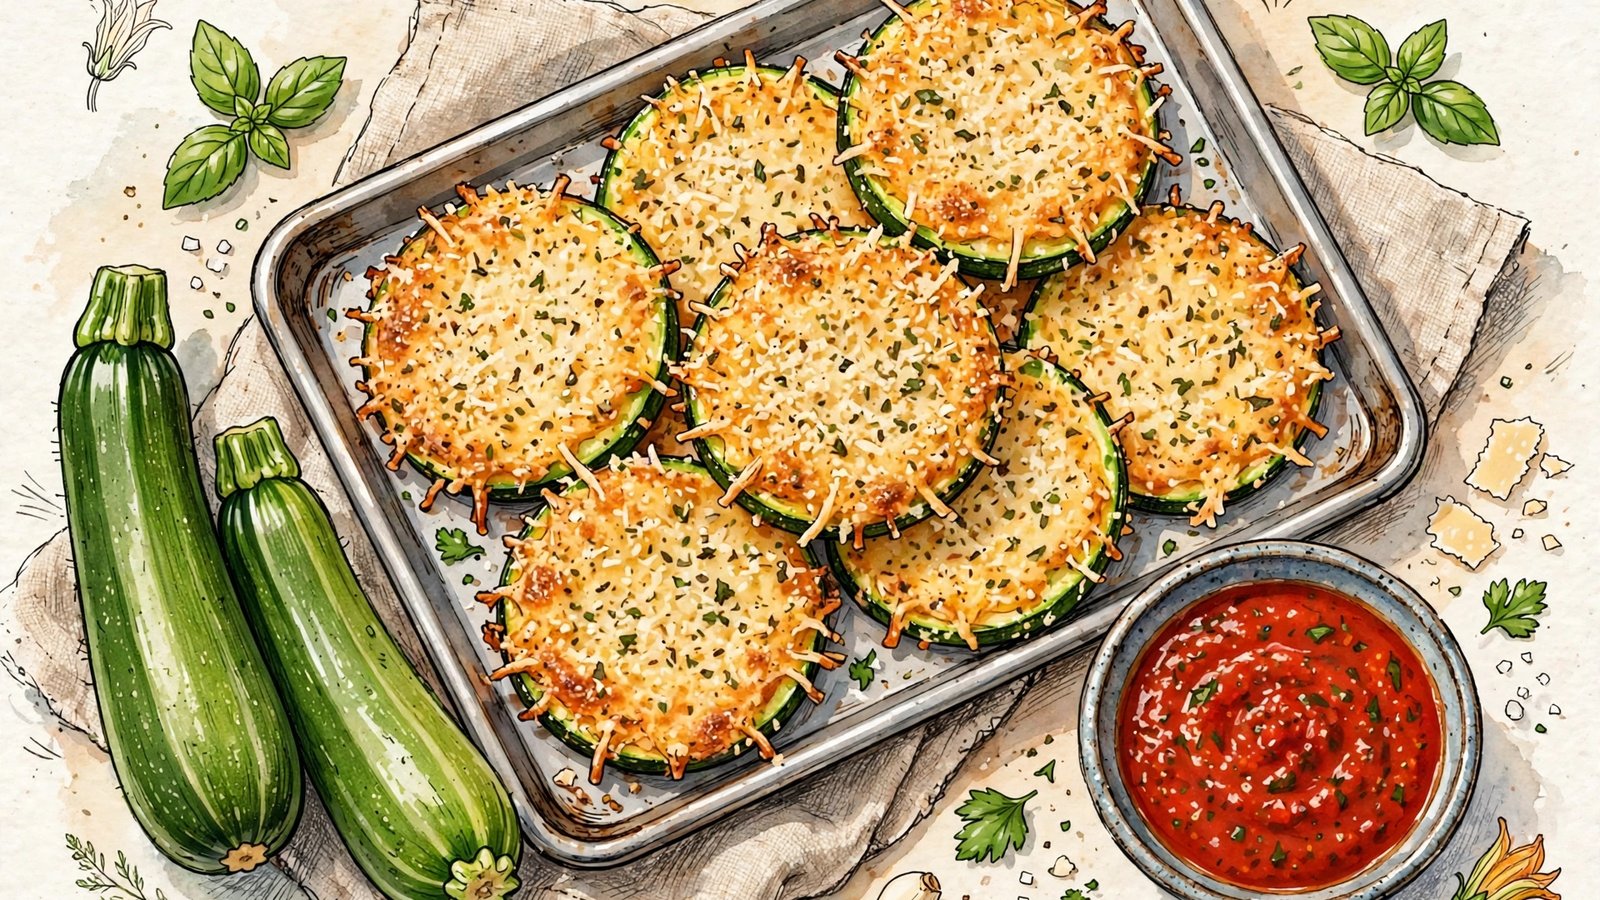
- Slice medium zucchini into even rounds about 1/4 inch thick, salt them lightly, and let them sit for 15 to 20 minutes so moisture beads on the surface, then blot them completely dry. Dredge each dry round in flour, dip it in beaten egg, and press it into panko breadcrumbs mixed with finely grated Parmesan, garlic powder, Italian seasoning, and black pepper. Arrange the rounds in a single layer with space between them on parchment-lined sheets or on an oiled wire rack over a sheet, spray the tops lightly with olive oil, and bake at 425 degrees Fahrenheit, about 220 degrees Celsius, for 18 to 22 minutes, flipping once halfway, until golden and crisp at the edges. Rest on the pan for 3 to 5 minutes, where they firm up further, and serve warm with marinara, ranch, or a garlic yogurt dip. The salting, drying, spacing, and hot oven are not extras. They are the recipe.
Introduction
Every gardener knows the moment. One week there are two zucchini on the counter, and the next week there are twelve, with more still swelling on the plant. Baked zucchini Parmesan crisps are one of the most satisfying answers to that surplus, because they turn a vegetable people are tired of into a snack people reach for first. Thin rounds, a salty Parmesan and breadcrumb coating, and a hot oven produce something crunchy at the edges, savory throughout, and tender in the center, especially good with a dip alongside.
They are not potato chips, and it helps to expect the right thing. A good zucchini crisp has a crisp coat and a soft center, not a shattering crunch all the way through. That contrast only works when the moisture is managed. Zucchini is mostly water, and water is the enemy of crispness. Bake a wet round and you get a steamed, soggy disc with coating sliding off. Slice evenly, salt and drain briefly, dry the surface, coat well, and bake hot with air around each round, and you get a crisp that holds up to dipping.
This guide keeps the simple recipe and explains each decision behind it, so you can fix a soft batch instead of guessing. It covers choosing and storing zucchini, slice thickness, what salting does, how the coating works, when a wire rack beats a flat pan, and how to store and re-crisp leftovers. Watch your own oven and pull the crisps when they are golden at the edges rather than cooking only by the timer, because ovens, thickness, and water content all vary.
Why Moisture Decides Everything
University of Maine Cooperative Extension puts the core fact plainly: like cucumbers, summer squash are about 95 percent water, and that high water content makes summer squash a low-calorie food, with a cup of raw zucchini at about 20 calories on that bulletin. For a crisp, that same fact is the whole problem. Almost everything inside the slice wants to become steam in a hot oven, and steam softens coating from underneath while it escapes.
Think of the bake as a race. On the outside, hot dry air and a light film of oil are drying and browning the breadcrumb and Parmesan coat. On the inside, the flesh is heating and releasing water. If the slice goes in wet, or the rounds are crowded so steam cannot escape, the inside wins and the coat steams instead of crisping. If you remove water before baking, keep slices thin enough to dry quickly, and leave room for steam to leave, the outside wins at the edges, where the crunch lives.
No single trick saves a batch alone. Salting without blotting leaves salty water on the surface. Blotting without spacing still traps steam. A hot oven without drying just steams faster. The method stacks small advantages, surface drying, even thickness, a firm dry coating, space on the pan, and high heat, so together they tip the race toward crispness. Humidity after baking matters too: cover a warm tray with foil, or seal warm crisps in a container, and you trap steam against the coating you just dried. Serve soon after the short rest, uncovered and in a single layer.
Choosing Zucchini That Will Crisp Well
Start with the right fruit and half the moisture work is easier. Clemson University Cooperative Extension advises harvesting zucchini when the fruit is 7 to 8 inches long, while it is still tender and has a shiny or glossy appearance, and notes summer squash can be harvested about 55 days after planting, with picking daily or every other day when conditions are favorable. The University of Maine bulletin gives the same warning from the other side: harvest while still small or medium, because large summer squash have very large seeds, tough rinds, and stringy, coarse flesh.
At a store or market, choose squash that are firm and heavy for their size, with sound, glossy skin without nicks, bruises, or decay, and bright color rather than a shriveled surface. Clemson adds that squash should look plump, with a fresh stem end, and that very large, overgrown squash may be coarse or stringy inside with large seeds, better for soups than crisps. Medium zucchini, roughly 6 to 8 inches long, are the sweet spot. Small zucchini work but are fiddly to coat. Very large zucchini have watery centers that stay soft, so save those for soups and baking.
Do not peel the zucchini. Clemson notes summer squash does not need to be peeled or seeded unless it is oversized. The skin holds each round together, adds color, and gives the crisp structure. A light scrub is enough for waxy skin. Wash, trim, and dry the outside just before slicing. Clemson lists one pound as about 2 medium squash, or about 3 and 1/2 cups of raw slices, so one pound is roughly one batch of the recipe below.
Storing Whole Zucchini Before You Cook
Fresh zucchini does not keep long, so timing matters in glut season. The University of Maine bulletin advises storing unwashed summer squash in the refrigerator crisper in an open or perforated plastic bag, where market squash will keep for up to a week, and garden squash slightly longer. Clemson gives the same up-to-a-week figure for squash stored in the refrigerator in a plastic bag, and stresses gentle handling because the skin is thin and fragile.
Store the squash unwashed, since washing adds surface moisture and damp skin spoils faster. Keep a little air moving, with an open or perforated bag, or a bag with small slits for ventilation. Handle gently and use the most blemished squash first, because nicks are where soft spots start, and a soft zucchini will never slice into firm, even rounds.
Check the crisper every day or two and cook in harvest order. Crisps are a same-day food, not a preservation method. Bake and eat them fresh, and preserve the rest of the harvest by a method meant for storage rather than baking extra crisps and hoping they keep.
Slice Thickness, Explained
Consistency matters more than any single perfect thickness, because mixed thick and thin rounds cook unevenly: thin ones burn while thick ones stay soft. Thickness still sets the character of the result, so choose it on purpose.
| Thickness | What you get | Best use |
|---|---|---|
| About 1/8 inch | Driest and crispest, closest to a chip, but fragile and easy to burn | Maximum crunch, with close watching |
| About 1/4 inch | Crisp edges and coat with a tender center, sturdy enough to dip | The standard recipe and best starting point |
| About 3/8 inch | Soft, almost roasted center with a crisp coat | A substantial bite, more side dish than snack |
Cut with a sharp knife, or with a mandoline if you have one. A mandoline makes even rounds fast, but use the hand guard every time and keep fingers well clear of the blade. If a few rounds come out thicker, group them at one end of the sheet so that end can bake a minute or two longer. Sticks work instead of rounds, coated the same way, and are easier for small hands to dip. Keep sticks close to 1/4 inch on the short sides so timing still applies. Pat slices dry right after cutting, before salting: cutting exposes wet flesh, and that first blot removes water salt does not need to draw out.
The Salt and Drain Step, and What It Actually Does
Lay the slices in a single layer on paper towels or a clean kitchen towel. Sprinkle lightly with salt and let them sit for 15 to 20 minutes. Beads of moisture will form on the surface. Blot dry with more towels, pressing gently but thoroughly, and blot the second side if it still feels damp.
The reason is osmosis, described here in plain terms as general cooking science rather than as a measured result for this recipe. Salt on the cut surface creates a saltier environment outside the cells than inside them, so water moves out of the flesh toward the surface to balance that difference. That is the beading you see. Blotting then removes that water before the oven has to deal with it. Salting also seasons the vegetable itself, rather than relying on the coating alone, so crisps taste seasoned all the way through.
Do not skip the step, and do not over-salt to pull out more water. Parmesan is a salty, concentrated cheese, so crisps should taste seasoned, not briny. The 1/2 teaspoon for draining plus a pinch in the coating is balanced against that cheese. Do not extend the rest indefinitely either: after about 20 minutes the easy gain is done and the flesh softens. Some cooks let blotted slices sit uncovered for about 10 minutes while the oven preheats. It helps a little and is optional. What is not optional is that slices go into the coating dry, not dripping, or coating slides off and steams instead of crisping.
Ingredients
For about four servings as a snack or side, you will need:
- 2 medium zucchini, sliced into 1/4-inch rounds
- 1/2 teaspoon salt, for draining, plus a pinch for the coating
- 1/2 cup plain breadcrumbs, preferably panko
- 1/2 cup finely grated Parmesan cheese
- 1 teaspoon garlic powder
- 1 teaspoon Italian seasoning
- 1/4 teaspoon black pepper
- 2 large eggs, beaten
- 1/4 cup all-purpose flour
- Olive oil spray, for the baking sheets and the crisps
- Optional dips: warm marinara, ranch dressing, or garlic yogurt dip
Panko gives a lighter, crunchier coat than fine breadcrumbs, because its larger flakes brown into a rougher crust. Fine breadcrumbs still work, but they can turn dense on a wet vegetable, so use a lighter hand and be extra strict about drying. Finely grated Parmesan melts into the coating and browns evenly. Coarsely grated Parmesan makes lumps that fall off during flipping. For extra crunch, add 2 tablespoons of cornmeal to the breadcrumb mixture. Cornmeal keeps its grit and gives a firmer bite, but browns a little faster, so watch the last minutes closely.
Flour and eggs are not filler. Flour gives egg something dry to cling to, and egg gives crumbs something wet to cling to. That two-step adhesion is why a three-bowl coating stays on through flipping while crumbs pressed straight onto a wet slice do not.
The Coating Method, Bowl by Bowl
Set up three shallow bowls before you touch a slice: flour in the first, beaten eggs in the second, and breadcrumbs mixed with Parmesan, garlic powder, Italian seasoning, pepper, and a pinch of salt in the third. Work in that order for every round.
Dredge each dried round in flour and shake off the excess. You want a thin, dusty layer, not clumps, because thick flour patches turn pasty under egg. Dip in egg and let the extra drip off, because too much egg sheds crumbs in a wet clump. Press into the breadcrumb mixture, coating both sides, including the skin edge, which is easiest to miss and first to curl and soften.
Use one hand for the dry bowls and the other for egg if you can, so your fingers do not build up coating and knock crumbs off. If crumbs clump as egg drips in, work from the dry part of the mixture, and refresh the bowl halfway through a double batch. Place each coated round straight onto the sheet or rack in a single layer. Do not stack coated rounds on a plate: they stick, tear each others coating, and release moisture while they wait. Coat close to baking time.
Rack Versus Pan Baking
On parchment-lined sheets, the standard method below, the top crisps well and the underside crisps more gently where it touches hot parchment. Flipping halfway is essential, because the underside spends the first half sitting in its own escaping moisture. Parchment itself matters: crisps stick to bare metal, and prying them off tears the coating.
On a wire rack set over a sheet, hot air circulates under the rounds as well as over them, so both faces dry at once and the underside usually finishes crisper. Oil the rack well first, because coating sticks to a dry rack just as it sticks to a dry pan, and keep the sheet underneath to catch drips. Flipping is still worthwhile for even browning, but a rack batch is more forgiving if delicate rounds would tear. If the rack has wide spacing, very small rounds can sag between the wires, so keep those for parchment.
Either way, spacing is non-negotiable. Leave clear space, use two sheets rather than one packed sheet, and never overlap rounds. Overlapping pieces steam each other and never crisp at the touching edges. Bake on the middle rack, or lower-middle if your oven runs cool. If you bake two sheets at once, swap their positions halfway when you flip, so one sheet does not finish paler than the other.
Full Method
Heat the oven to 425 degrees Fahrenheit, about 220 degrees Celsius. Line two baking sheets with parchment and spray lightly with olive oil spray, or set an oiled wire rack over a lined sheet for each batch.
Slice, salt, drain, and blot the zucchini as described above, then set up the three bowls. Coat every round in flour, then egg, then the Parmesan breadcrumb mixture, pressing crumbs on gently and placing each round in a single layer with space around it.
Spray the tops lightly with olive oil spray, which helps crumbs brown evenly. Bake for 18 to 22 minutes, flipping halfway with a thin spatula, until golden and crisp at the edges. Watch the last minutes closely, because at 425 degrees the line between golden and burnt is short, especially for thin rounds and cornmeal batches.
Centers will still feel slightly soft when hot. That is normal. Rest on the pan for 3 to 5 minutes: they firm as surface steam leaves and the coating sets. Serve warm with dips. For a double batch, serve the first tray while the second bakes, rather than holding it in a cooling oven where it will soften.
For an air fryer, cook in batches at 400 degrees Fahrenheit for 8 to 10 minutes, flipping halfway, with space between rounds. Air fried crisps are often crisper because forced air dries the surface quickly, but the basket holds fewer rounds, so serve batches as they finish.
Why Crisps Go Soggy, and How to Fix Each Cause
Sogginess has a short list of causes, and each has a specific fix. Work through this table before changing the recipe, because the recipe is rarely the problem.
| Problem | Likely cause | Fix next time |
|---|---|---|
| Soft all over | Salting or blotting skipped, or slices coated wet | Salt 15 to 20 minutes and blot both sides until dry |
| Crisp edges, soggy centers | Slices too thick | Slice near 1/4 inch, or bake longer at a slightly lower temperature |
| Pale, soft undersides | Crowded pan or no flip | Use two sheets, flip halfway, or bake on an oiled rack |
| Coating in the pan | Wet slices, loose crumbs, or rough flip | Dry thoroughly, press firmly, flip gently with a thin spatula |
| Crisp at first, soft within the hour | Covered while warm or stored sealed | Serve soon, hold uncovered in a single layer, re-crisp leftovers |
| Burnt edges, raw centers | Mixed thicknesses | Slice evenly and group thick rounds together for extra time |
On a very humid day, crisps soften faster after baking no matter how well you managed the oven, because dry coating pulls moisture back from the air. Serve soon after they cool, keep the plate uncovered, and re-crisp any that sit too long. A short return to a hot oven restores most of the edge.
Dips and Serving
Crisps work alone, but they shine in a spread. Warm marinara gives an Italian feel and plays on the Parmesan and seasoning in the coating. Ranch is the crowd-pleasing option, cool and herby against a hot, salty crisp. A garlic yogurt dip, plain yogurt stirred with crushed garlic and a pinch of salt, is lighter than both. Put dip in a small bowl rather than drizzling it over the crisps: drizzle softens coating on contact, while dipping keeps each crisp dry until it is eaten.
As a side, crisps pair well with grilled chicken, pasta, and sandwiches, where they add crunch a salad alone does not provide. Serve them beside saucy food, not underneath it. For a party, make a double batch with two dips, one tomato based and one creamy, and time the second tray to finish as the first plate empties.
Dips containing dairy or egg are perishable. Perishable food should not sit out for more than 2 hours, or 1 hour above 90 degrees Fahrenheit. Put out small bowls and refill from the refrigerator rather than leaving one large bowl out all afternoon.
Variations Worth Trying
For a spicier crisp, add 1/2 teaspoon red pepper flakes or cayenne to the breadcrumb mixture, so heat is distributed evenly instead of sprinkled on afterward. For a lemon and herb version, add a teaspoon of lemon zest to the coating and replace Italian seasoning with finely chopped fresh thyme and parsley. Add zest to the crumbs, not juice to the egg, because juice adds back the water you just removed.
For a gluten-free version, use gluten-free breadcrumbs and a gluten-free flour blend, and read the Parmesan label as you would any packaged ingredient, since pre-grated cheese varies by brand. Keep a gluten-free batch on its own tray so it does not pick up wheat crumbs. For a cheesier version, sprinkle extra finely grated Parmesan over the rounds in the last 2 minutes of baking, watching so it melts without burning. That late cheese has no crumb to protect it, so two minutes is enough.
For an egg-free coating, brush rounds lightly with milk or a plant based milk and press crumbs on firmly, accepting weaker adhesion. Flip especially gently, or bake on a rack and skip the flip. Yellow squash can stand in for zucchini with the same method. It is slightly softer and wetter, so drain it a few minutes longer and check the bake a minute or two early.
Storage and Re-Crisping
Crisps are best the day they are made, ideally within the first hour. That is a texture statement, not a safety one. A softened leftover is not unsafe for that reason alone. What changes first is quality: coating absorbs moisture from the center and the air, and a crisp edge turns leathery, then soft.
Cool leftovers completely before storing them, because sealing warm crisps traps steam. Cooled leftovers can be kept in an airtight container at room temperature for up to one day, accepting that they will soften. For longer keeping, or for leftovers with dips, follow federal guidance. The USDA Food Safety and Inspection Service advises refrigerating leftovers within 2 hours of cooking, 1 hour above 90 degrees Fahrenheit, keeping leftovers in the refrigerator for 3 to 4 days, and reheating leftovers to 165 degrees Fahrenheit as measured with a food thermometer. FoodSafety.gov, in its Cold Food Storage Chart and FoodKeeper resource, gives the same 3 to 4 day window for cooked leftovers. In practice, re-crisp and eat refrigerated crisps on the first or second day, because texture declines long before the safety window closes.
Re-crisp in a 400 degree Fahrenheit oven for 5 to 7 minutes in a single layer, or in an air fryer at 375 degrees Fahrenheit for about 3 minutes. Re-crisping does not restore a leftover to fresh condition, so reheat only what you will eat. Refrigerate dips promptly: dips containing dairy or egg should not sit out for more than 2 hours and should be used within 3 to 4 days refrigerated. When in doubt about a dip that sat out, discard it rather than tasting it to check. Do not freeze baked crisps for serving as crisps: freezing and thawing ruin the texture. Frozen raw coated rounds can be baked from frozen with extra time in a pinch, but they are a compromise, not a party plan.
Allergy and Ingredient Notes
This recipe as written contains wheat, milk, and egg: wheat in the flour and breadcrumbs, milk in the Parmesan, and egg in the coating. The U.S. Food and Drug Administration lists nine major food allergens in the United States: milk, egg, fish, crustacean shellfish, tree nuts, wheat, peanuts, soybeans, and sesame, with sesame becoming the ninth major allergen effective January 1, 2023. The FDA advises readers with food allergies to read the entire ingredient list every time they buy a product, because ingredients can change, and to check a contains statement where one appears while remembering that not every product carries one.
Read labels if you are cooking for someone with an allergy, including breadcrumb, flour blend, and pre-grated cheese labels, and keep an allergen-free batch on a separate tray with clean utensils. Substitutions change more than allergens. Gluten-free crumbs brown differently, egg-free coatings adhere less firmly, and plant based cheeses melt on a different schedule from Parmesan, so judge a first substituted batch by color and edge crispness rather than timing alone. This section is general label information, not medical advice for any individual reader.
Frequently Asked Questions
Can I use yellow squash instead of zucchini?
Yes, with the same method. Yellow squash is a fellow summer squash, and Clemson and Maine guidance for selection and storage applies to summer squash generally. It tends to be slightly softer and wetter, so drain it a few minutes longer, blot it especially well, and check the bake a minute or two early.
Why did my coating fall off?
Usually because slices were wet when coated, crumbs were not pressed on, or rounds were flipped roughly. Blot after salting until the surface feels dry, complete all three coating steps, press crumbs firmly, and flip gently with a thin spatula. Placing coated rounds straight onto the sheet, instead of stacking them, also protects the coating.
Can I make these ahead for a party?
Partially. Slice, salt, and blot zucchini up to four hours ahead and refrigerate the dried slices in a single layer, covered loosely. Coat and bake close to serving time, because coated rounds soften as they wait and baked crisps soften within hours. Bake in two waves during the party rather than one large wave before it.
Are these actually crispy?
They are crisp on the outside, especially at the edges, with a tender center. They are not shatteringly crisp like a potato chip. For a harder result, slice closer to 1/8 inch, bake longer at a slightly lower temperature so the slice dries before the coating burns, and accept a smaller yield and a more fragile crisp.
How do I keep a second batch crisp while the first is eaten?
Do not hold finished crisps in a closed oven or covered container. Hold them uncovered in a single layer for a short time only, serve the first tray while the second bakes, and re-crisp the first tray for a few minutes at 400 degrees Fahrenheit if it softens.
Can I skip the flour or the egg?
You can, but expect weaker adhesion. Flour gives egg a dry surface to cling to, and egg gives crumbs a wet surface to cling to. The egg-free variation above, brushing with milk and pressing firmly, is the better compromise if you need to omit egg, and rack baking without a flip protects it further.
Sources & references
- University of Maine Cooperative Extension, Bulletin 4257, Vegetables and Fruits for Health: Zucchini and Summer Squash. Used for summer squash being about 95 percent water, a cup of raw zucchini at about 20 calories, selection of firm, heavy, glossy squash without nicks or decay, large squash having large seeds and tough, stringy flesh, and storing unwashed squash in the refrigerator crisper in an open or perforated bag for up to a week.
- Clemson University Cooperative Extension, Home and Garden Information Center, Using and Storing Summer Squash, and Summer Squash. Used for buying small to medium squash no bigger than 8 inches, firm and heavy for size with plump, shiny skin, one pound equaling about 2 medium squash or about 3 and 1/2 cups of raw slices, no need to peel or seed unless oversized, refrigerator keeping for up to a week, harvesting zucchini at 7 to 8 inches while tender and glossy, and harvesting about 55 days after planting with daily or every other day picking in favorable conditions.
- USDA Food Safety and Inspection Service, Leftovers and Food Safety. Used for refrigerating leftovers within 2 hours, 1 hour above 90 degrees Fahrenheit, keeping leftovers 3 to 4 days in the refrigerator or 3 to 4 months frozen, and reheating leftovers to 165 degrees Fahrenheit.
- FoodSafety.gov, Cold Food Storage Chart, and FoodKeeper. Used for the 3 to 4 day refrigerator window for cooked leftovers at 40 degrees Fahrenheit or below, freezer storage being for quality, and FoodKeeper providing storage tips for over 650 foods and beverages.
- U.S. Food and Drug Administration, Have Food Allergies? Read the Label. Used for the nine major food allergens, milk, egg, fish, crustacean shellfish, tree nuts, wheat, peanuts, soybeans, and sesame, sesame becoming the ninth effective January 1, 2023, and the advice to read the entire ingredient list every time and to check contains statements.


