Short answer
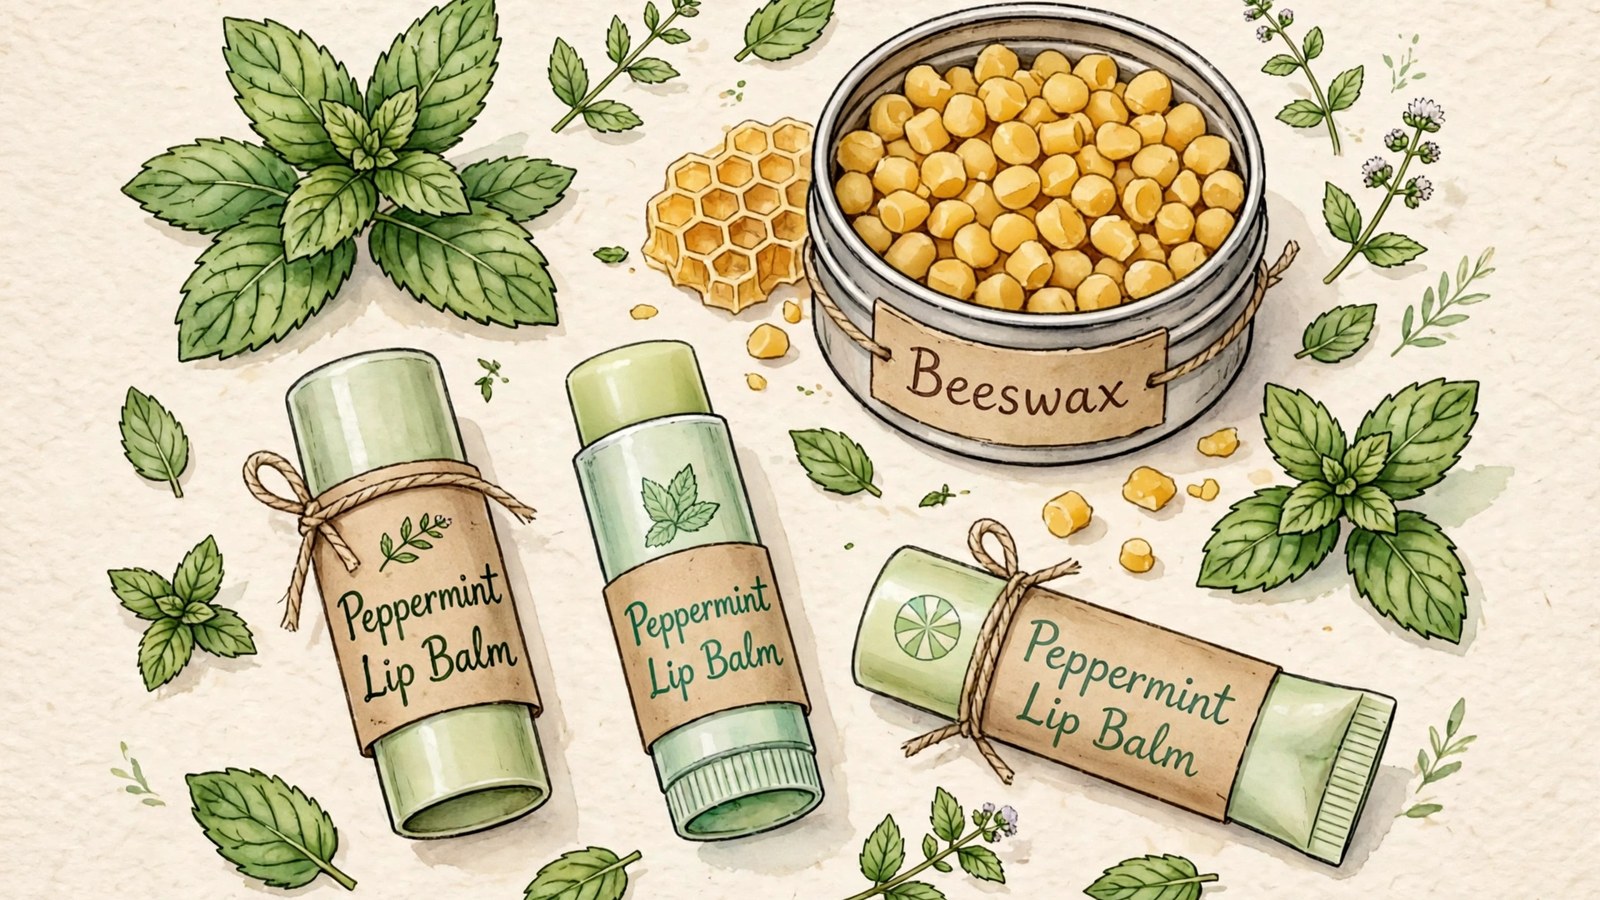
- Melt two tablespoons of beeswax pellets with two tablespoons of sweet almond oil or jojoba oil, plus one teaspoon of shea butter if you want extra richness, in a heat safe jug set in simmering water. Remove the jug from the heat, let it cool briefly, stir in two to three drops of peppermint essential oil only, and pour at once into clean, completely dry tubes or tins. That peppermint amount is deliberately low. Never apply peppermint oil undiluted to lips or skin, test the finished balm on a small area first following the American Academy of Dermatology method described below, and do not use peppermint balm on infants or young children, on broken skin, or near the eyes. Label every container with its ingredients and the date made, and use the batch within about six months as a cautious home rule, sooner if it smells off or changes texture.
Introduction
Homemade lip balm is one of the most satisfying small projects you can make in a kitchen. It takes about half an hour, uses a handful of ingredients, and produces something you will actually use every day. A beeswax and peppermint balm feels firm in the tube, glides on smoothly, and leaves a cool, clean tingle that suits cold mornings, long walks, and dry indoor air in winter.
This guide gives a straightforward starting recipe built around beeswax, a carrier oil, and a small amount of peppermint essential oil, with clear safety notes about dilution and testing a new product on a small area of skin first. Peppermint oil is potent, and more is not better. A balm with too much peppermint can sting, dry the lips, or irritate sensitive skin, while a balm with a restrained amount feels refreshing and comfortable. The recipe below keeps the peppermint low on purpose, and the safety section explains why and how to test before you commit to using a whole batch.
A note on expectations matters at the start. This is a home craft project, not a tested cosmetic formulation and not medical advice. It will not heal cracked, bleeding, or infected lips, and it is not a substitute for sun protection or for medical care if your lips are persistently sore. What it will do is give you a simple, pleasant balm whose ingredients you chose yourself, in a tube or tin you can refill again.
How Lip Balm Works
The red part of the lips, the vermilion, is thin and exposed. A clinical review of lip anatomy and pathology, drawing on StatPearls, describes the vermilion as a modified mucous membrane only three to five cellular layers thick, containing no hair follicles, salivary glands, sweat glands, or sebaceous glands. With no oil glands of its own and such a thin surface, it loses moisture readily, especially in wind, cold, and dry heated air. The same review notes that lip licking makes simple chapped lips worse, because it removes the thin oily surface film that protects the lips.
A lip balm works mainly by forming a thin barrier that slows moisture loss from the lip surface, rather than by adding water to the lips themselves. That is why a balm can feel protective even though it contains no water.
Beeswax gives this balm its structure. The Joint FAO and WHO Expert Committee on Food Additives describes beeswax as the refined wax from honeycombs and gives its melting point as 62 to 65 degrees Celsius, or about 144 to 149 degrees Fahrenheit. It is firm at room temperature, melts in a water bath, and sets into a smooth solid that holds oil in place. Without enough beeswax, a balm is soft and messy in a pocket. With too much, it is hard and drags.
Carrier oils do the softening work. Almond oil is light and neutral, jojoba oil feels silky, and olive oil is richer. Coconut oil is also popular, but it melts at around 76 degrees Fahrenheit, so it can make a balm softer in a warm pocket, which is why it is an option here rather than the default.
Choosing Ingredients
Buy cosmetic grade beeswax pellets or a clean block from a reputable supplier, and avoid beeswax sold for candles if it contains additives or fragrance, because those do not belong on lips. Pellets melt faster and are easier to measure than a block. Yellow beeswax gives a warm, honey colored balm, while white beeswax, which the FAO and WHO committee notes is bleached yellow beeswax, gives a paler balm. The committee also noted that beeswax might have allergenic potential, so beeswax belongs on the label and in your test spot even though reactions are uncommon.
Choose a carrier oil that you know you tolerate. Sweet almond oil is made from almonds, a tree nut, so do not use it if you have an almond or tree nut allergy, and do not give an almond oil balm to someone with that allergy. Shea butter needs a careful, current note. It is made from the seed of the shea fruit, and the Food and Drug Administration removed shea nut from its list of tree nuts considered major food allergens in its revised guidance published in January 2025. That food labeling change does not prove shea butter suits every person with a nut allergy, so anyone with a nut allergy history should check with a clinician before using it and should always see it named on the label. Buy oils in small bottles and check that they smell fresh rather than rancid, because old, oxidized oils can irritate skin.
Peppermint essential oil needs the most care of any ingredient here. Buy a small bottle from a reputable supplier, keep it tightly closed, and store it up and away from children. The National Center for Complementary and Integrative Health, part of the National Institutes of Health, states that essential oils are very concentrated, that side effects of applying peppermint oil to the skin can include rashes and irritation, and that peppermint oil should not be applied to the face of infants or young children because serious side effects may occur if they inhale the menthol in the oil. Never apply it undiluted, and keep it away from the eyes.
You will also need containers: tubes, small tins, or tiny jars, all clean and completely dry. Tubes are most convenient for daily use, tins are easier to fill and refill, and jars require a clean finger or spatula, which adds contamination risk each time.
Tools and Safety Setup
Set up a double boiler, or a heat safe jug set in a pan of simmering water, rather than melting ingredients directly over high heat. Beeswax melts at 62 to 65 degrees Celsius and wax can scorch or catch fire if overheated, so gentle, indirect heat and constant attention are essential. Keep the heat low and never leave melting wax unattended. Have oven mitts ready, because the jug and the melted mixture will be hot enough to burn skin. Keep children and pets out of the work area while wax is hot.
Work on a protected surface, such as a tray lined with newspaper or a silicone mat, because spills harden quickly. Keep paper towels nearby, keep essential oil bottles closed when not in use, and keep the area clear of anything flammable. If you spill melted wax, let it cool and harden before scraping it up, rather than wiping hot wax, which spreads it and risks a burn.
Cleanliness matters more for lip balm than for most crafts, because the finished product goes on your mouth. The Food and Drug Administration publishes good manufacturing practice guidelines for cosmetics that stress clean, sanitized equipment and utensils, raw materials stored to prevent contamination, and sanitary production conditions. At home scale, that means washing your hands, washing containers and utensils in hot, soapy water, rinsing well, and letting them dry completely before filling. Do not taste the mixture during making, and do not dip a used applicator back into a finished balm.
The Starting Recipe
This recipe makes about six standard lip balm tubes, or about three small tins, depending on container size. You will need:
- 2 tablespoons beeswax pellets
- 2 tablespoons sweet almond oil or jojoba oil
- 1 teaspoon shea butter, optional, for extra richness
- 2 to 3 drops peppermint essential oil, no more
That peppermint amount is deliberately low. Drops vary in size, so this is a kitchen estimate rather than a measured formulation, but two drops in a batch of this size works out at roughly 0.15 to 0.2 percent, and three drops at roughly 0.3 percent, close to the low end of leave on use reported for peppermint oil. If you are sensitive, start with one drop, test the balm, and only increase in a future batch if it feels comfortable. Never strengthen a finished batch by stirring in extra oil, because you cannot distribute it evenly.
Write down the exact amounts you use, so the second batch is easier to adjust.
Do not add water, honey, fruit juice, or fresh ingredients. Honey must not be given to infants under 12 months, because honey can cause infant botulism; that is the position of the Centers for Disease Control and Prevention. This balm contains no preservative, and that is only workable because it is water free. The Food and Drug Administration notes that dipping fingers into a product adds microorganisms such as bacteria and fungi, which need to be controlled, for example by preservatives, and that exposure to moisture can make it easier for bacteria and fungi to grow. A water based addition would need a preservative system this recipe does not have, and without one it can grow mold and bacteria in a product that sits in a pocket for weeks. Keep the recipe oil and wax only.
Making the Balm Step by Step
Step 1: Melt gently
Place the beeswax, carrier oil, and shea butter if using it in your heat safe jug, and set the jug in a pan of gently simmering water. Stir occasionally with a clean stick or spoon, keeping the heat low and steady. The mixture will turn from cloudy and lumpy to clear and liquid, usually in about ten minutes. Do not let the water boil vigorously, and do not let water splash into the jug, because water in the finished balm causes cloudiness and can encourage spoilage.
Step 2: Cool briefly and add the peppermint
When everything is fully melted and smooth, remove the jug from the heat using oven mitts, and let it cool for a minute or two, stirring gently. The mixture should still be liquid but not scalding hot when you add the peppermint oil. Adding essential oil to very hot wax can drive off its aroma and increase fumes. Add the oil drop by drop, counting carefully, and stir well.
Step 3: Pour promptly
Pour promptly into your prepared tubes or tins, because the mixture begins to set as it cools. Fill tubes to just below the rim and tins to just below the edge. If the mixture thickens in the jug, return it briefly to the warm water bath to re melt it, rather than forcing lumpy balm into containers. Wipe drips from the outside of containers while they are still warm.
Step 4: Set, check, and label
Let the filled containers sit undisturbed until fully set and cool to the touch. Each balm should be smooth, firm but not hard, and free of graininess or separation. Graininess sometimes happens when shea butter cools too slowly, and reheating then cooling more quickly often improves it. Cap the containers, label them with the ingredients and the date made, and set one aside for your test spot before regular use or giving any away.
Testing a New Balm and Safe Use
The American Academy of Dermatology advises applying the product to a quarter sized test spot, such as the underside of your arm or the bend of your elbow, twice daily for seven to ten days, using the normal amount and thickness. A single 24 hour check, which some craft guides suggest, can miss a delayed reaction, so do not shorten this method. The Academy notes that more than 15,000 allergens can cause allergic contact dermatitis, that skin care products are a common cause, and that even products labeled hypoallergenic, natural, or clean can cause a reaction.
Watch for red, itchy, or swollen skin, stinging, or a rash. If any of these appear, wash the product off gently as soon as possible and do not use that batch again. The Academy advises a cool compress or petroleum jelly if needed, and seeing a dermatologist if a severe reaction is not relieved that way. If the test spot stays comfortable through the full seven to ten days, try a tiny amount on one corner of your lips, wait a few hours, and only then use the balm normally. A clear test spot lowers the risk. It does not guarantee a reaction will never happen.
Peppermint deserves particular respect in this test. Its cooling tingle comes from menthol, and that tingle is, in effect, a mild irritation that most people enjoy in small amounts but that sensitive lips experience as burning or dryness. The National Center for Complementary and Integrative Health lists skin rashes and irritation among the side effects of applying peppermint oil to the skin, and says it can rarely cause allergic reactions. If your lips sting for more than a few moments, feel tight or dry after use, or develop small cracks, the peppermint level is too high for you, even if a friend loves the same batch. Make your next batch with fewer drops, or with no essential oil at all.
Do not use peppermint lip balm on broken, cracked, or bleeding lips, on cold sores, or on skin with eczema or another condition, and do not use it near the eyes. Do not apply it to the face of an infant or young child, and keep peppermint balm away from infants and young children generally, because inhaled menthol may negatively affect their breathing and serious side effects may occur. For children, a plain balm without essential oil is the safer choice. Tisserand Institute guidance adds an explicit age line: avoid peppermint essential oil on children under 3 years, and for children ages 3 to 6, use no more than 0.5 percent. If you are pregnant, nursing, or managing a health condition, ask a clinician or pharmacist before using essential oil products, rather than relying on a craft guide for medical advice. Little is known about whether peppermint in larger than food amounts is safe during pregnancy or while breastfeeding.
Stop using any homemade balm and seek advice if you develop persistent redness, swelling, blistering, or a rash, or if lip soreness does not improve. Allergic reactions to beeswax, carrier oils, and essential oils are uncommon but real. Note which ingredient you suspect, so you can avoid it in future batches.
Texture, Scent, and Color Variations
Once the basic balm works for you, small variations let you tailor it without changing the safety rules. For a softer balm, reduce the beeswax slightly and increase the carrier oil, and use it in a tin, where softness is an advantage. For a firmer balm that survives a warm pocket, increase the beeswax slightly and skip shea butter, which softens the finished product. Make only one change at a time.
For scent variations, keep the total essential oil low and use only one oil at a time. Every essential oil has its own safety profile, and an oil commonly used on skin elsewhere is not automatically suitable for lips. Research each oil first, check whether it is recommended for leave on lip use at all, and test every new version with the same seven to ten day method. Never mix several strong oils in a first batch. Citrus oils can increase sun sensitivity on skin, so they are a poor casual swap for a product worn outdoors.
For a tinted balm, color is regulated, not improvised. The Food and Drug Administration states that cosmetic products and ingredients, other than color additives, do not need its approval before going on the market, but color additives are the exception. Its table of color additives permitted for use in cosmetics lists mica as permitted generally, a category that includes lipsticks. That permission does not cover craft glitter, which is not a listed cosmetic color additive and does not belong on lips, or food coloring, which is water based and will not mix into a wax balm. If you tint a balm, use only a mica sold for cosmetic lip use, follow its supplier instructions, and test the tinted version like any new batch. Powdered kitchen ingredients such as beetroot powder give uneven, grainy color and add plant material to a preservative free product, so they are not recommended here.
Troubleshooting
If the balm is too hard, it has too much beeswax for your taste or climate. Re melt the batch, add a little more carrier oil, stir well, and re pour into clean, dry containers. If it is too soft and melts in a pocket, it has too little beeswax or too much butter or coconut oil. Re melt it, add a few more beeswax pellets, and re pour. Re melting and adjusting is normal in balm making. Test any adjusted batch again before regular use if you changed the essential oil amount.
If the balm feels grainy, the shea butter probably cooled slowly and formed crystals. Reheat until fully liquid, stir well, and cool more quickly. If the balm separates, the mixture was not stirred enough after adding the essential oil, or water got into the jug. Re melt, stir thoroughly, and re pour into clean, dry containers.
If the balm has little scent, the peppermint oil may have been added while the wax was too hot, or the batch may simply be at the low, safe end of scent. Resist the urge to add many more drops to a finished batch, because scent strength and irritation risk rise together.
If the balm smells rancid or off, or develops mold, discoloration, or an unusual texture, discard it. Rancidity comes from old oils or storage in heat and light, and mold comes from water contamination or dirty containers. Do not try to rescue a spoiled balm by re melting it, because re melting does not remove rancid oils or mold. Make a fresh batch with fresh oils and clean, dry containers.
Storage and Shelf Life
Store finished balm in a cool, dry place away from direct sunlight and heat. The Food and Drug Administration advises not leaving cosmetics where they are exposed to heat, such as in a hot car, and notes that temperature changes and exposure to sunlight and air can cause changes in color and texture and may cause products to smell. Keep tubes capped and tins closed to limit dust and contamination.
Label every container with its ingredients and the date made, including the carrier oil and the essential oil. The Food and Drug Administration states that no United States law requires cosmetics to carry a specific shelf life or expiration date, and that determining shelf life is part of the manufacturer responsibility. For a homemade batch, use about six months as a cautious planning guide, and sooner if it smells off, changes texture, or has been carried in heat repeatedly. That six month guide is a home rule, not a tested expiry date, and fresher is always better for a preservative free product that goes on your mouth.
Do not share a used lip balm tube or tin. The Food and Drug Administration advises consumers not to share makeup, because you may be sharing an infection, and a clinical review of lip conditions lists shared cosmetics among the activities that can expose a person to saliva from someone with a cold sore. A tin touched repeatedly with unwashed fingers also collects microorganisms faster than a tube. For gifts, give sealed, unused containers with a full ingredient label, so the recipient can check for allergies and run their own test spot.
Gifting, Labeling, and the Limits of a Home Batch
A gift balm needs a proper label even more than a personal batch does. List every ingredient, note that it is homemade and not a commercial cosmetic, and add the date made and a note to test on a small area before regular use. If the recipient has allergies, ask before you make their balm, and choose a carrier oil you know they tolerate, rather than guessing. Do not make gift batches months in advance, because scent fades and oils age.
Be honest about what the balm is. Do not claim that it heals, treats, or prevents any condition, and do not describe it as natural, organic, or hypoallergenic unless every ingredient genuinely meets that description and you can say why. The Food and Drug Administration explains that a product intended for a therapeutic use, such as treating or preventing disease, is a drug rather than a cosmetic, even if it also affects appearance.
Selling is a different step again. The Food and Drug Administration states that companies and individuals who manufacture or market cosmetics have a legal responsibility to ensure the safety and labeling of their products, that cosmetics must not be adulterated or misbranded, and that it can inspect cosmetic manufacturing facilities. It is not against the law to manufacture cosmetics in your home, but home manufacture does not remove those responsibilities, and state rules can add more. Do not sell homemade balm based on this guide alone. This guide is for personal use and gifts only.
Frequently Asked Questions
Can I make lip balm without beeswax?
Yes. Plant based waxes such as candelilla wax can replace beeswax, but candelilla is harder and denser than beeswax, so you need less of it. Supplier guidance commonly recommends starting with about half the amount of candelilla you would use of beeswax, then testing and adjusting. Do not assume a one to one swap will work, and test any new version with the same test spot method.
Can children use peppermint lip balm?
Not this one. The National Center for Complementary and Integrative Health states that peppermint oil should not be applied to the face of infants or young children because serious side effects may occur if they inhale the menthol in the oil, and that menthol may negatively affect their breathing. Lips are on the face, so keep peppermint balm for adults. For children, make a plain beeswax balm without essential oil instead.
Why does my balm smell strong at first and then fade?
Essential oil aroma is strongest when the balm is freshly made and fades gradually as the balm is used and stored. This is normal, and it is not a sign that the balm has gone bad. Discard a balm that smells rancid or off, which is different from simple fading.
Can I add sun protection to homemade balm?
No, not reliably. The Food and Drug Administration treats products with SPF labeling as both cosmetics and drugs, and drug products must be tested for stability and carry expiration dates. Home mixing cannot guarantee a protection factor or even coverage. If you need sun protection for your lips, use a commercial lip product with a stated sun protection factor, and use your homemade balm at other times.
How do I clean up melted wax?
Let spills cool and harden, then scrape them up. Wash the jug and utensils in hot, soapy water, wiping out as much wax as possible with a paper towel first, so wax does not clog your drain. Do not pour melted wax down a sink.
Can I sell homemade lip balm?
Selling cosmetics brings legal responsibilities for safety, labeling, and making conditions that go beyond a home craft guide, and state rules may add more. Do not sell homemade balm based on this guide alone.
Sources & references
- Food and Drug Administration, FDA Authority Over Cosmetics: How Cosmetics Are Not FDA Approved, but Are FDA Regulated. Used for cosmetics being defined by intended use, a product intended for therapeutic use being a drug, cosmetics and ingredients other than color additives not needing FDA premarket approval, cosmetics having to be safe and properly labeled and not adulterated or misbranded, manufacturers and marketers having a legal responsibility for safety, and FDA being able to inspect cosmetic manufacturing facilities.
- Food and Drug Administration, Good Manufacturing Practice (GMP) Guidelines and Inspection Checklist for Cosmetics. Used for rigorous adherence to good manufacturing practice minimizing the risk of adulteration or misbranding, equipment and utensils being clean and sanitized at appropriate intervals, raw materials being stored and handled to prevent contamination, and production equipment and containers being clean, in good repair, and in sanitary condition.
- Food and Drug Administration, Shelf Life and Expiration Dating of Cosmetics. Used for shelf life meaning the time a product can be expected to look and act as expected and stay safe for use, dipping fingers into a product adding microorganisms such as bacteria and fungi which need to be controlled for example by preservatives, exposure to moisture making it easier for bacteria and fungi to grow, temperature changes and sunlight and air causing changes in color, texture, and smell, no United States law requiring a specific cosmetic shelf life or expiration date, determining shelf life being part of manufacturer responsibility, products with SPF labeling being regulated as both cosmetics and drugs, drugs requiring stability testing and expiration dates, not sharing makeup because you may be sharing an infection, keeping containers and applicators clean, and not leaving cosmetics exposed to heat such as in a hot car.
- Food and Drug Administration, Color Additives Permitted for Use in Cosmetics. Used for the table listing mica as a color additive exempt from certification and permitted for use in cosmetics generally, a category that includes lipsticks, at 21 CFR 73.2496.
- Food and Drug Administration, Frequently Asked Questions: Food Allergen Labeling Guidance for Industry. Used for the revised guidance published on 6 January 2025 and for shea nut being among the tree nuts no longer considered major food allergens and no longer on the tree nut list in that guidance, while almond remains a tree nut.
- National Center for Complementary and Integrative Health, National Institutes of Health, Peppermint Oil: Usefulness and Safety, last updated May 2025. Used for essential oils being very concentrated oils, side effects of applying peppermint oil to the skin including skin rashes and irritation, peppermint oil rarely causing allergic reactions, peppermint oil not being applied to the face of infants or young children because serious side effects may occur if they inhale the menthol, menthol not being inhaled by or applied to the face of an infant or small child because it may negatively affect breathing, and little being known about safety in larger than food amounts during pregnancy or while breastfeeding.
- American Academy of Dermatology, How to Test Skin Care Products Before Use, news release 19 August 2021, reported through Newswise. Used for applying a product to a quarter sized test spot twice daily for seven to ten days on the underside of the arm or the bend of the elbow, using the normal amount and thickness, watching for red, itchy, or swollen skin, washing the product off and not using it again if a reaction develops, more than 15,000 allergens being able to cause allergic contact dermatitis, and even products labeled hypoallergenic, natural, or clean being able to cause a reaction.
- Piccinin and Zito, Anatomy, Head and Neck: Lips, StatPearls, as summarized in Kiss and Tell: Variations of Normal and Pathology of the Lips, a clinical review in Todays RDH. Used for the vermilion being a modified mucous membrane of three to five cellular layers containing no hair follicles, salivary, sweat, or sebaceous glands, for lip licking removing the thin oily surface film and worsening simple chapped lips, and for shared cosmetics being among the activities that can expose a person to saliva from someone with herpes labialis.
- Joint FAO and WHO Expert Committee on Food Additives, Beeswax, WHO Food Additives Series 30, hosted by INCHEM. Used for beeswax being the refined wax from honeycombs, white beeswax being bleached yellow beeswax, beeswax having a melting point of 62 to 65 degrees Celsius, and the committee noting that beeswax might have allergenic potential and that consumers should be made aware of its presence.
- Centers for Disease Control and Prevention, guidance on honey and infant botulism. Used for honey not being given to infants under 12 months.
- Tisserand Institute, peppermint essential oil safety guidance for children. Used for avoiding peppermint essential oil on children under 3 years and the 0.5 percent level for children ages 3 to 6.


