Short answer
- Buy pre-cut, fully dry wood slices about 3.5 to 4.5 inches across and a quarter to a half inch thick, or dry your own slices slowly first, because wood shrinks and checks as it loses moisture below about 28 to 30 percent moisture content. Sand the top smooth, finishing near 220 grit. Separate a decorative napkin down to its printed top layer, brush a thin coat of decoupage medium onto the slice, lower the motif from one edge, and smooth it gently from the center outward. Seal the paper with thin coats of the medium, then protect the top with several thin coats of a clear water resistant finish, following that product label for recoat and use times. Treat food and heat limits plainly: Plaid states that its Dishwasher Safe decoupage formula is not food safe, so never serve food directly on a decoupaged surface, and use a coaster for hot mugs only if the topcoat maker explicitly rates that product for hot items. If the label is silent about heat, keep that set for cold drinks and say so.
Introduction
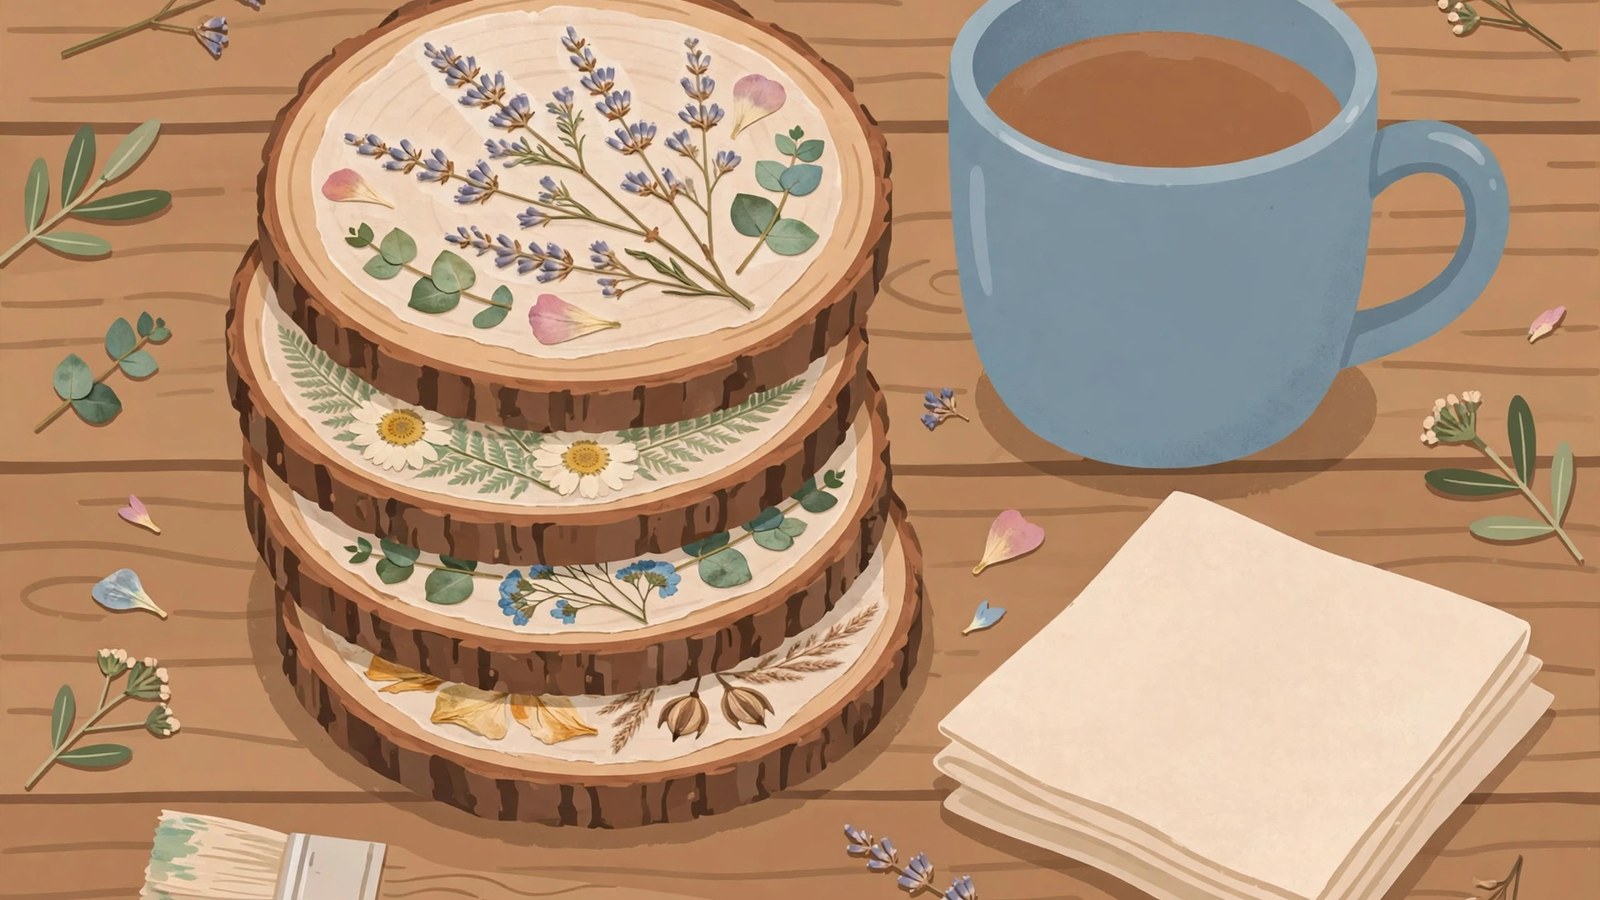
Wood slice coasters have a warmth that store bought coasters rarely match. Each slice has its own grain, its own rings, and its own slightly irregular edge, and a decoupage design turns that natural surface into something personal. A paper napkin motif, a pressed leaf print, or a piece of decorative paper can suit a rustic kitchen, a cabin living room, or any table where a handmade touch is welcome.
This project needs patience, mostly for drying time between coats, but no advanced woodworking skill. The steps below cover choosing slices that will not crack apart, preparing them, applying a decoupage design cleanly, and sealing the finished coaster honestly. That last word matters. A decoupage medium is a glue and sealer for paper, not a food contact coating, and common clear finishes do not all carry a rating for hot mugs. This guide separates what the manufacturers actually state from what craft folklore assumes, so the coasters you give away are labeled for the use they can really handle.
What You Will Need
For a set of four to six coasters, gather:
- Four to six wood slices, roughly 3.5 to 4.5 inches across and a quarter to a half inch thick
- Decorative paper napkins, tissue paper, or thin decorative paper with motifs you like
- A water based decoupage medium and a soft, flat brush
- A clear, water resistant topcoat finish, chosen using the heat and food section below, not by habit
- Sandpaper in medium and fine grits, around 120 grit and 220 grit
- Scissors and a craft knife for trimming paper
- A foam brush or soft bristle brush for the topcoat
- Optional acrylic paint for the edges, felt pads or cork sheet for backing, and ribbon or twine for tying a gift set
- A protected work surface, such as newspaper or a silicone mat
Read both product labels before you open anything. The decoupage medium and the topcoat do different jobs and have different limits, drying times, and cleanup rules. The label in your hand, for the exact formula you bought, governs where this guide gives a general range.
Why Wood Slices Crack, and How Drying Prevents It
Most failed coasters fail before any paper is glued down. The wood was still drying, and it kept moving after the design and finish went on.
Purdue University Extension explains the mechanism in its guide to drying small quantities of hardwood lumber. Up to one half of the weight of freshly cut hardwood can be water. As moisture content drops below about 28 to 30 percent, a point called the fiber saturation point, shrinkage begins, and shrinkage can be accompanied by defects such as end splitting, surface checking, cupping, bowing, and twisting. Above that point, the water leaving is free water held in the cell cavities, and its removal does not shrink the wood. Below it, the water comes from the cell walls, so the wood gets smaller as it dries.
Direction matters as much as amount. The same guide distinguishes tangential shrinkage, parallel to the growth rings, from radial shrinkage, parallel to the wood rays, and notes that the two rates differ, with tangential values consistently larger. On a round slice that mismatch puts the outer rings under stress that usually escapes through a crack running outward from the center.
A slice also dries unevenly. Purdue notes that moisture moves through wood about 10 to 15 times faster in the longitudinal direction than laterally, and that rapid loss at the ends of a board creates stresses that lead to end checking. A wood slice is a short cross section of a branch or log, so both of its large flat faces are end grain, the fastest drying surface the wood has. The surface shell also dries and tries to shrink while the core is still wet and holding its size, which opens surface checks. End coatings are used on lumber ends precisely to slow that fast loss and reduce checking.
Practical rules for coaster slices follow from that science:
- Start dry, or dry slowly. If you cut your own slices, keep them out of direct sun, away from heat vents and fans, and in a calm spot where both faces get similar air. Stacking them with thin dry spacers between faces, the same sticker principle used for lumber piles, keeps air moving evenly instead of trapping moisture against one face. Rushing with heat is the classic way to open checks.
- Aim for indoor moisture levels. Purdue states that wood at 6 to 8 percent moisture content is suitable for indoor use, and that air dried lumber typically reaches only about 15 to 20 percent, which is not dry enough for indoor use without further drying. A craft ready slice should already be in the indoor range. A slice you cut yourself needs real time indoors before it is stable enough to decorate.
- Let the set rest before finishing. Bring cut or bought slices into the room where the coasters will live and leave them for at least several days before sanding and gluing. A slice that is going to check usually shows hairline checks in that window, and it is far better to reject it then than after you have sealed a design onto it.
- Cut a little thicker. Slices about a quarter to a half inch thick resist warping better than very thin slices, and thickness gives you material to sand a face flat again if it moves slightly. Very thin slices warp more easily and use their small strength quickly.
- Seal every face at the end. Sealing the top, bottom, and edge at the finishing stage slows later moisture exchange with the room. It does not stop movement in wood that was never dry, which is why sealing is the last step of crack prevention, not a substitute for drying.
None of this guarantees a crack free set. Some species check more readily than others, and Purdue singles out oak as slow and difficult to dry, with serious checking and splitting possible even during air drying. Cutting extra slices is not waste. It is how you end up with four good coasters instead of forcing a cracked one into the set.
Choosing and Preparing the Slices
You can buy pre-cut, pre-sanded slices from craft suppliers, the easiest route for a first project, or cut your own from a fallen branch if you have a suitable saw, eye protection, and permission to take the wood. If you cut your own, use dry, seasoned wood where you can. Freshly cut green wood will shrink and crack as it dries, as the section above explains.
Prepare each slice before decorating:
- Inspect the slices. Set aside any with deep cracks, loose bark that will not stay attached, or soft, punky spots. A few small checks and knots are fine and add character. Structural cracks are not fine, because a crack under a mug collects liquid and keeps opening.
- Sand smooth. Start with a medium grit sandpaper, around 120 grit, to remove rough spots and loose bark, then finish with a finer grit, around 220 grit, for a smooth top surface. Sand the top, where the design will go, most carefully. A smooth surface is what lets thin paper lie flat. Wipe away dust with a dry cloth or brush, because dust left under paper shows as gritty bumps.
- Decide about the bark. Some makers love the bark edge. Others remove it for a cleaner look and to avoid bark flaking onto the table later. If you keep the bark, seal it thoroughly in the sealing step and expect a little flaking over time. If you remove it, sand the edge smooth so the topcoat can cover it evenly.
- Check for flatness. Set each slice on a flat surface and check for rocking. A coaster that rocks will annoy everyone who uses it. Sand a slightly uneven slice flatter on the bottom, or level it later with felt pads or cork backing.
- Consider a base coat. A thin coat of decoupage medium on the bare top, left to dry fully, can stop the wood absorbing the gluing coat unevenly and darkening in patches. Test on a spare slice first, because any clear coat changes the wood tone slightly.
How Decoupage Medium Actually Works
Decoupage medium is an all in one glue, sealer, and finish. Plaid, the maker of Mod Podge, describes its formulas in exactly those terms, and its guidance is a useful model for water based decoupage mediums generally, whichever brand you use.
Three of Plaid’s working tips translate directly to coasters. First, for napkins, remove the excess layers before application, using a small piece of tape to lift the bottom layers, and keep only the top printed layer. Gluing a full two or three ply napkin down makes a thick, cloudy patch that wrinkles. Second, for stronger adhesion, apply the medium to both the back of the paper and the project surface, which reduces lifting later. On a coaster, take care not to soak the fragile printed ply from behind. Third, expect temporary buckling. Plaid notes that paper may buckle or wrinkle during application, that this is a normal part of drying, and that it typically resolves as the adhesive cures. It warns against pressing or flattening wet paper, which can set permanent creases. Its smoothing method is to place wax paper over the still wet paper and glide a squeegee across it, pushing out air bubbles without fingers dragging on the wet napkin.
Plaid also suggests a white base coat under napkin designs when you want the colors to stay vivid, because a translucent napkin ply over dark wood will darken and mute. On light wood the effect is small. On walnut or stained slices it decides whether a motif looks bright or muddy. Foam brushes need restraint too: Plaid warns against overloading one, because too much medium is hard to control and creates drips. The moral is the same throughout. Thin, patient coats beat one generous coat.
Applying the Decoupage Design
- Choose and cut your motif. If you are using paper napkins, separate the layers and keep only the printed top layer. Cut or tear the motif to roughly the size you want. Torn edges blend into the wood more softly than cut edges, which can leave a visible line. If you cut, cut close to the motif.
- Plan the layout. Lay each motif on its slice without glue and step back to look at the set as a whole. A set looks best when the motifs share a theme, all botanical, all vintage maps, or all in one color family, even if each coaster design is different.
- Apply a thin coat of medium to the top of the slice with a soft brush. Work in one direction and keep the coat thin and even. Thick glue pools, wrinkles paper, and dries cloudy.
- Lay the paper down gently. Place the motif onto the wet medium, starting from one edge and lowering it gradually so air escapes ahead of the paper instead of getting trapped underneath. Do not stretch the paper. It tears easily when wet.
- Smooth from the center outward. Glide a squeegee or a piece of plastic wrap over your finger gently outward from the center, pushing out air bubbles. Work lightly. Pressing hard tears wet napkin paper, and pressing to flatten a temporary wrinkle can set a permanent crease.
- Seal the paper. Once the motif is in place, brush a thin coat of medium over the top, again from the center outward. Let it dry fully before adding another coat. Plaid’s Dishwasher Safe formula directions, as one concrete example, call for two to three thin top coats with one to two hours of drying between coats.
- Trim and tidy. After the first sealing coat dries, trim any paper overhanging the edge with a craft knife or fine sandpaper, sanding downward along the edge so the paper does not lift. Touch up bare wood at the edge with a little paint if it looks unfinished against the design.
Photographs need one adjustment. Laser printed images on thin paper behave better than inkjet prints, which can smudge when wet, and better than thick photo paper, which does not conform to the wood. Test one coaster first.
Food Contact and Heat: The Limits, Stated Plainly
This is the section gift labels and craft blogs most often get wrong, so it is worth being exact.
Decoupage medium is not a food contact coating. Plaid states directly that its Dishwasher Safe formula is not food safe, even though the same formula is described as non-toxic and water based. Non-toxic and food safe are different claims. Non-toxic describes the product as a craft material used as directed. Food safe, for a coating, means the finished film is cleared for contact with food under stated conditions. The United States Food and Drug Administration regulation for resinous and polymeric coatings, 21 CFR 175.300, allows such coatings as a food contact surface only under prescribed conditions, with the coating applied as a continuous film that serves as a functional barrier and formulated from listed substances, and with extractives limits tested under conditions matching the intended use. A craft decoupage bottle makes no such claim, so do not create one for it.
For coasters, the practical consequences are simple. A mug base sitting on a coaster is not food contact, and that normal use is fine. What is not fine is placing food directly on a decoupaged or craft finished surface, or using a large slice as a mini serving board or cheese plate, or cutting food on one. Make serving boards a separate project with a finish the maker explicitly clears for food contact, used exactly as directed.
Heat resistance is a product claim, not a property of clear finishes in general. The two manufacturer technical sheets checked for this guide illustrate the gap. Minwax describes its Polycrylic protective finish as resisting abrasion, scuffing, chipping, water, alcohol, and other common household chemicals, and recommends it for furniture, doors, molding, and cabinets. Its aerosol directions call for at least three coats on unfinished wood, light sanding with 220 grit between coats, and 24 hours after the final coat before heavy use. Rust-Oleum describes its Varathane water based polyurethane as protection from scratches and stains for interior furniture, doors, windows, cabinets, and trim, with a minimum of three brush coats, at least two hours between coats, 24 hours before light use, and three days before normal usage. Neither sheet states a hot mug rating or a maximum service temperature for tabletop items. Silence on a technical sheet is not a rating.
So choose and label by this rule. If a topcoat’s own literature explicitly says it suits hot items or tabletop heat, use it for hot drinks, follow its full cure directions, and still expect very hot or long sitting mugs to test any finish. If the literature does not say that, treat the set as a cold drinks set. Ordinary decoupage medium alone is the weakest option for a working coaster: it can soften, turn tacky under a warm mug, stick to the mug base, or show white rings from condensation. It seals the paper. It is not the final defense.
Dry is not cured. A finish can feel dry in under an hour and still need a day before light use and days before normal use, and Plaid’s Dishwasher Safe formula needs a full 28 days of air curing before its top rack dishwasher claim applies. Recoating too early traps moisture and can cloud the finish, and using a coaster too early can press a mug ring into a film that has not hardened. Write the finish date on painter’s tape on the bottom of the last coaster, and do not gift or use the set before the longest time any product on it requires.
Sealing for Real Use
- Apply the first topcoat thinly. Brush a thin, even coat of your chosen clear finish over the top and around the edges, including the bark edge if you kept it. Thin coats dry harder and clearer than one thick coat.
- Respect the recoat window. Follow your product. As checked examples, Minwax’s aerosol sheet says recoat after 30 minutes, while Rust-Oleum’s brush directions for Varathane say allow a minimum of two hours and recoat only when the previous coat has dried clear and feels hard. Different products, different rules, which is the point.
- Sand lightly between coats. A very light pass with fine sandpaper, around 220 grit, between coats, followed by wiping away dust, helps each coat grip the next and keeps the surface smooth. Both manufacturers above specify 220 grit sanding between coats, and Minwax adds: do not use steel wool. Never sand through to the paper design.
- Build up at least three coats. Both manufacturers checked recommend a minimum of three coats for this kind of finish, and Rust-Oleum’s aerosol directions recommend four for maximum durability. Coasters take standing liquid, so the minimum is a floor, not a target to shave.
- Cure before use. Follow the longest instruction on any product you used, as covered above. When in doubt, wait longer. Extra days cost nothing. A ring pressed into soft finish costs the set.
- Add backing. Stick small felt pads or a cork circle to the bottom of each coaster. Backing protects the table from rough wood, stops sliding, levels minor unevenness, and gives the finished coaster a polished feel.
Design Ideas
- Botanical prints. Ferns, leaves, and wildflowers suit the natural wood edge and look good in any season.
- Vintage maps and text. Old map fragments or printed script give a study or library feel, and suit a traveler.
- Seasonal sets. Four coasters in autumn leaves, winter berries, spring blossoms, and summer herbs make a set that can be rotated through the year.
- Family initials. A single large initial on each coaster, printed on tissue paper in a classic font, personalizes a set for a household.
- Painted edges. Painting the edge and back of each slice in a color that matches the design, such as deep green, navy, or cream, frames the design and hides an uneven bark edge.
For gifts, tie the set with twine or ribbon and add a tag noting that the coasters are handmade and sealed, and whether they are for hot drinks or cold drinks only, based on the topcoat you actually used. Honest labeling is part of the gift.
Caring for Wood Slice Coasters
Wipe coasters with a damp cloth and dry them promptly. Do not soak them, put them in a dishwasher, or leave them standing in water. The wood under the finish still absorbs moisture, swells, and can crack the sealed surface. Note that the 28 day dishwasher cure mentioned above belongs to Plaid’s formula claim for decoupaged glass and ceramics. It does not turn a wood coaster into a dishwasher safe object.
If a coaster develops a white ring from a cold drink, moisture has usually sat on the finish. A gentle wipe and thorough drying often helps, and a fresh thin coat of topcoat can restore a surface where the ring persists. Store coasters dry, with a little air between them rather than sealed in plastic while damp. If the finish becomes scratched or dull after long use, a light sanding and one or two fresh topcoats will renew it.
Troubleshooting
- Wrinkles in the paper. Usually caused by too much medium or by pressing too hard. Use thinner coats, smooth gently from the center, and remember that small wrinkles often flatten as the paper dries and tightens. Do not chase a wet wrinkle.
- Air bubbles. Prick a small bubble with a pin after the glue has dried slightly, then press it flat and seal over it. Large bubbles mean the paper was laid down too quickly. Peel it off while wet and start again with a fresh motif.
- Cloudy finish. Often caused by recoating before the previous coat dried, or by high humidity. Let coats dry fully and work in a dry room.
- A mug sticks to the coaster. The topcoat was not fully cured, or the product was never suited to warm items. Let the set cure longer. If sticking continues after full cure, retire that set to cold drinks.
- Design edges lift. The paper was not sealed at the edges, or the topcoat was too thin there. Brush finish carefully around the edges of the motif, and trim overhanging paper after the first sealing coat.
Frequently Asked Questions
Are wood slice coasters safe for hot drinks?
Only conditionally. The coaster is safe for a hot mug when the final topcoat’s own literature rates it for hot items or tabletop heat and you have followed its full cure directions. The manufacturer sheets checked for this guide, for Minwax Polycrylic aerosol and Rust-Oleum Varathane water based polyurethane, list furniture type uses and give dry and use times, but state no hot mug rating. If your product is silent on heat, use the coasters for cold drinks and label them that way.
Can I put food directly on a finished coaster or a large wood slice?
No. Plaid states that its Dishwasher Safe decoupage formula is not food safe, and a coating counts as a food contact surface under FDA regulation 21 CFR 175.300 only when it meets that regulation’s prescribed conditions. A coaster normally touches the base of a mug, not food, and that use is fine. Do not serve, place, or cut food on a decoupaged or craft finished slice.
Do I need to remove the bark?
No. It is a matter of taste and upkeep. Bark looks rustic and natural, but it can flake over time and is harder to seal completely. Removing it gives a cleaner, more durable edge. Either choice works if the coaster is dried and sealed well.
How long does the project take?
Active work is about an hour for a set of four, plus drying time between coats. Calendar time is set by your slowest product. Examples checked for this guide range from 24 hours before heavy or normal use for some clear finishes to a full 28 days of air curing before Plaid’s Dishwasher Safe formula carries its dishwasher claim. Self cut slices add drying time before work even starts.
Can I cut my own wood slices?
Yes, if you have a saw suitable for the job, dry seasoned wood, and permission to take the branch. Cut slowly and evenly, wear eye protection, and sand thoroughly. Then dry the slices slowly and let them rest indoors before decorating, because shrinkage below the fiber saturation point is what splits them. For most crafters, buying pre-cut, craft ready slices is simpler and gives more consistent results.
Why did my slice crack after I finished it?
Most likely it was still drying. Wood shrinks as its moisture content falls below about 28 to 30 percent, and it shrinks more around its growth rings than across them, so a slice that felt dry on the surface can still split as its core dries. Sealing undried wood slows the loss but does not remove the stress. Start with fully dry slices, and keep finished coasters away from heat sources that drive one sided drying.
Sources & references
- Plaid, How to Use Mod Podge Dishwasher Safe. Used for that formula being an all in one glue, sealer, and finish, applying two to three thin top coats with one to two hours of drying between coats, the formula being non-toxic and water based, the statement that it is not food safe and that room should be left for lips on a crafted mug, and the full 28 days of air curing before a project is top shelf dishwasher safe.
- Plaid, Mod Podge Guide: Formulas, Tips and FAQs (Mod Podge Academy). Used for decoupage mediums being all in one glue, sealer, and finish products, removing excess napkin layers with tape and keeping only the top printed layer, applying medium to both the back of the paper and the project surface for adhesion, paper buckling or wrinkling temporarily and typically resolving as the adhesive cures, avoiding pressing or flattening wet paper because it can create permanent creases, smoothing with wax paper and a squeegee while wet, applying a white base coat under napkin designs for color vibrancy, and avoiding overloading a foam brush.
- Daniel L. Cassens, Purdue University Cooperative Extension Service, FNR-37, Drying Small Quantities of Hardwood Lumber: Understanding the Effects of Moisture on Wood. Used for up to one half of freshly cut hardwood weight being water, shrinkage beginning below the fiber saturation point of about 28 to 30 percent moisture content with defects including end splitting, surface checking, cupping, bowing, and twisting, tangential and radial shrinkage differing, moisture moving about 10 to 15 times faster longitudinally than laterally and causing end checking stresses, end coatings reducing that loss, the surface shell drying and shrinking against a wet core, wood at 6 to 8 percent moisture content being suitable for indoor use, air dried lumber reaching about 15 to 20 percent, and oak being slow and difficult to dry with checking and splitting possible in air drying.
- Minwax (Sherwin-Williams), Minwax Polycrylic Aerosol Technical Data Sheet. Used for that finish resisting abrasion, scuffing, chipping, water, alcohol, and other common household chemicals, recommended use on furniture, louver doors, molding, and cabinets, recoating after 30 minutes, light sanding with 220 grit and no steel wool, at least three coats on unfinished wood, drying to the touch in 30 minutes, handling in one hour, and allowing 24 hours before heavy use, and for no hot item or heat rating being stated in that sheet.
- Rust-Oleum, Varathane Ultimate Water Based Polyurethane technical data. Used for that finish providing protection from scratches and stains for interior furniture, doors, windows, cabinets, and trim, brush application with a minimum of three coats recommended, a minimum of two hours of drying before recoating, recoating only when previous coats have dried clear and feel hard with a powder developing on light sanding, light sanding with 220 grit between coats, allowing 24 hours of drying before light use and three days before normal usage, and for no hot item or heat rating being stated in that data.
- United States Food and Drug Administration, 21 CFR 175.300, Resinous and Polymeric Coatings (eCFR). Used for resinous and polymeric coatings being usable as a food contact surface only in accordance with prescribed conditions, including application as a continuous film or enamel serving as a functional barrier, formulation from the substances the regulation lists, and finished coating extractives limits tested under conditions characterizing the intended use.


